I chose to build a pipe organ. I am still choosing to build a pipe organ, in progress since March of 2023.
Please enjoy these photos and videos of progress so far. If you’re curious as to what in tarnation got up my rear end to make me want to do this, that detail is written out meticulously below the pretty pictures, just scroll down.
Specifications (as of right now that I am building towards):
- 5-6 Ranks, 1 Division
- 1 Manual, 1 Pedal
- Stops:
- 16′ Bourdon (Pedal)
- 8′ Principal (Pedal C2-G4, Manual C3-C7)
- 8′ Trompete (Manual C3-C7)
- 4′ Octave (Manual C3-C7)
- 2′ Octave (maybe, Manual C3-C7)
- Couplers: None as of right now; the mechanics may be too hard at this point.
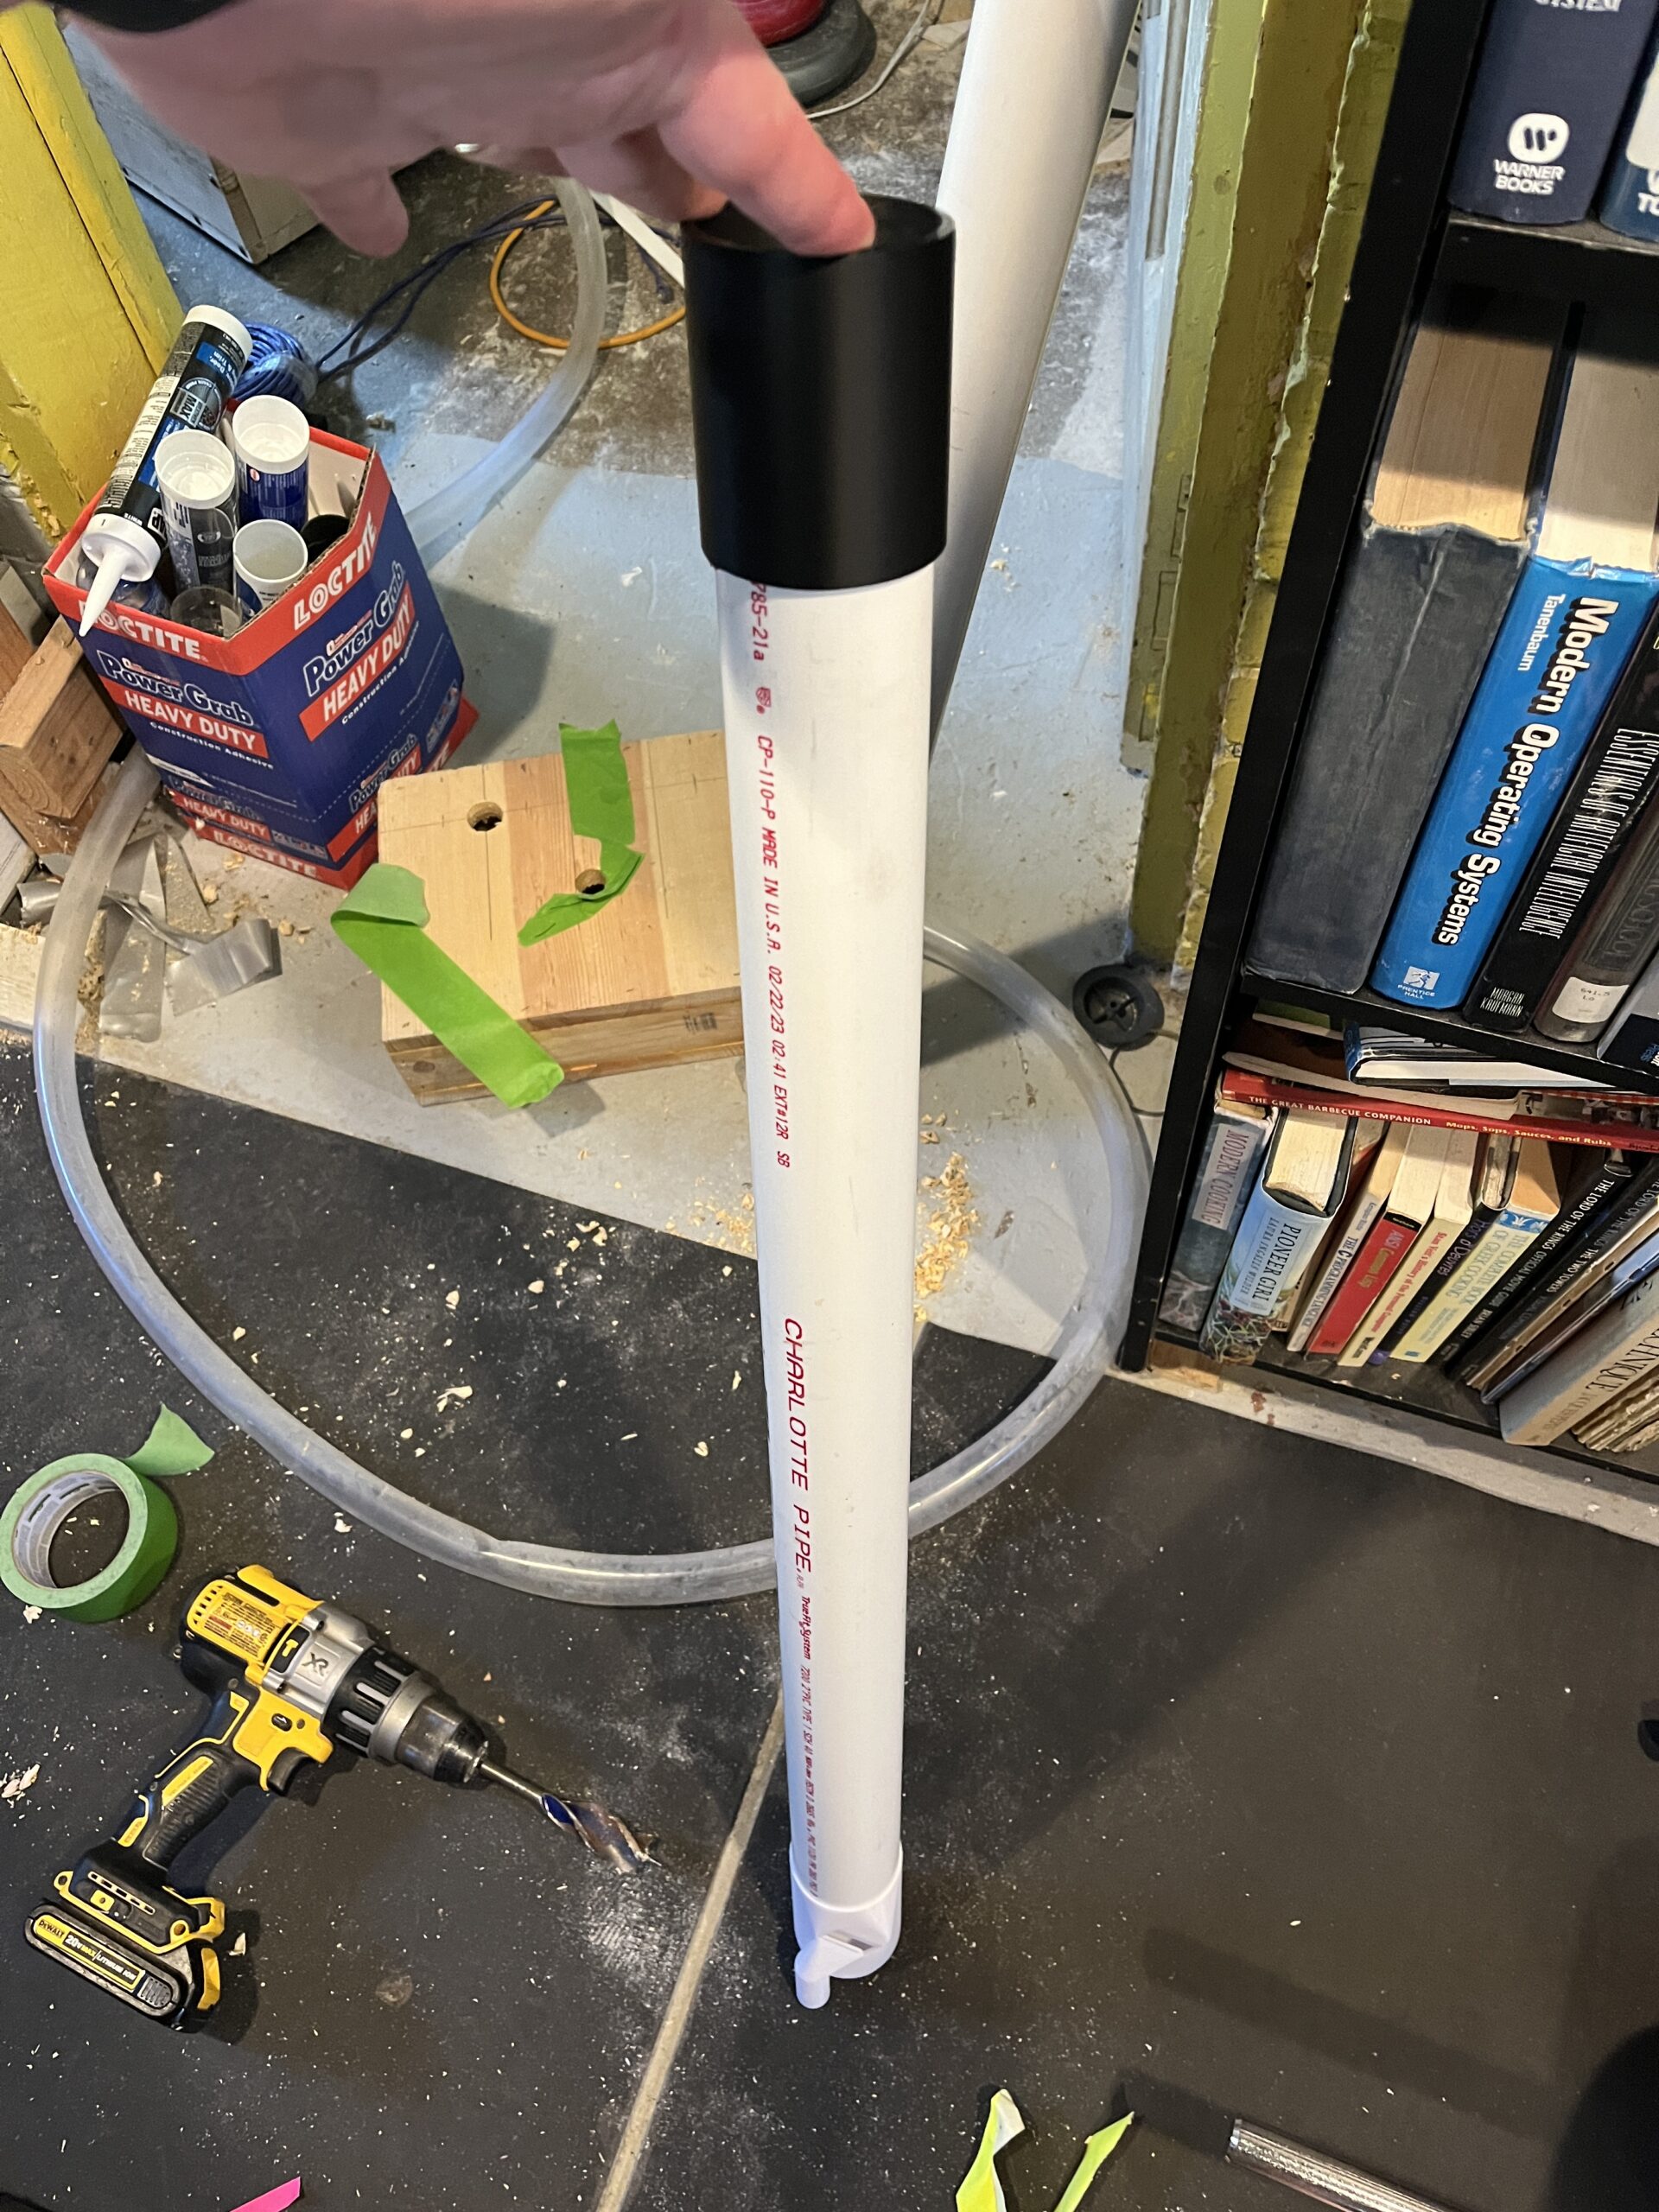
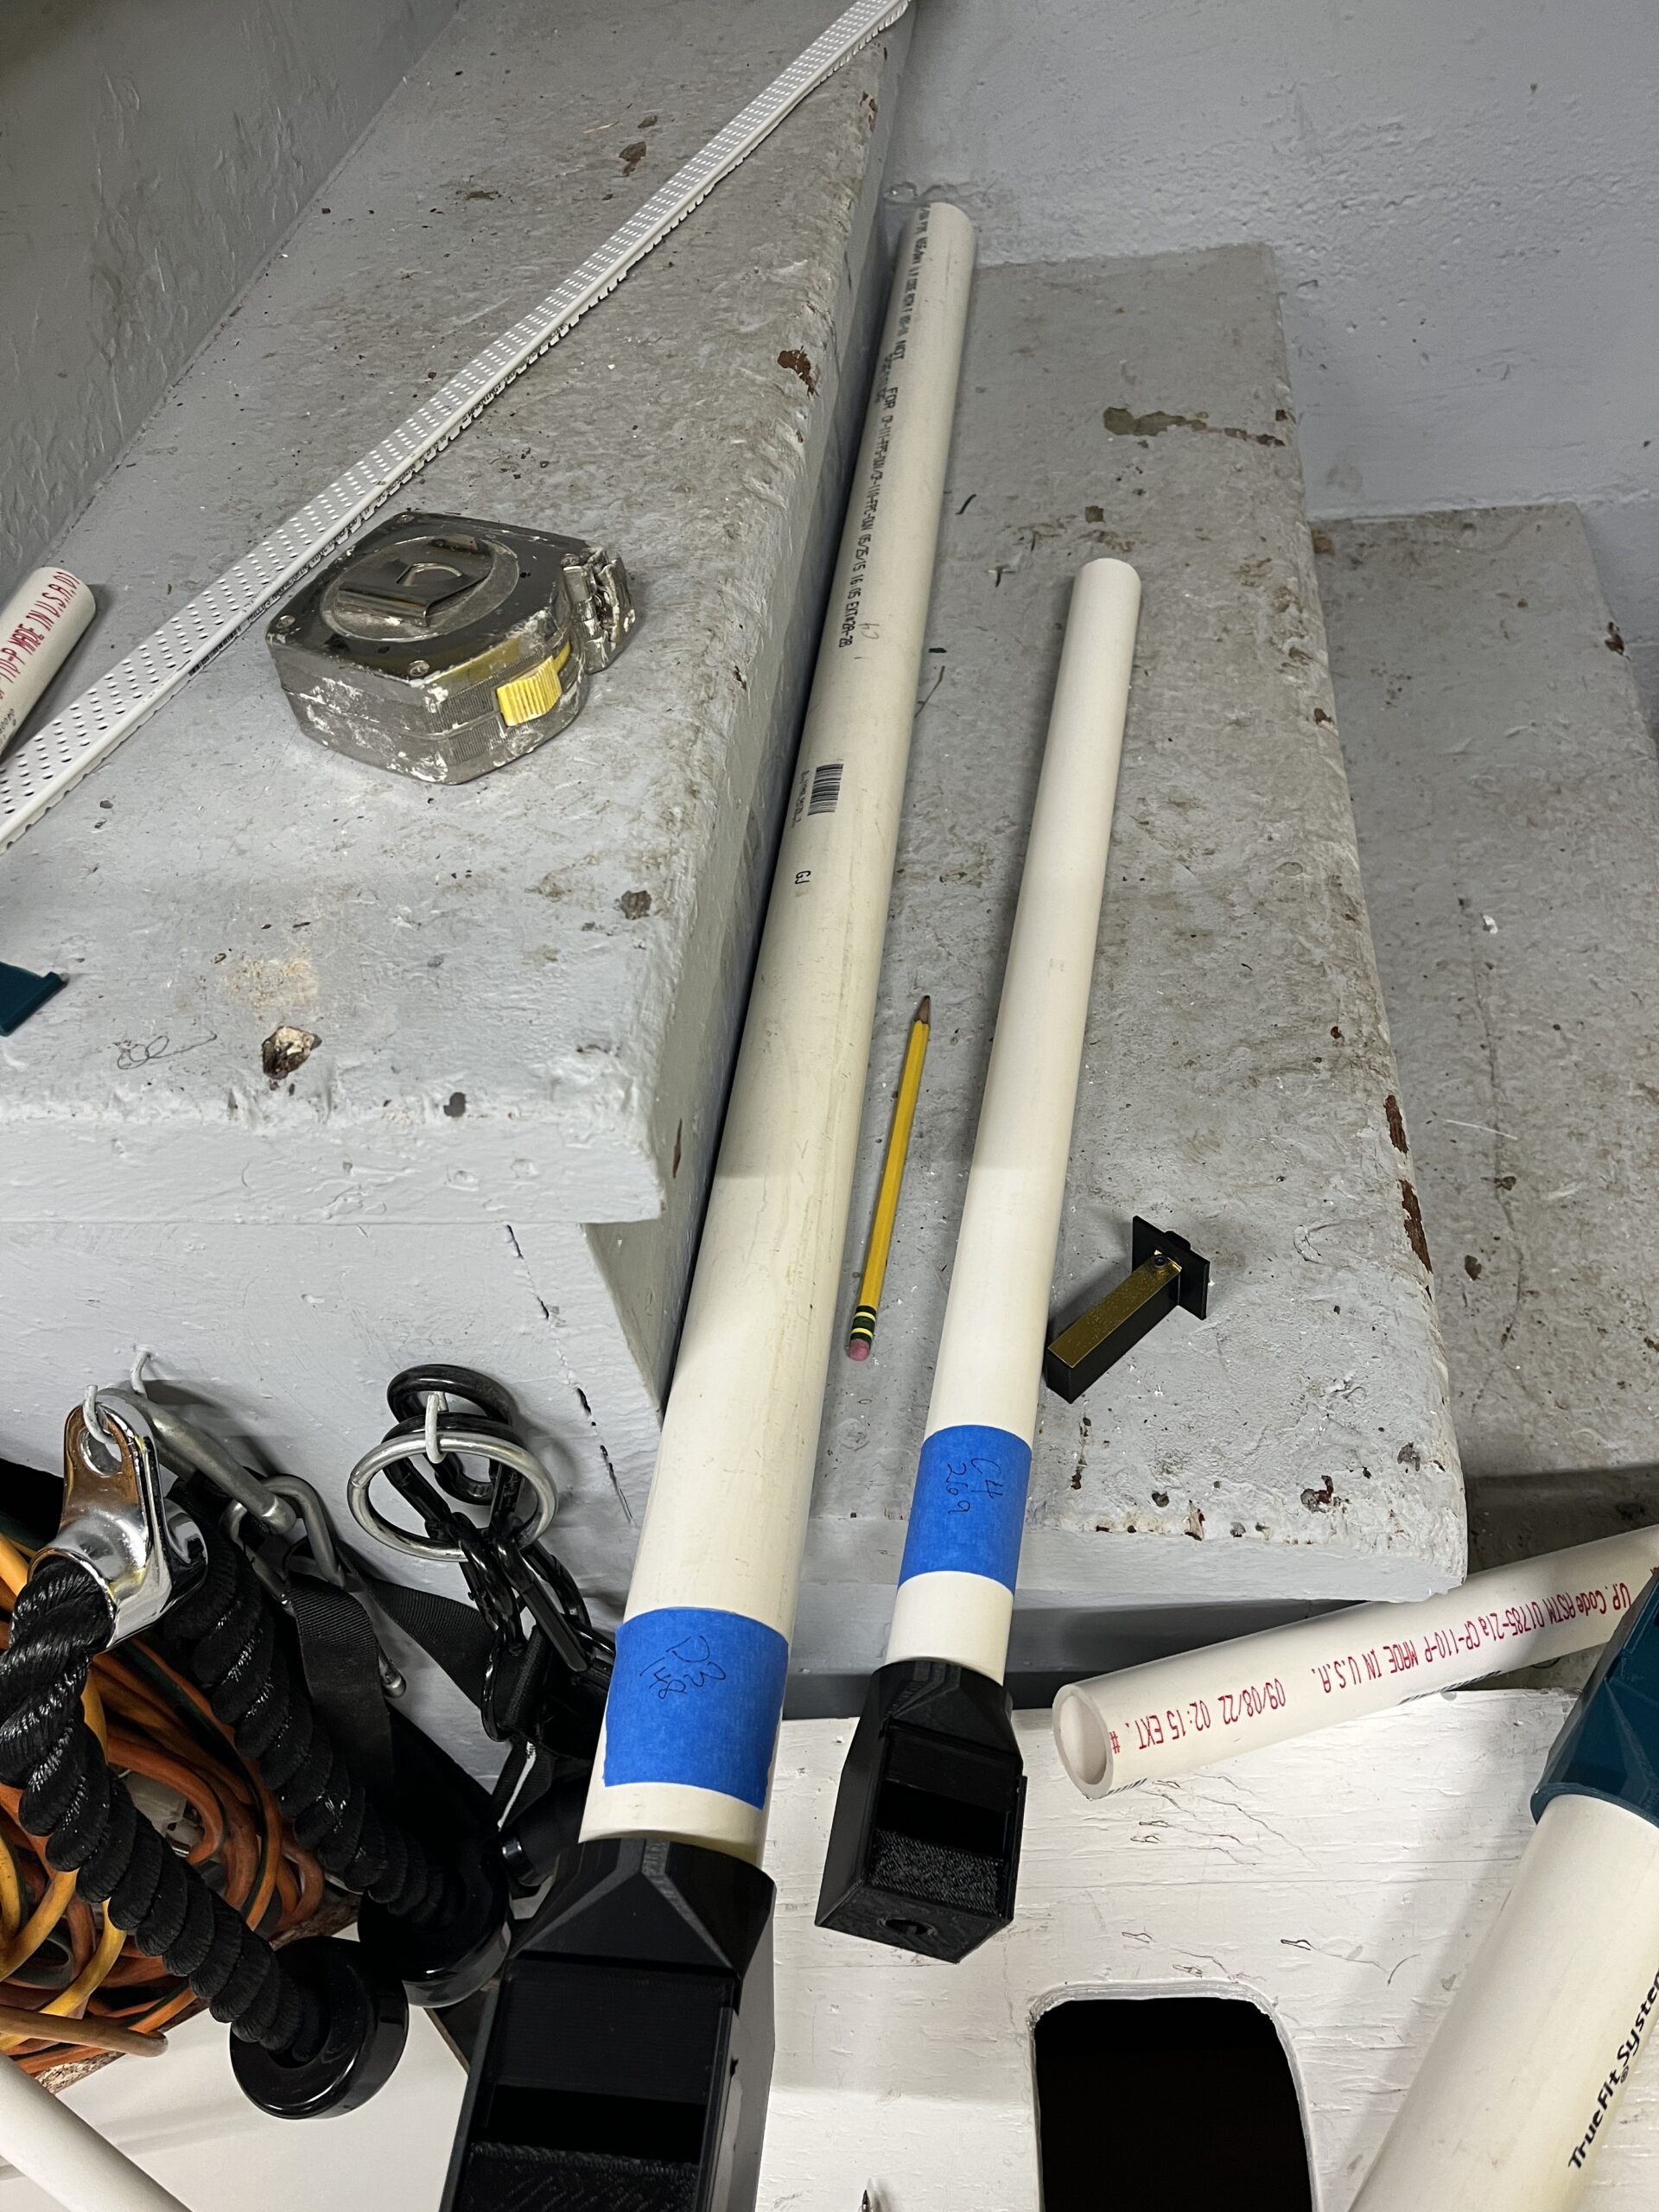
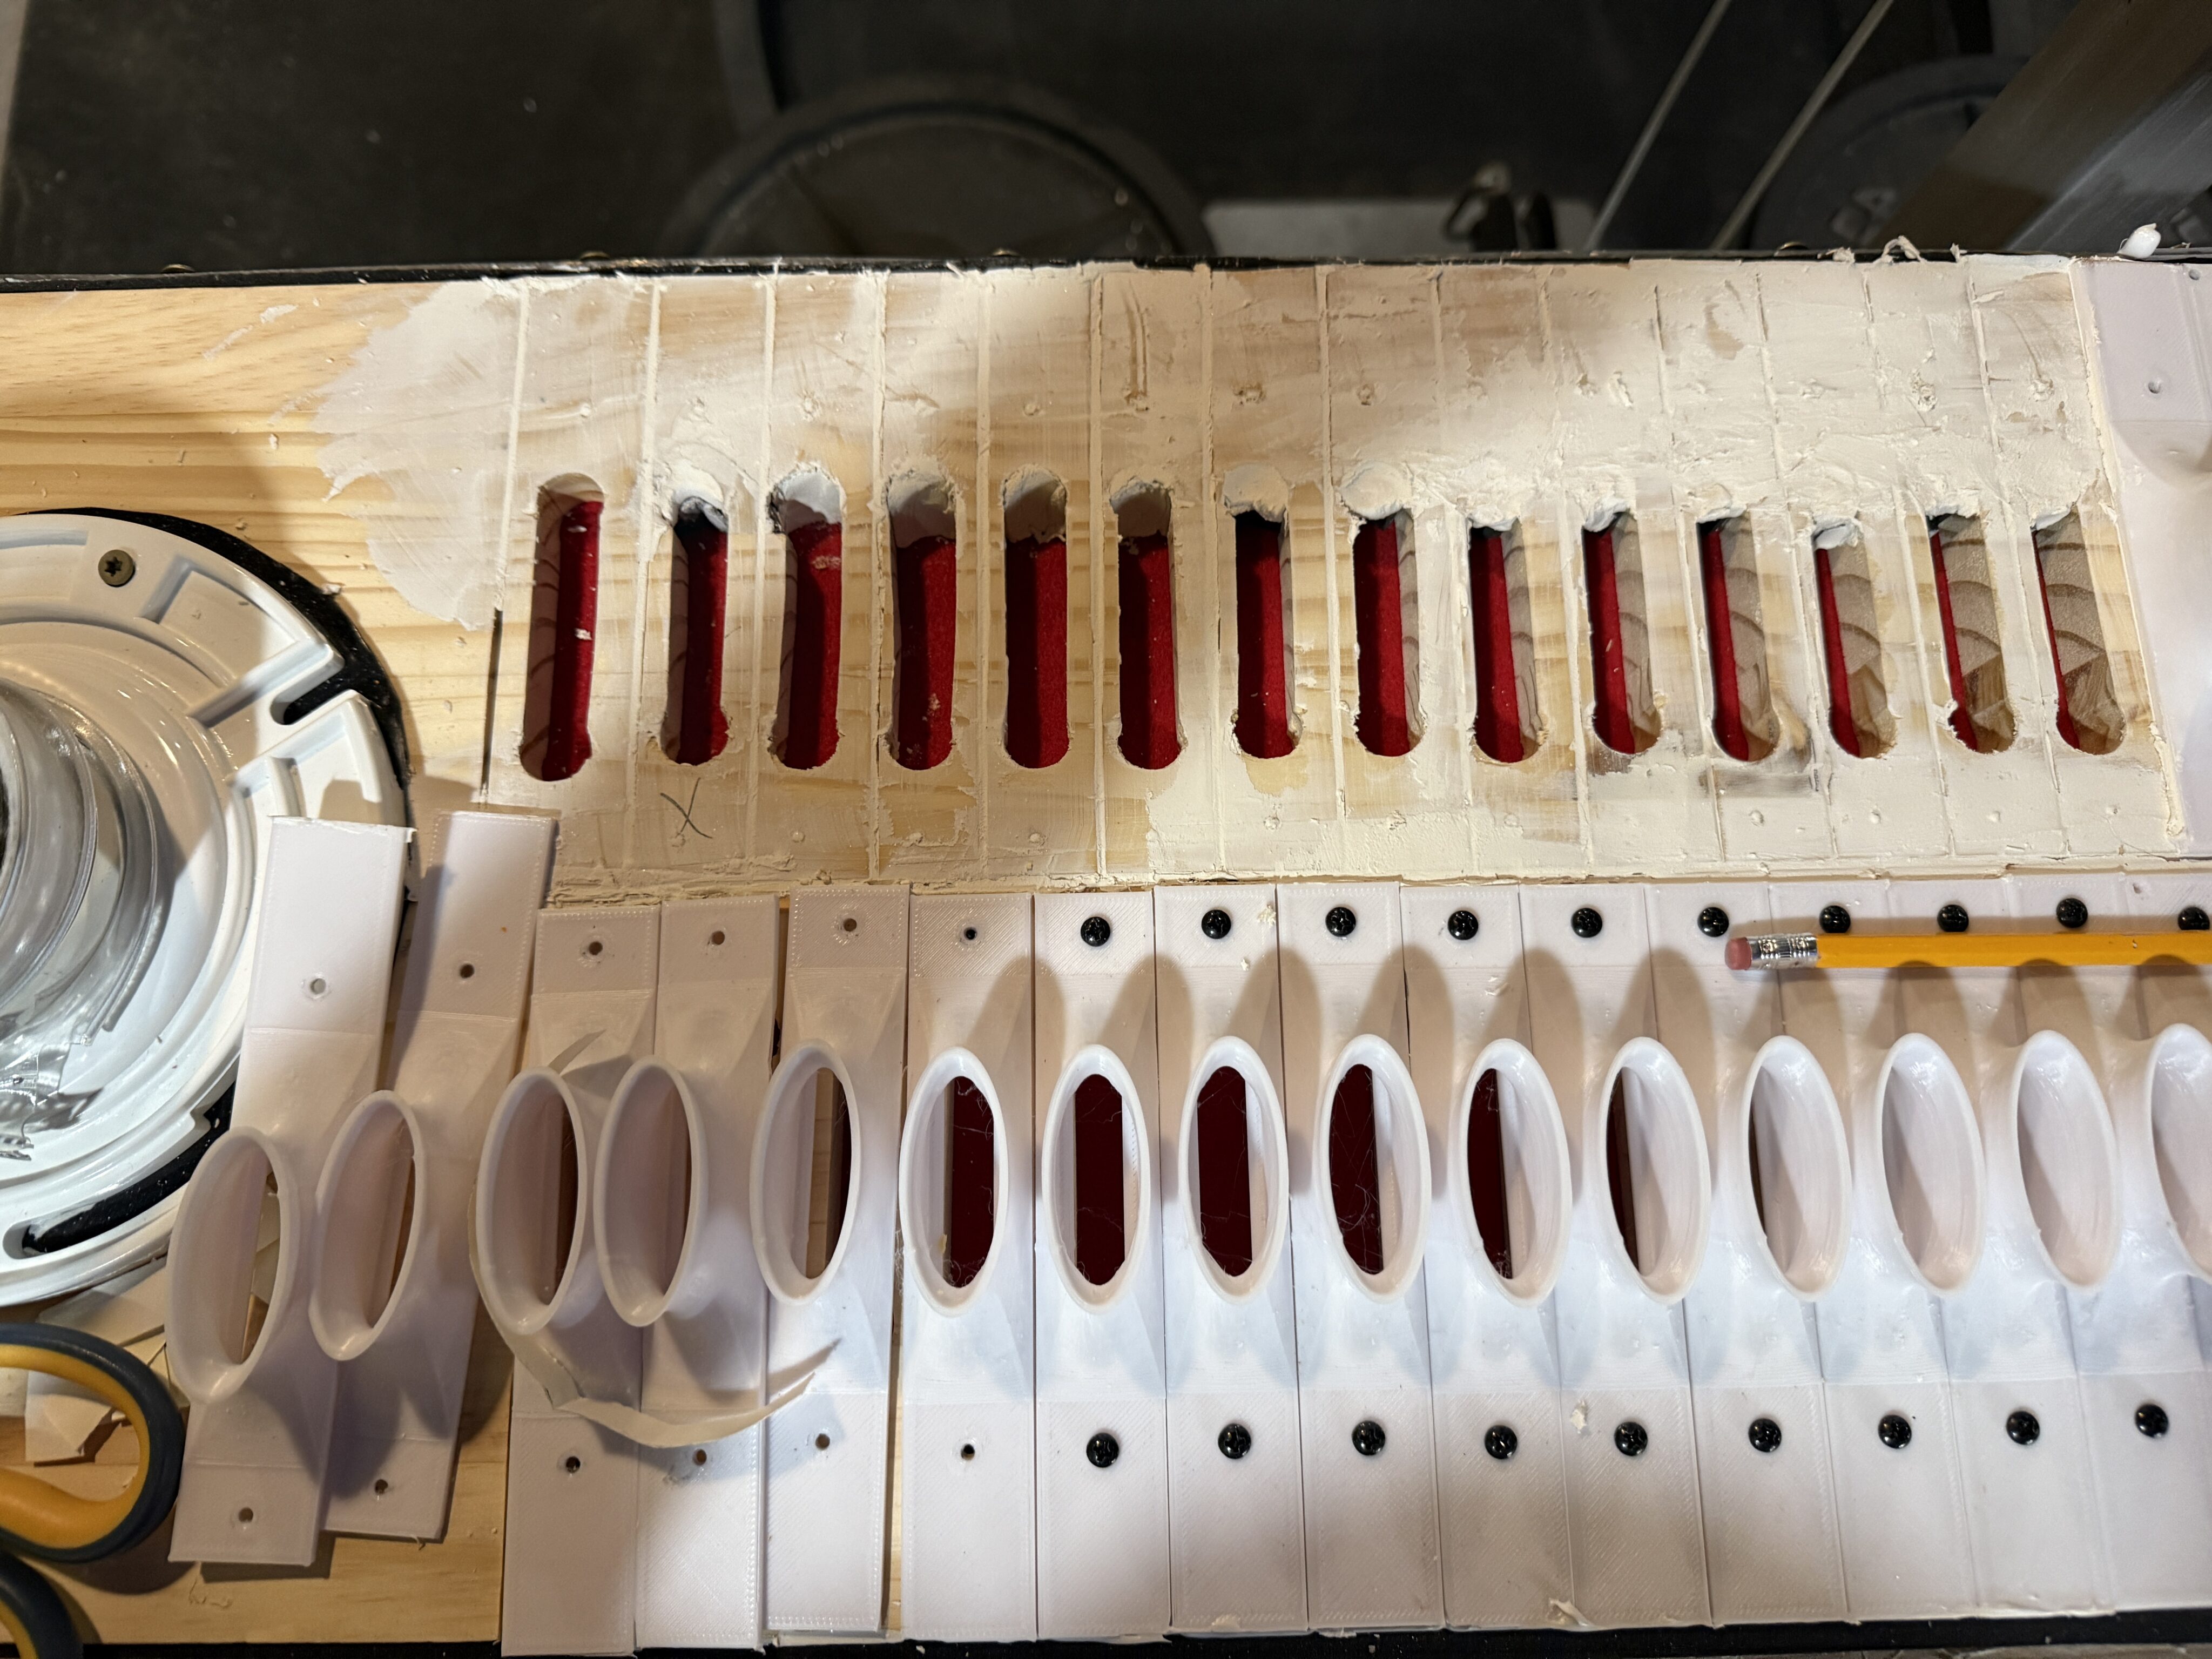
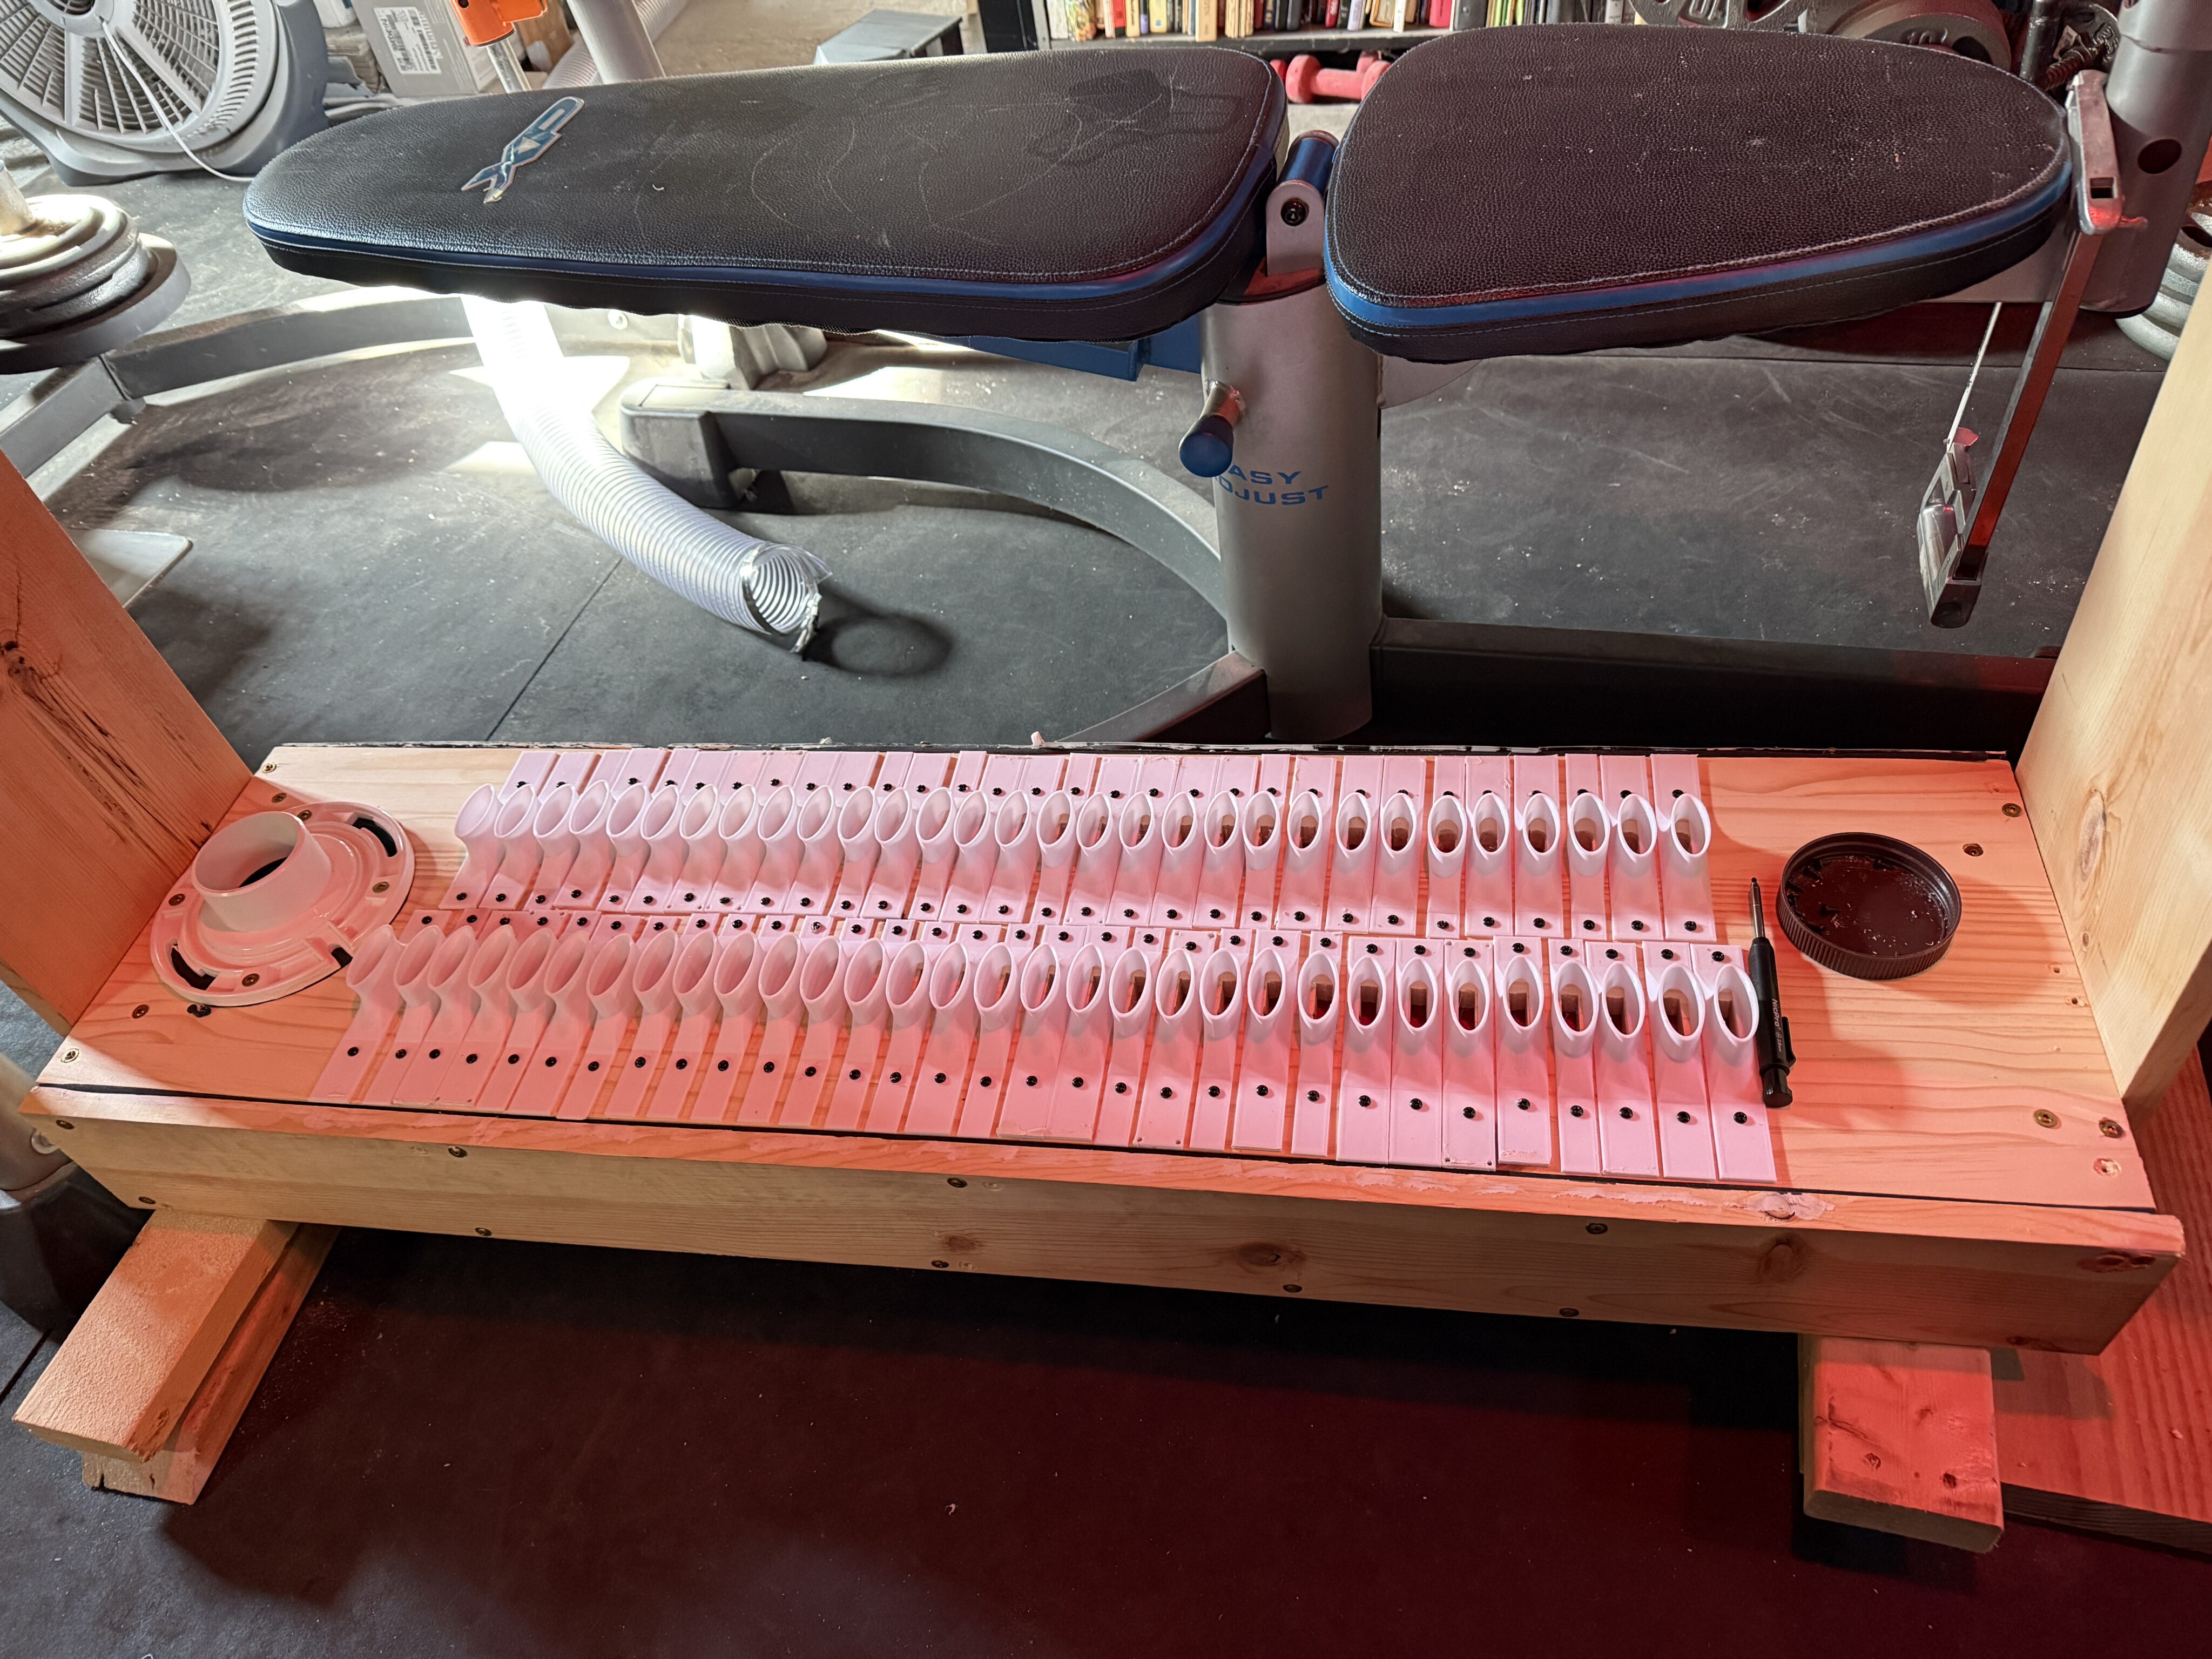
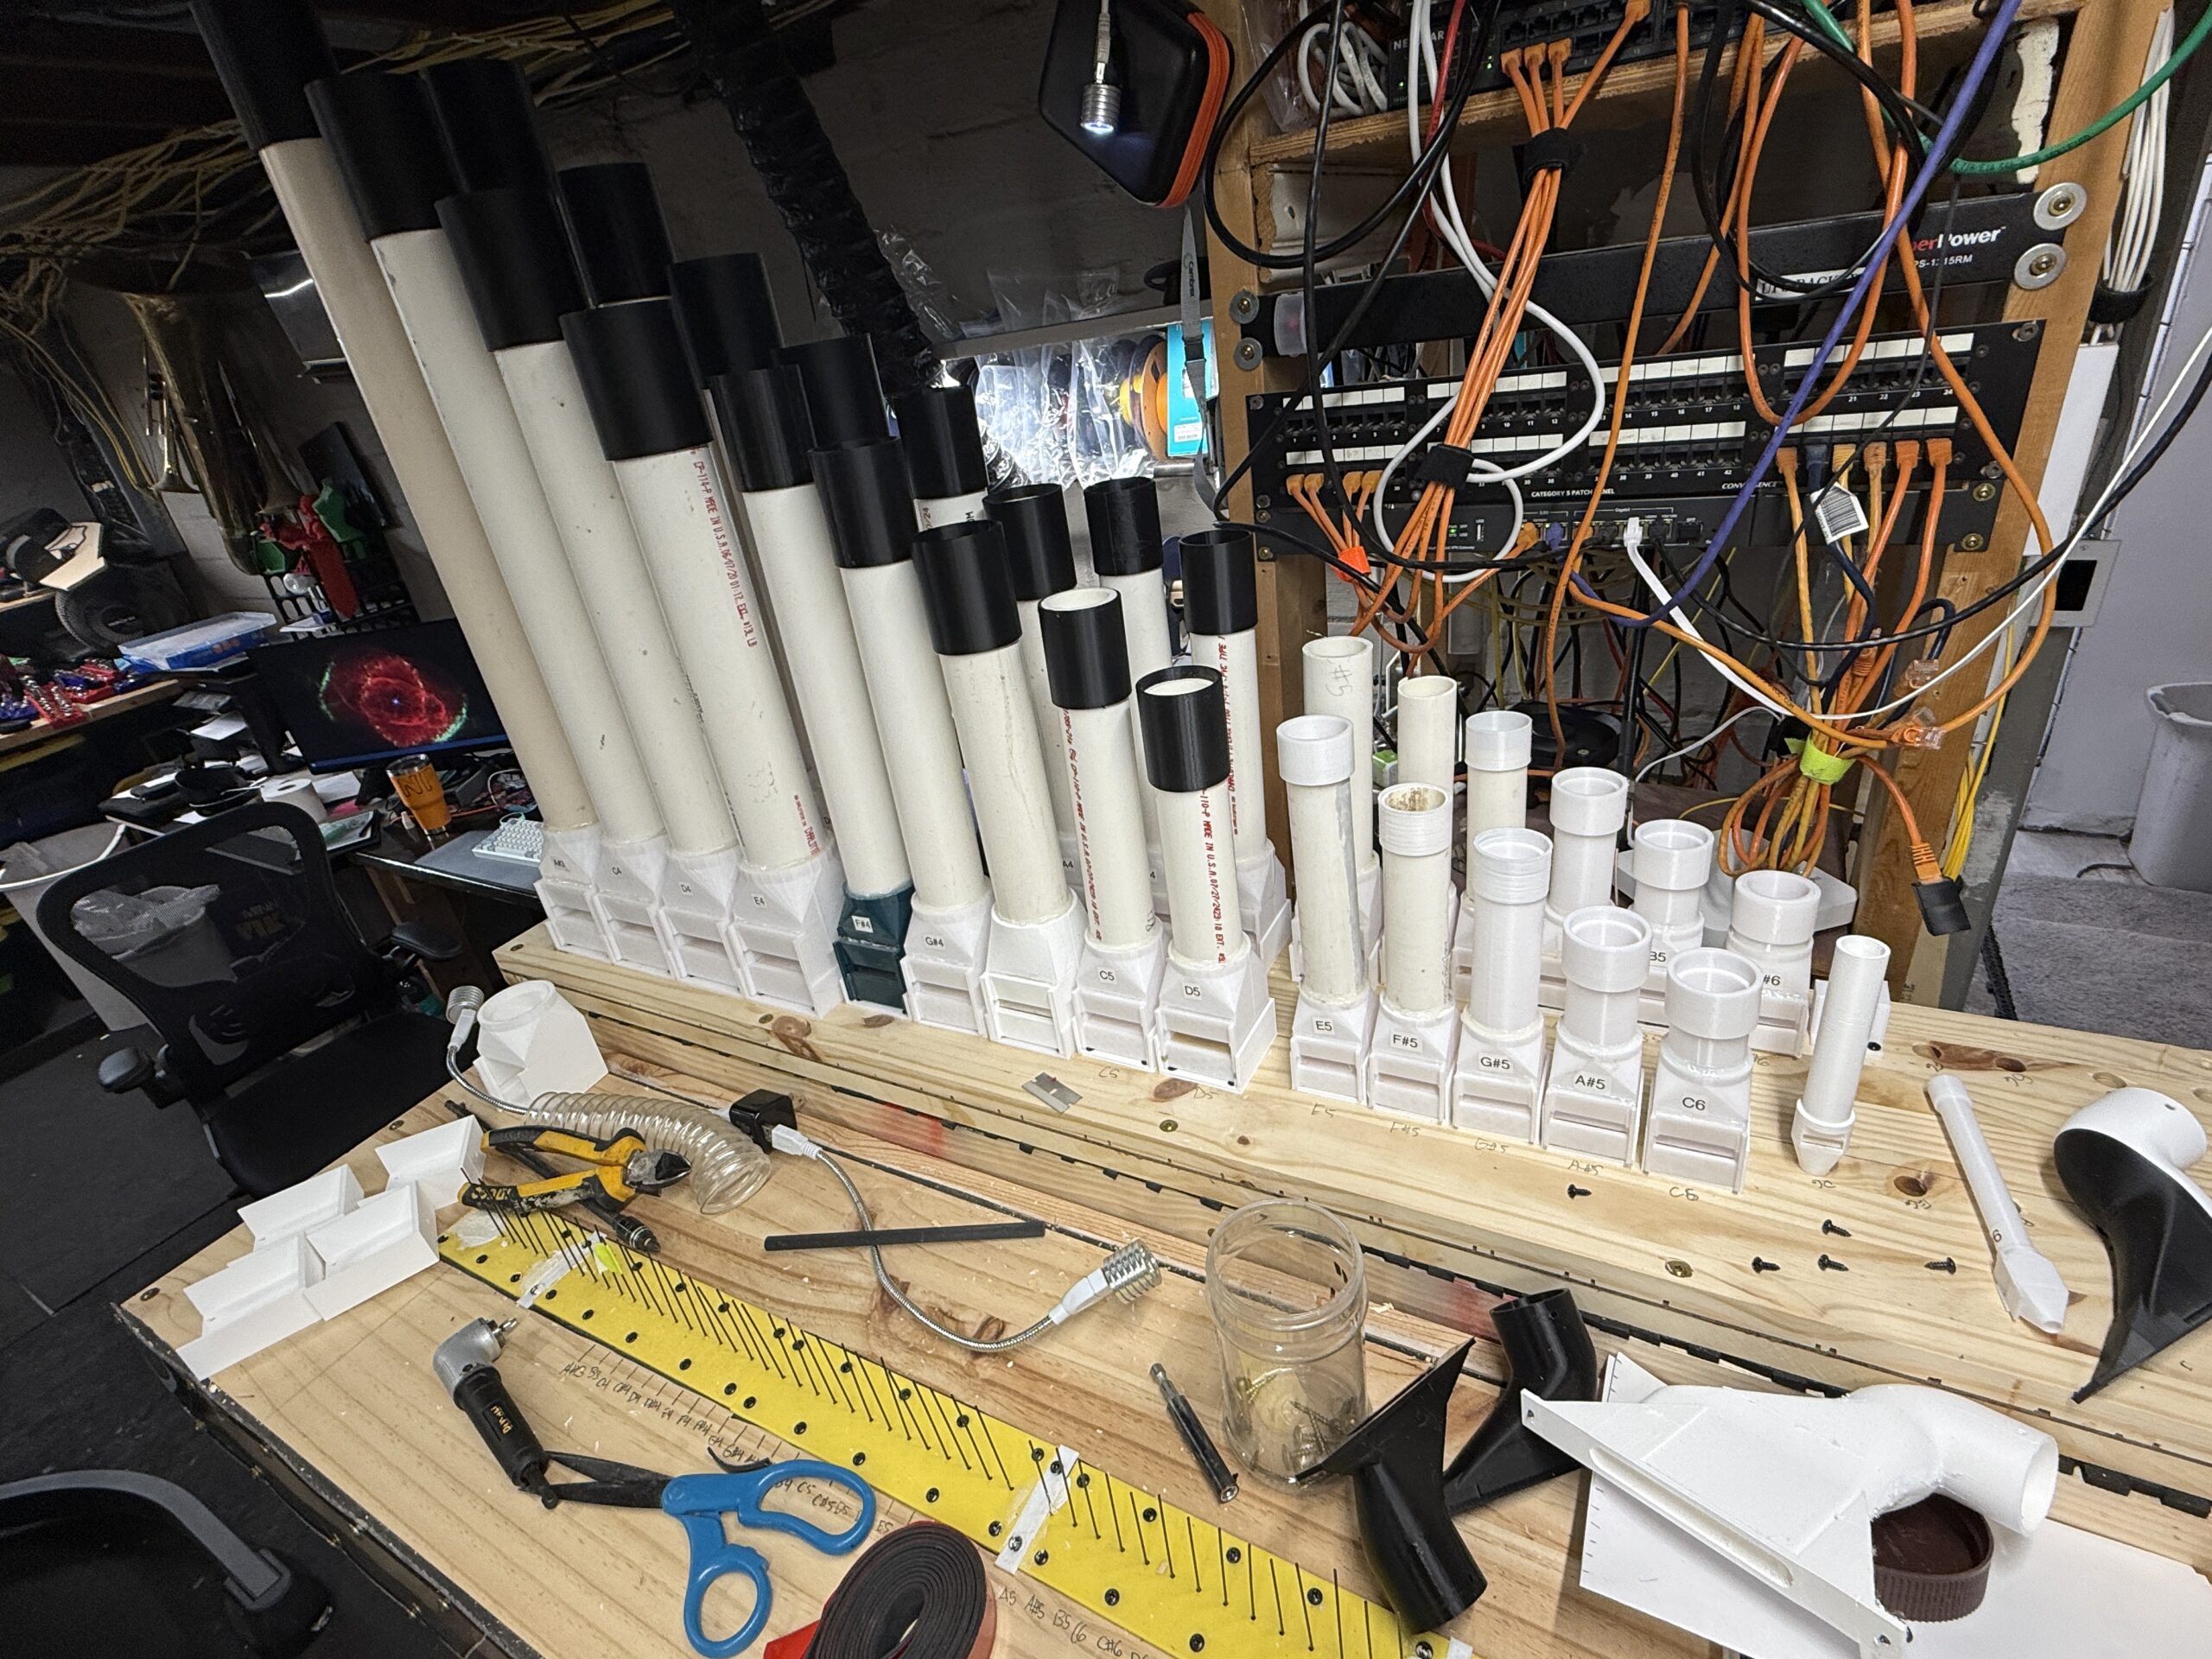
- Painted PVC and 3D-printed PLA+ pipes, brass reeds, may attempt a wood rank, wood casework, direct mechanical key action, mechanical stop action, all on 2″-3″ W.C. wind


Current Status as of March 18, 2026:
Here’s an unordered list of things I have accomplished with this project and where I am working on it so far:
- MARCH 2026
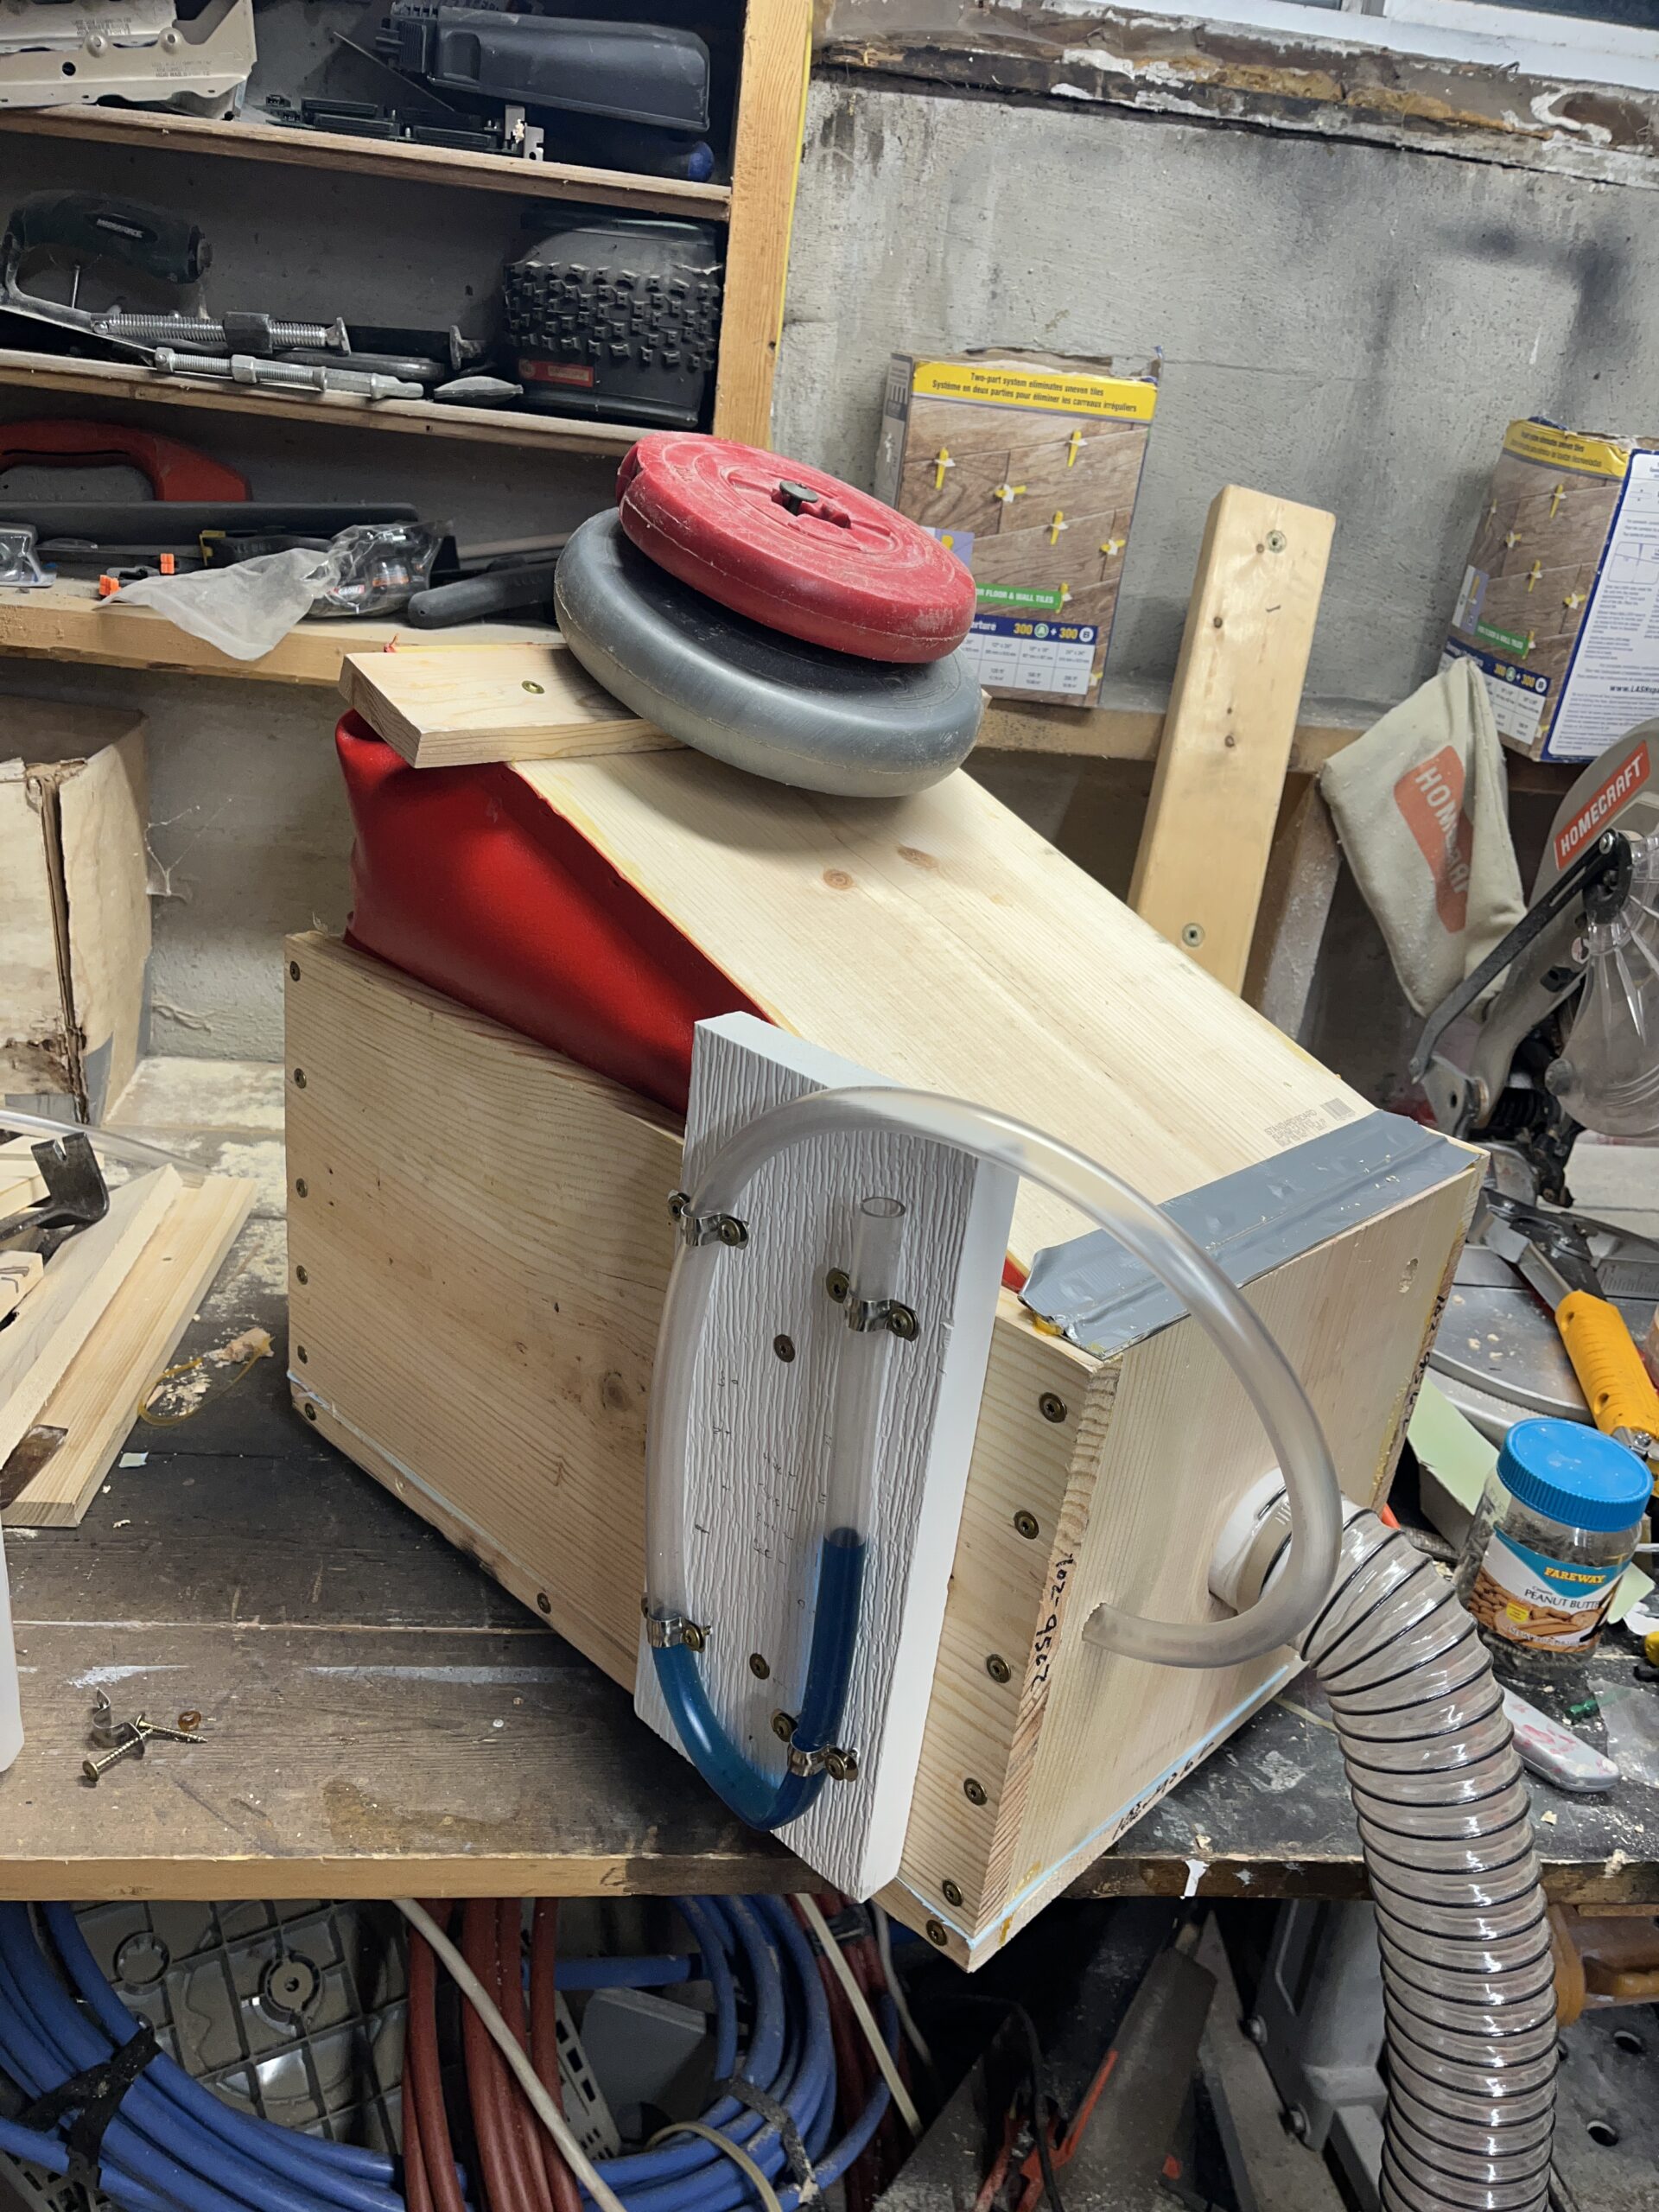
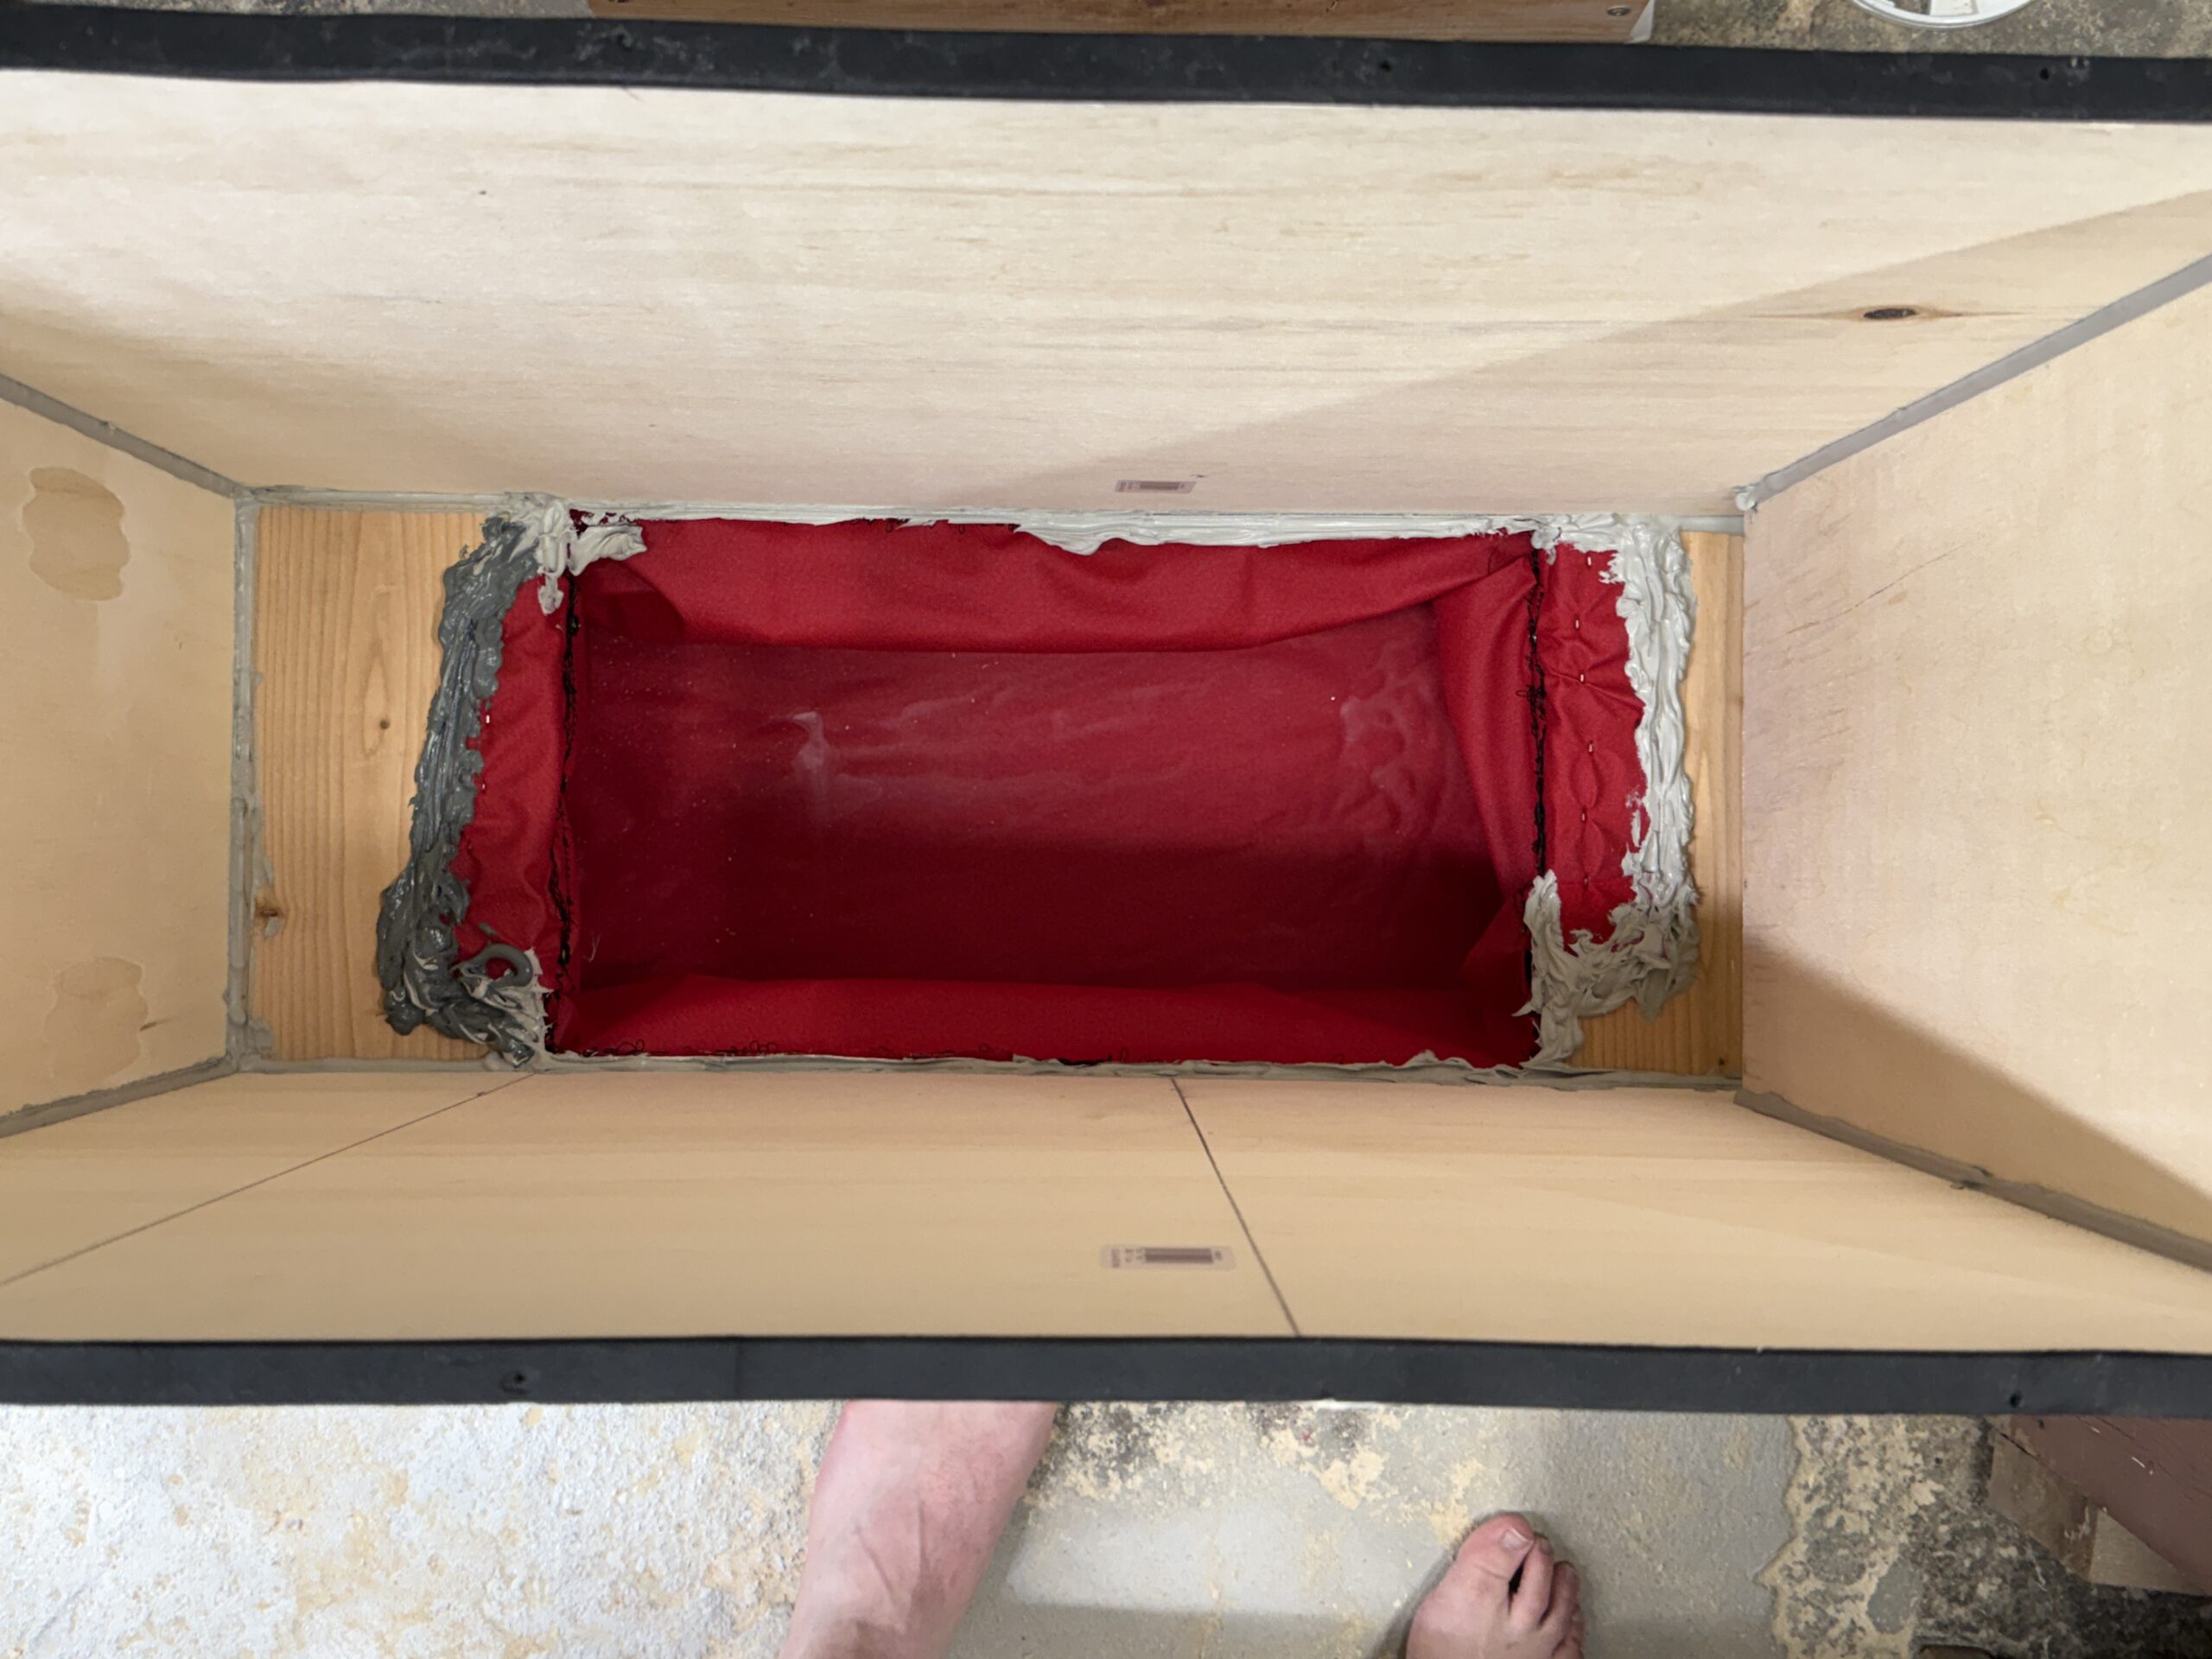
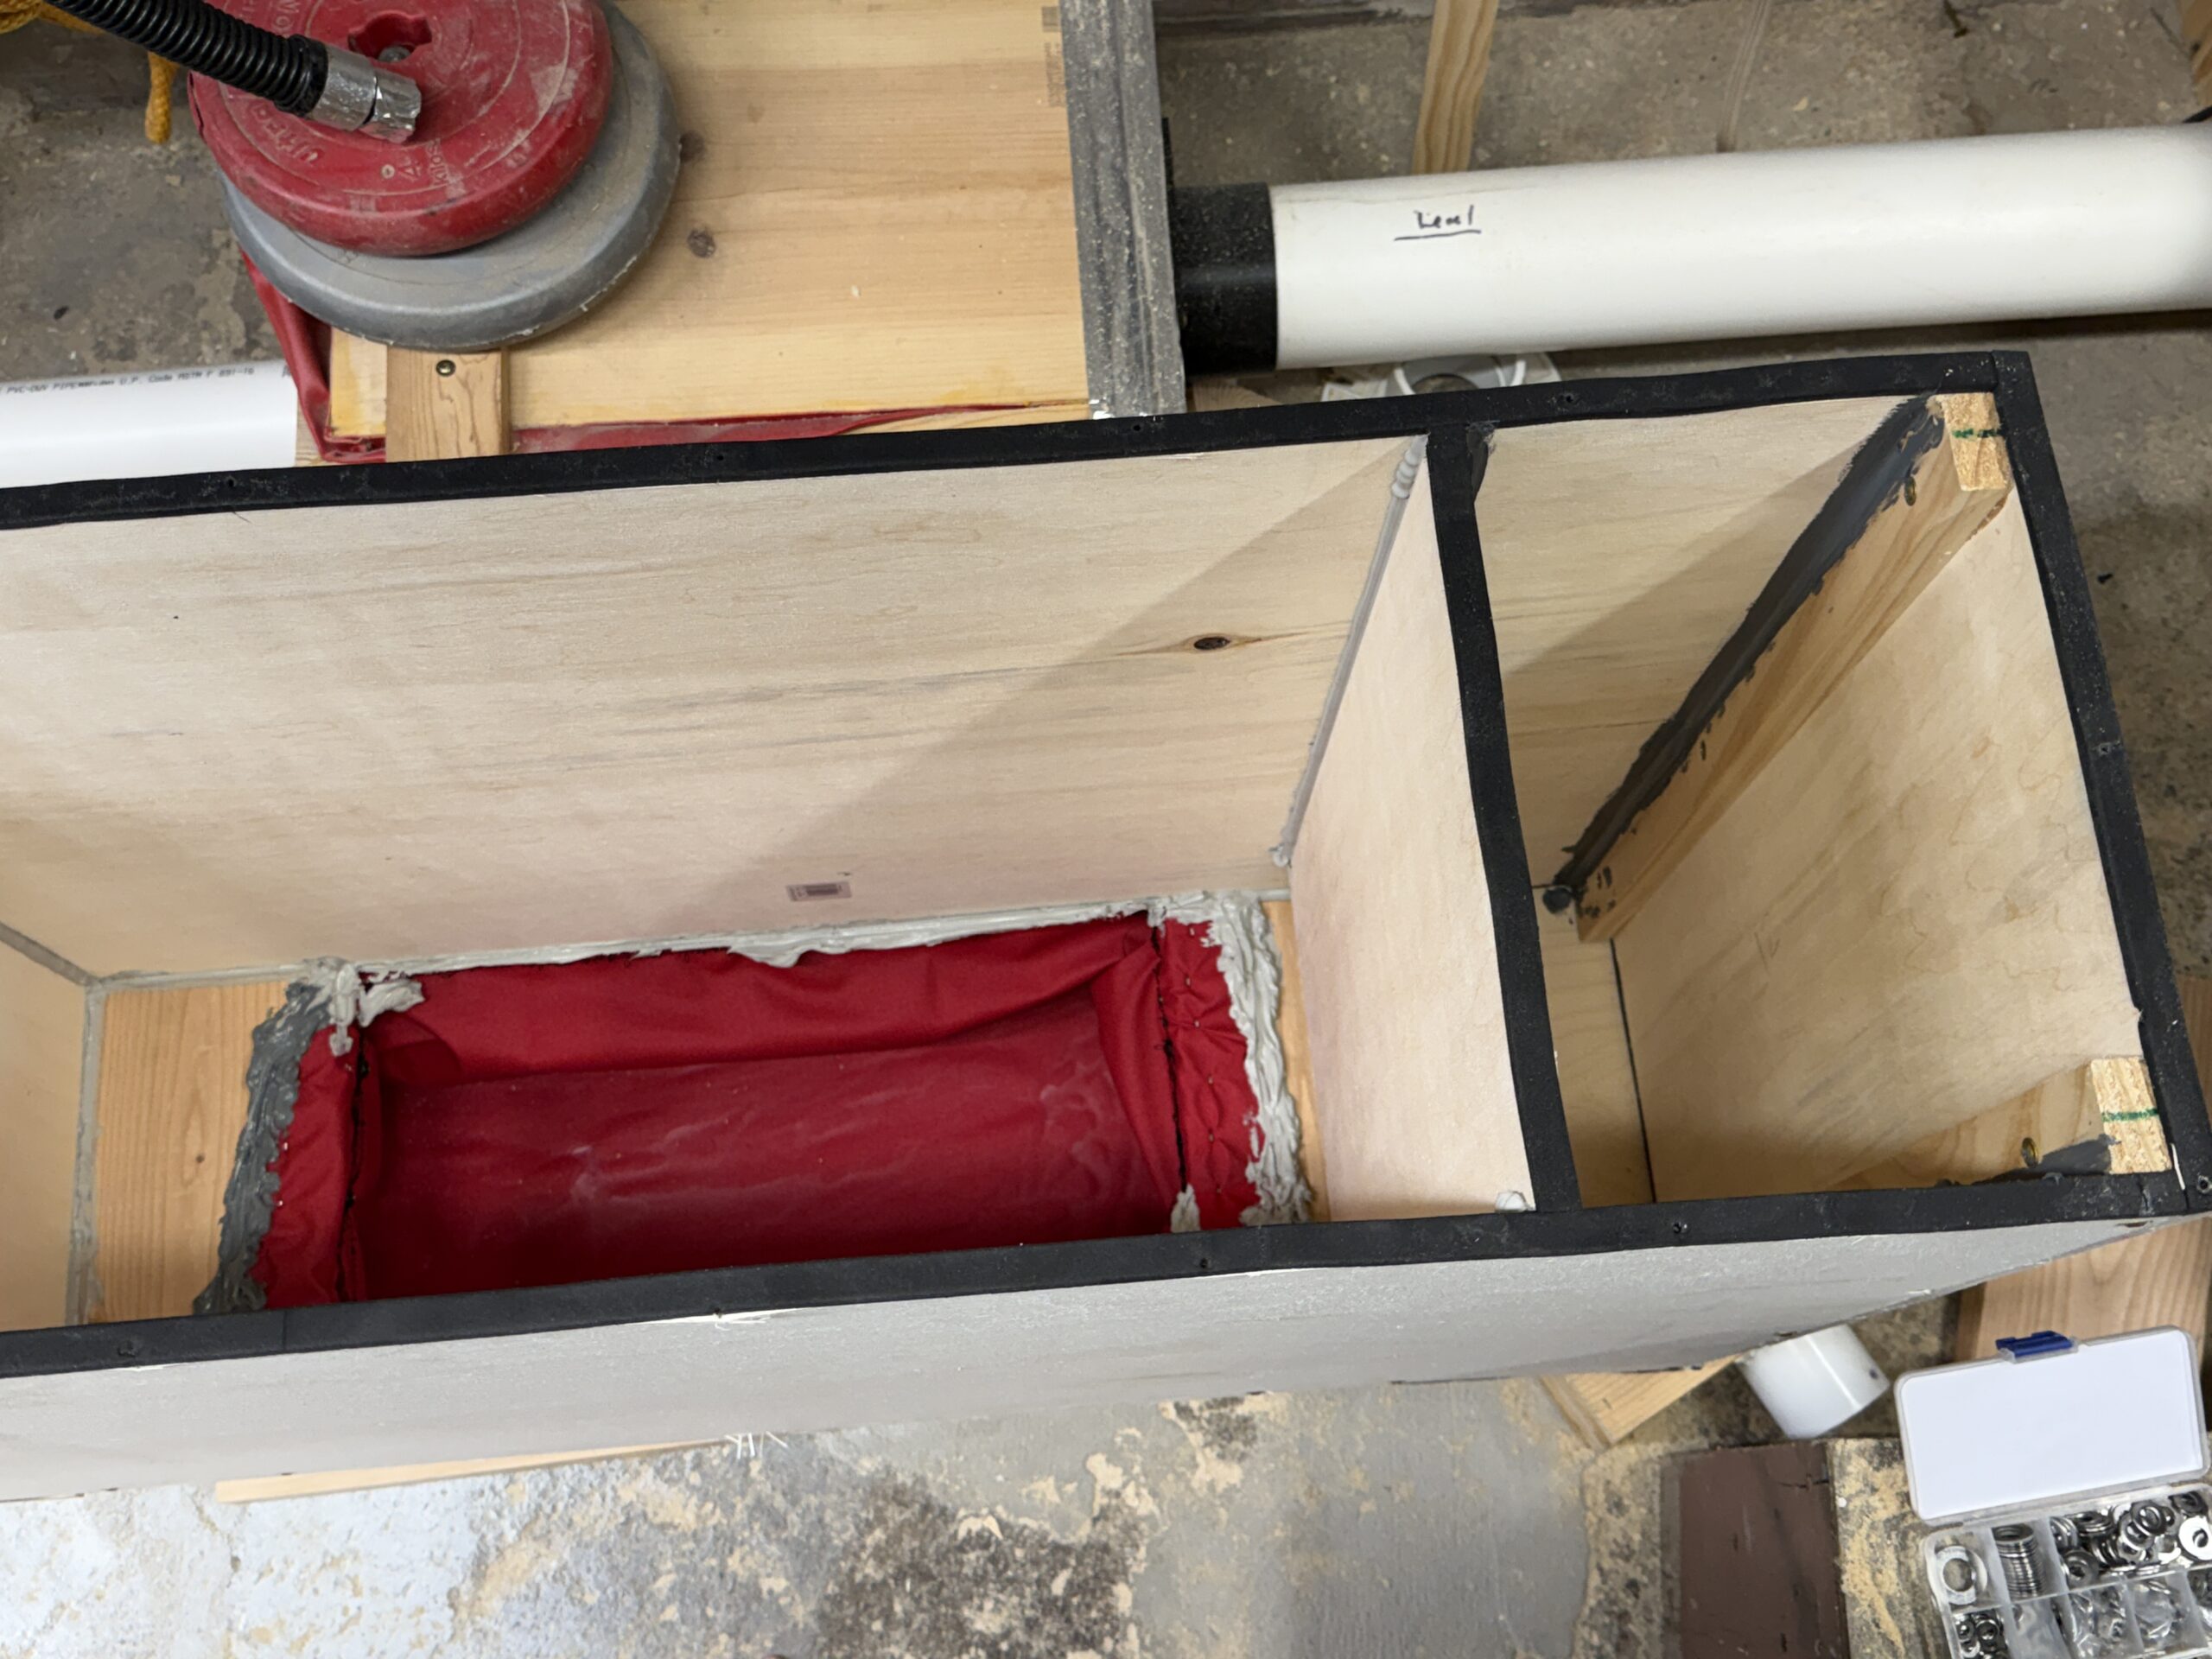
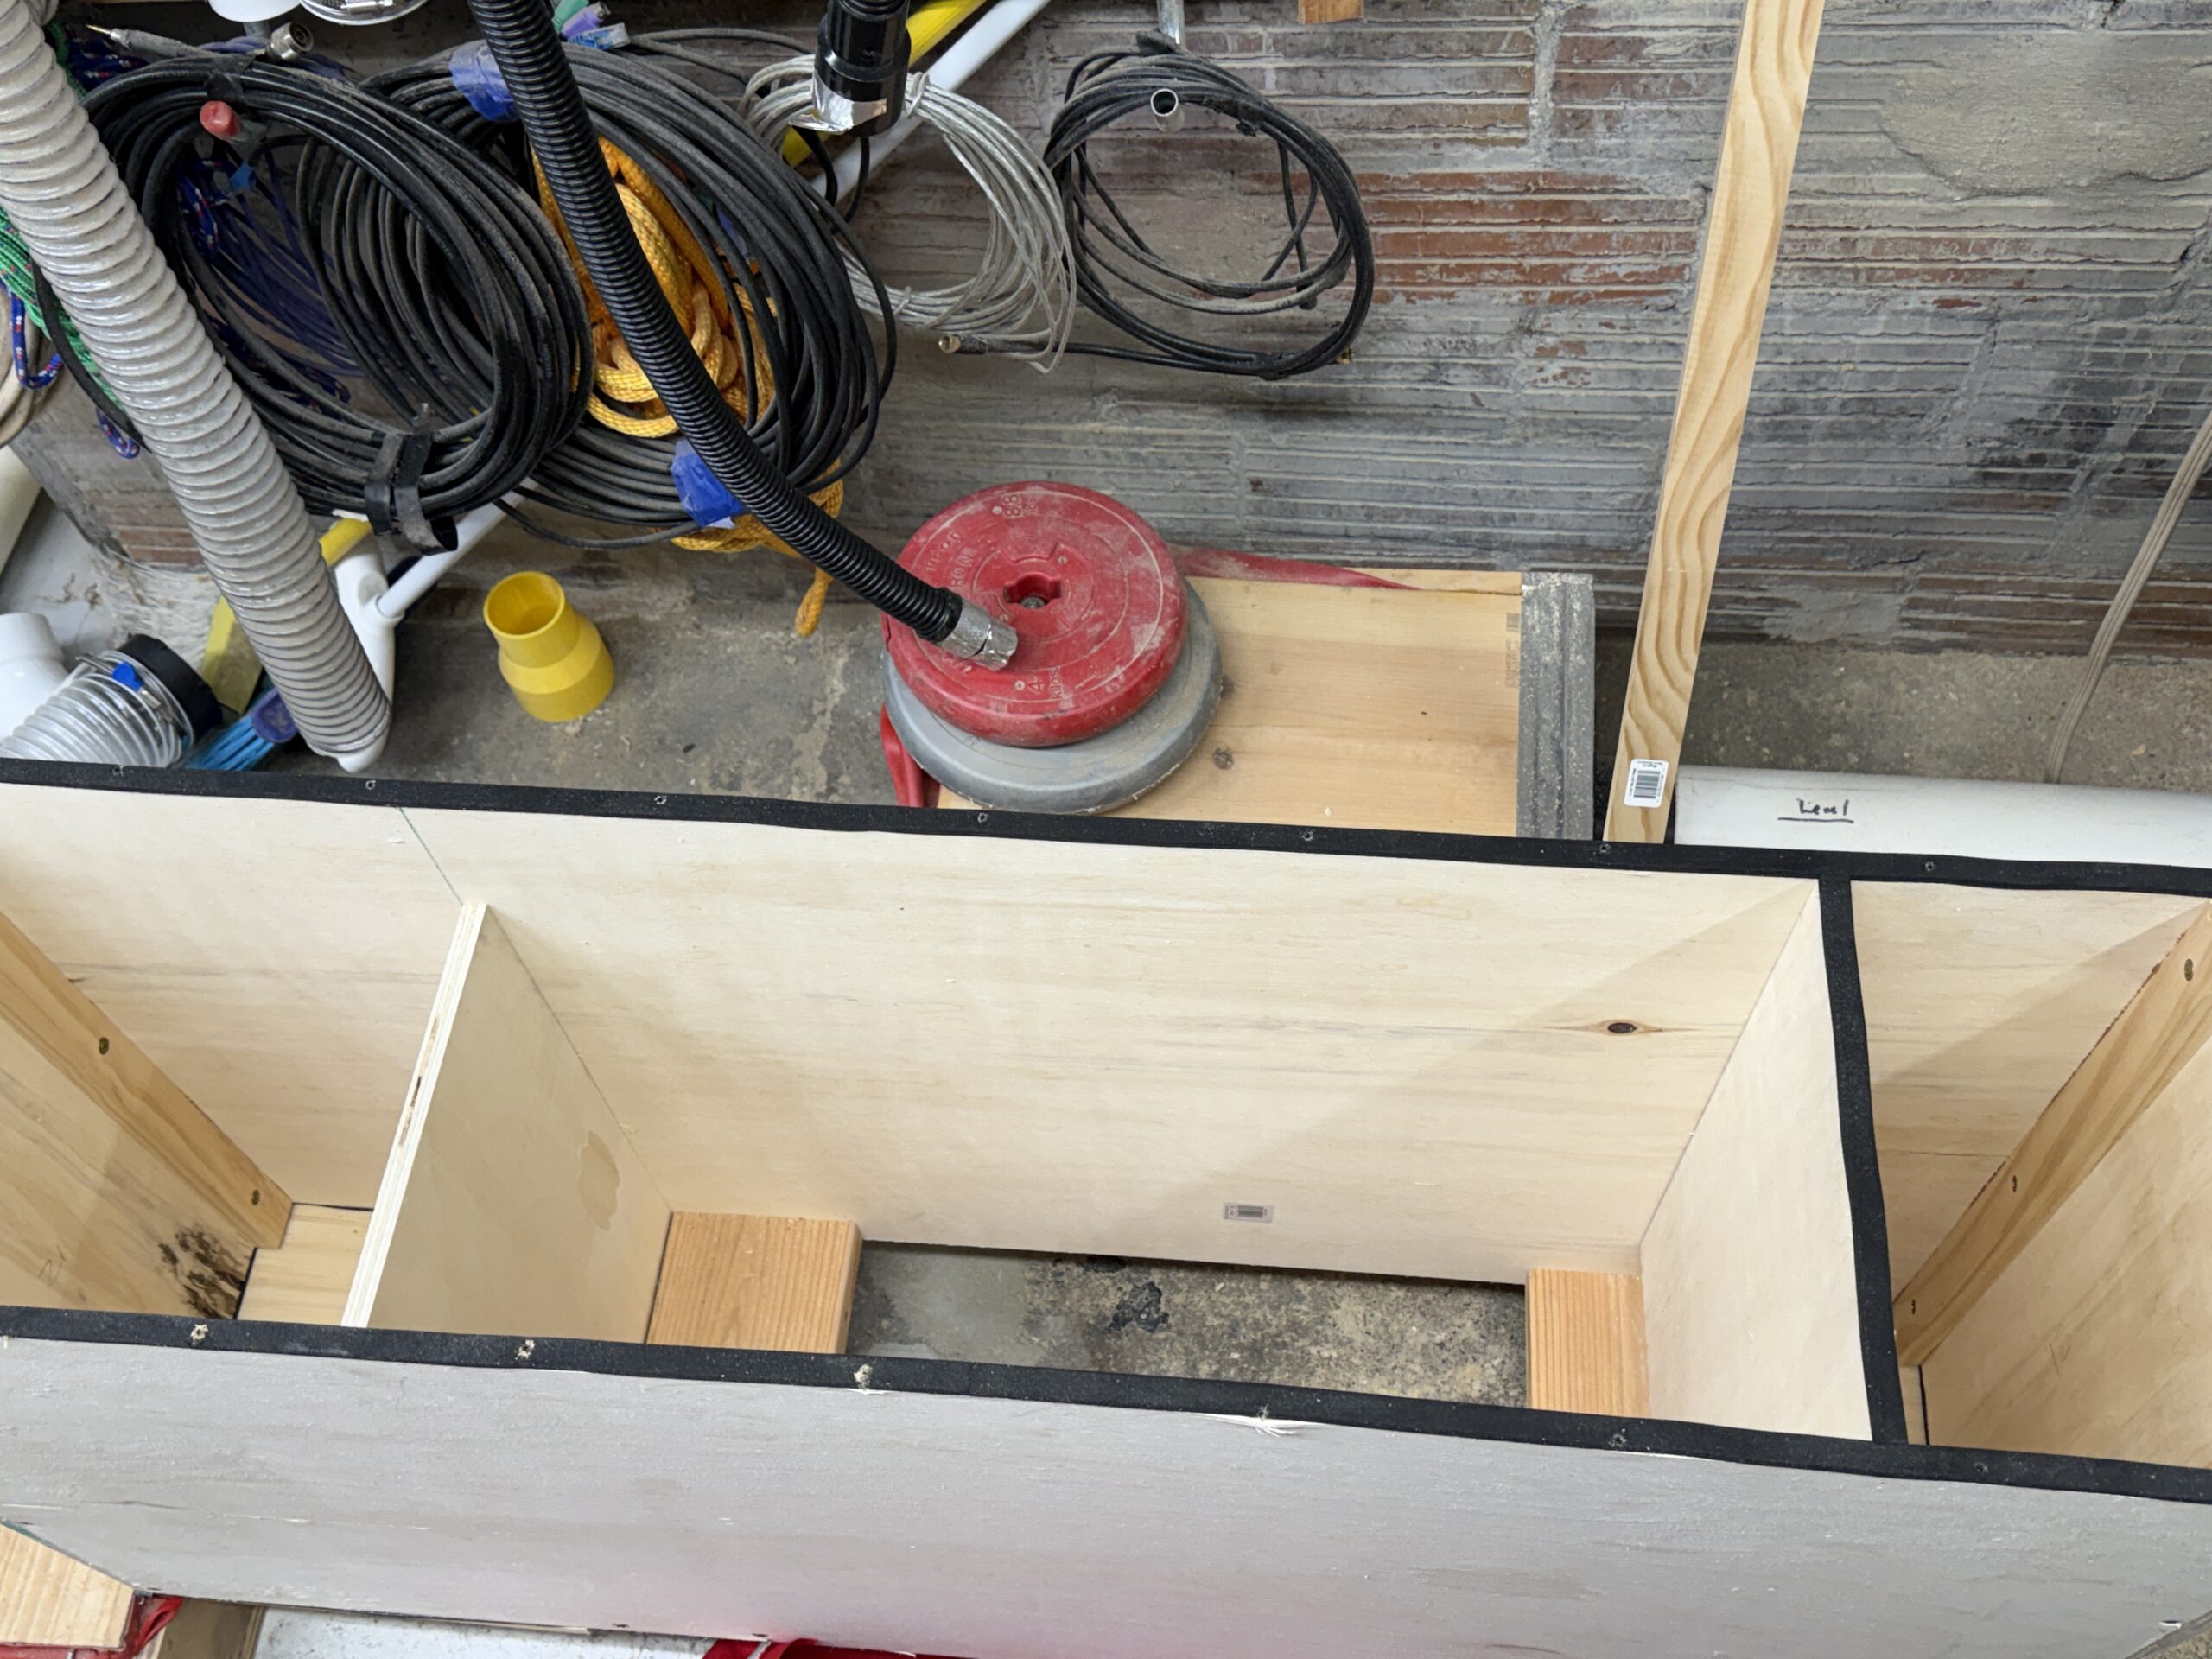
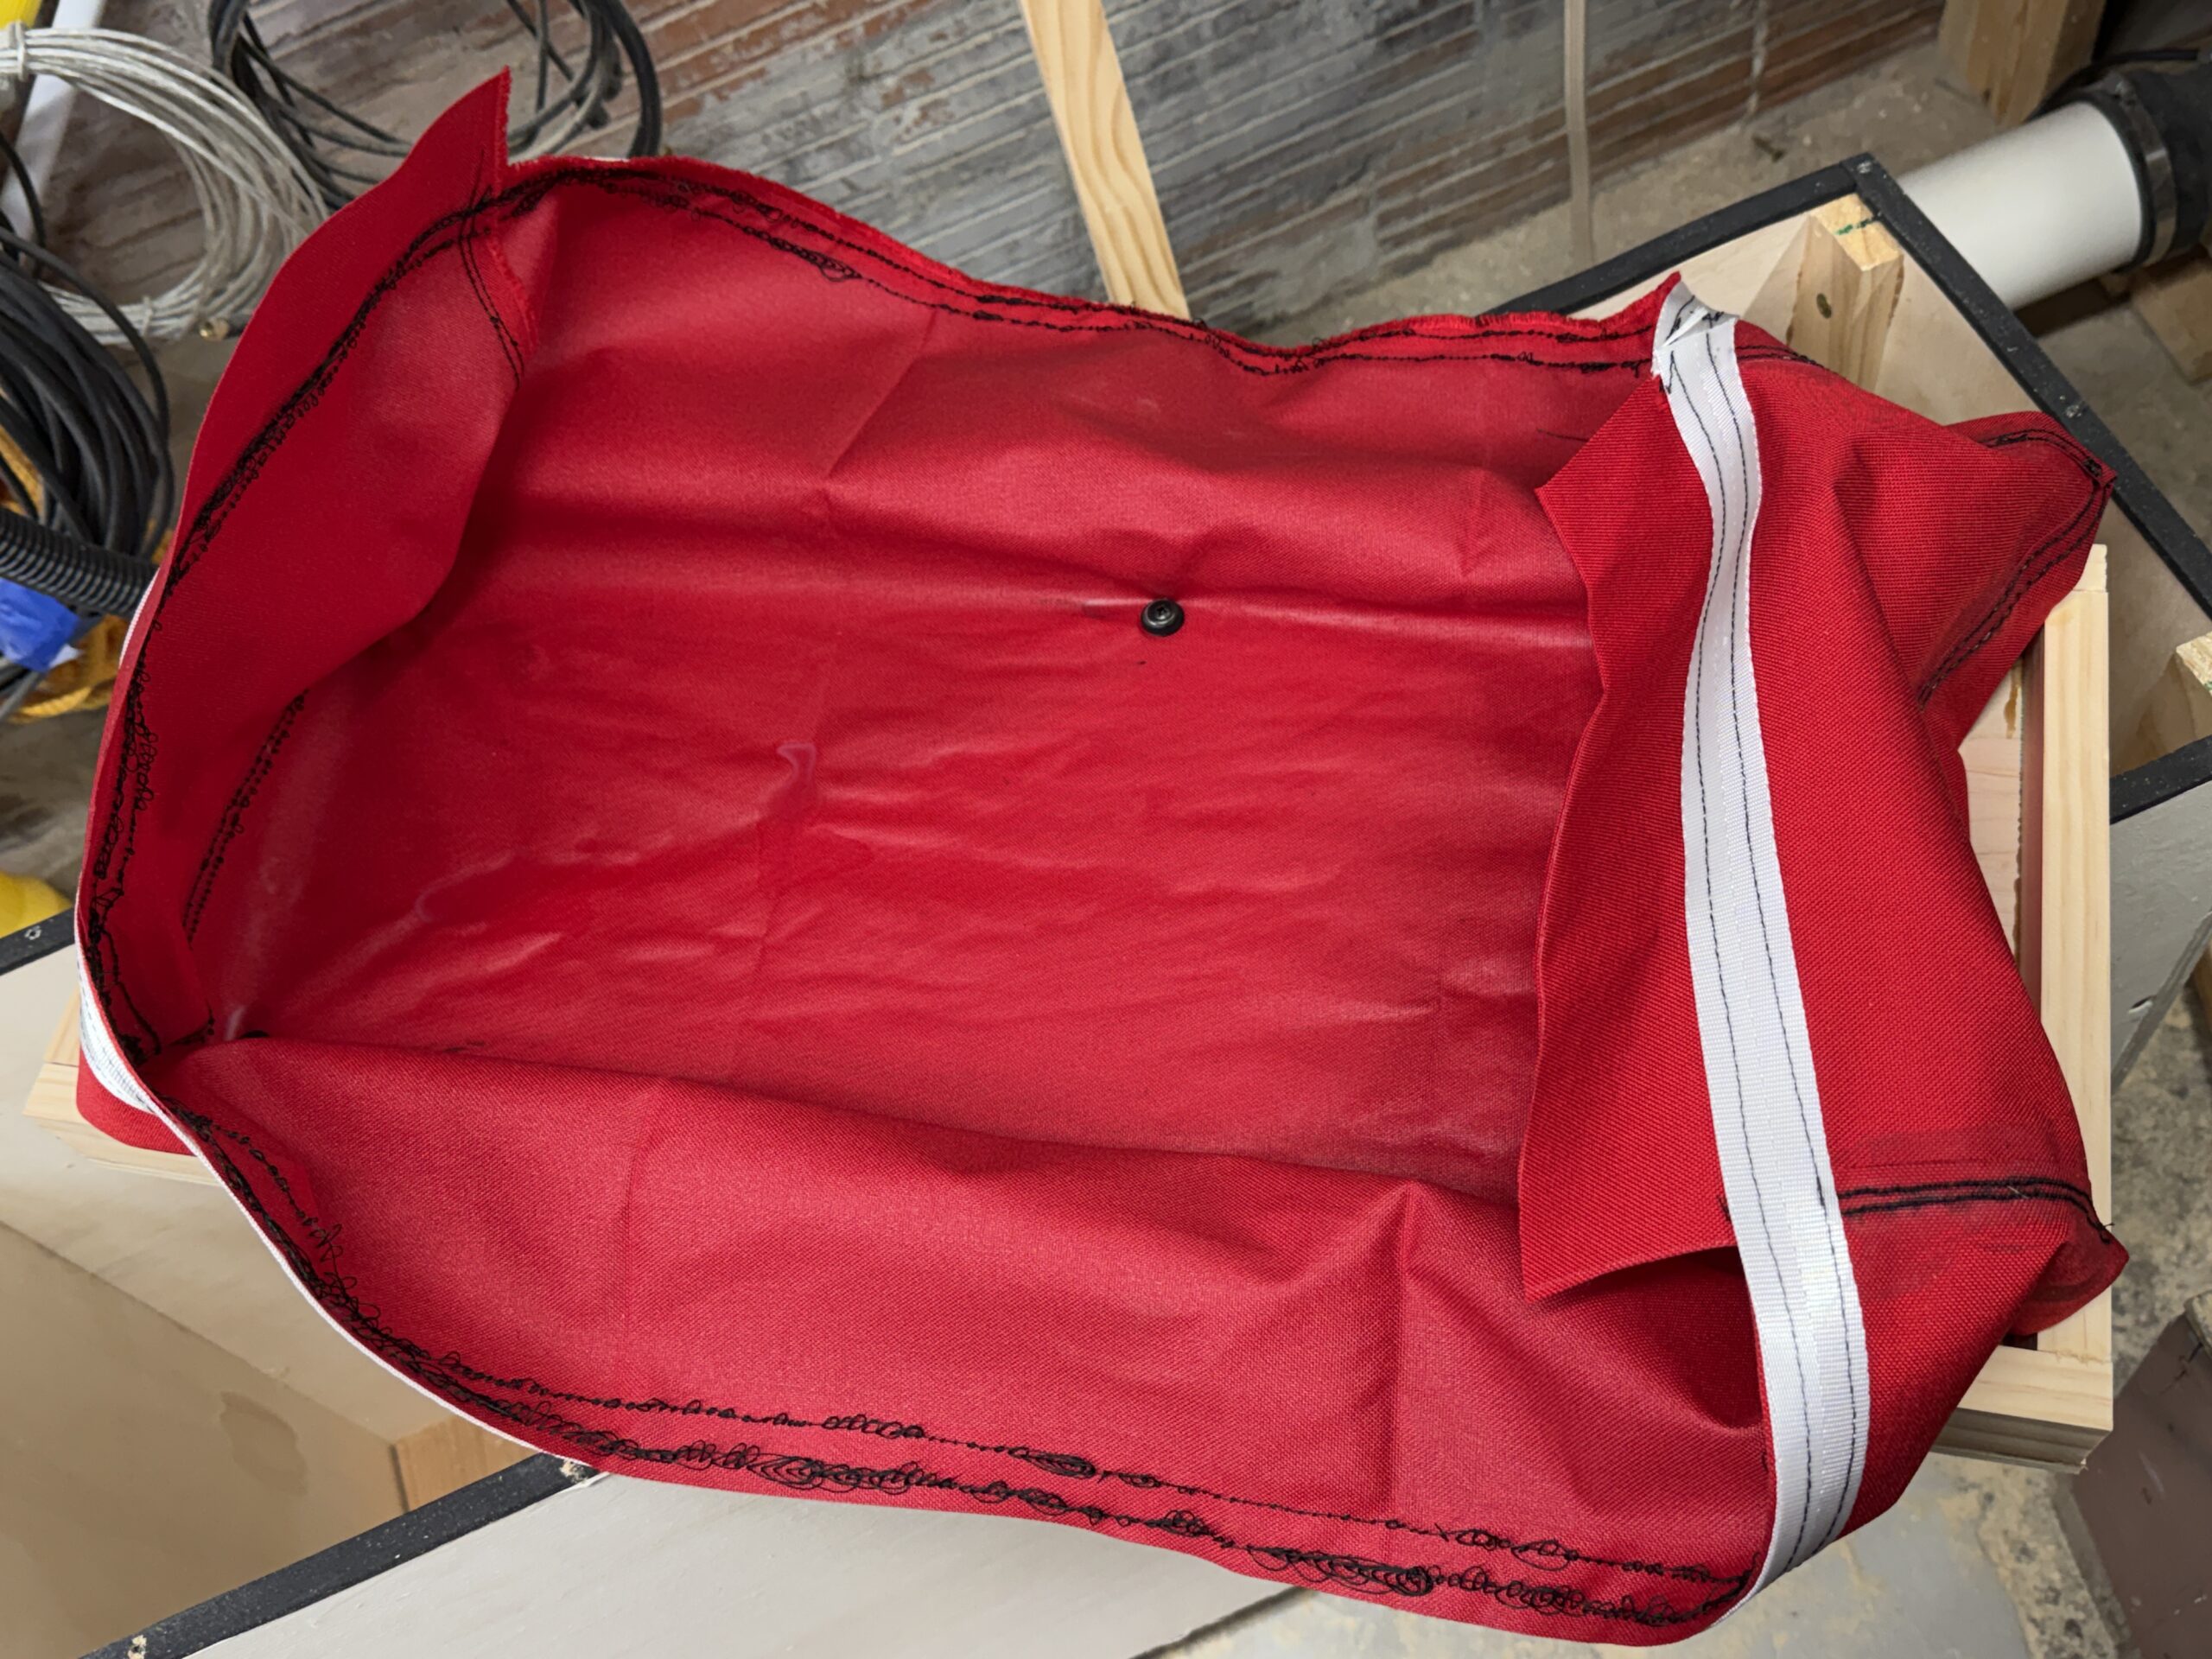
- New reservoir built, ~15 ft^3
- Filter and housing incorporated onto the new blower
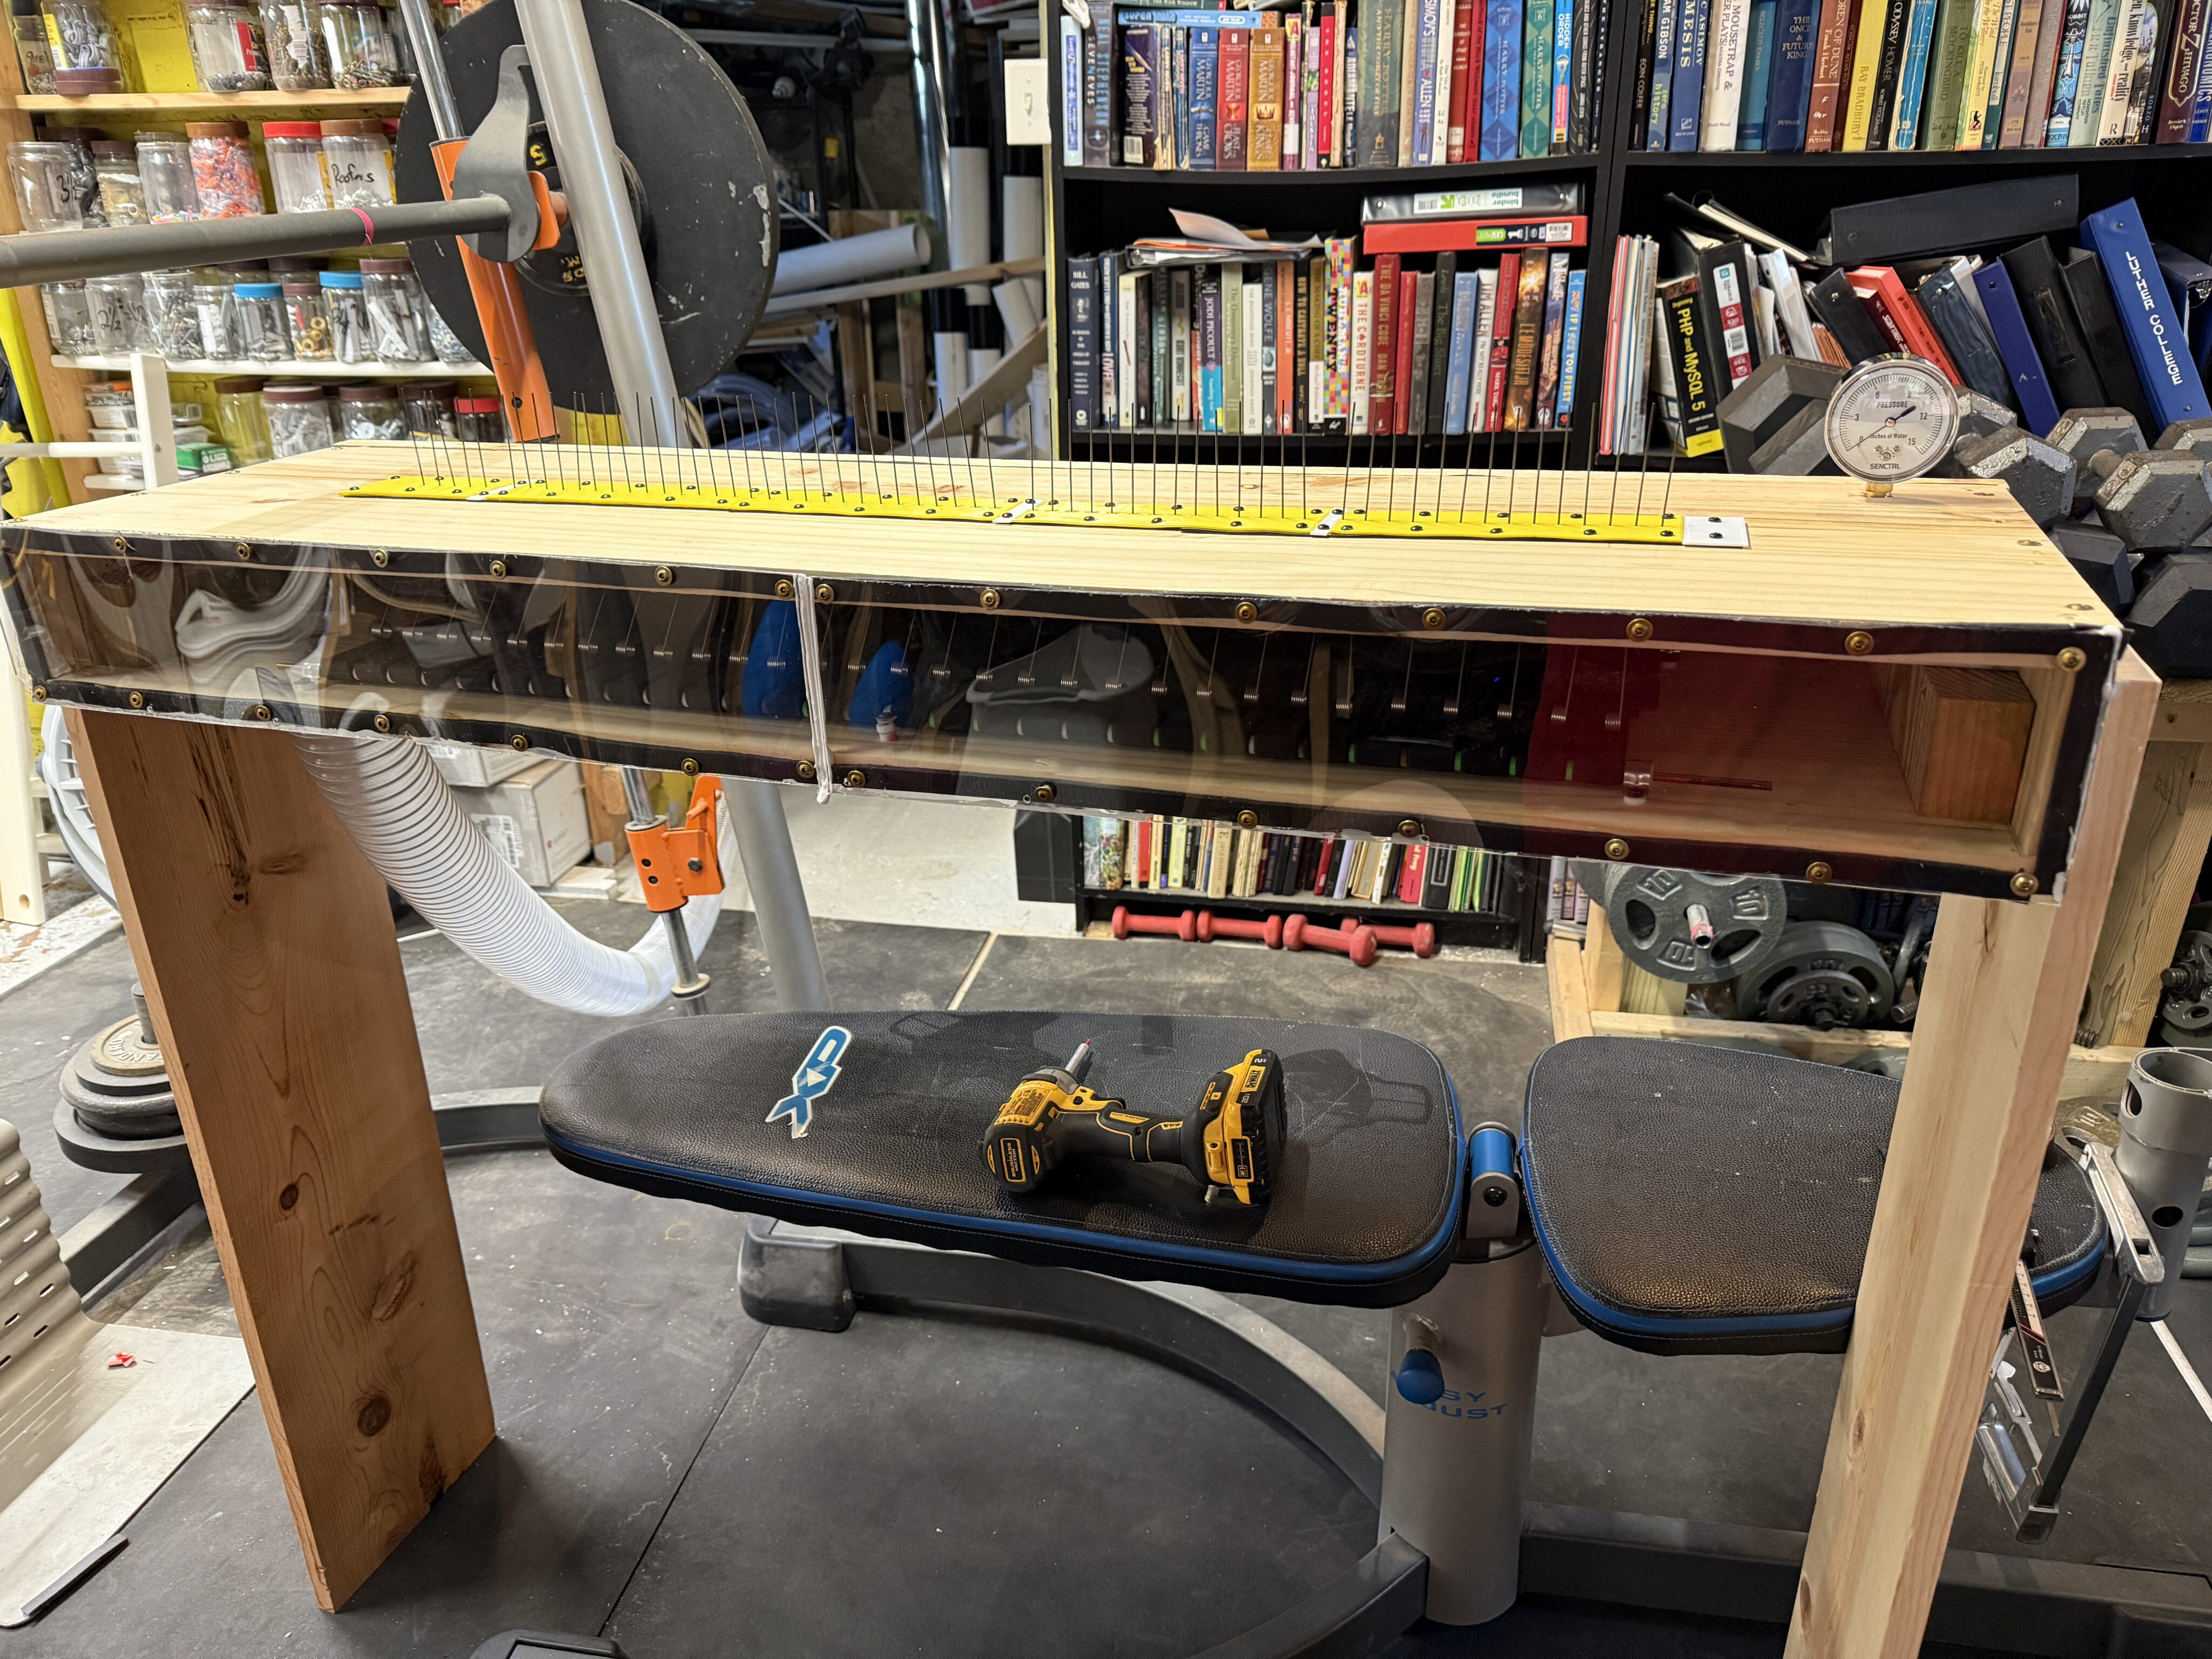
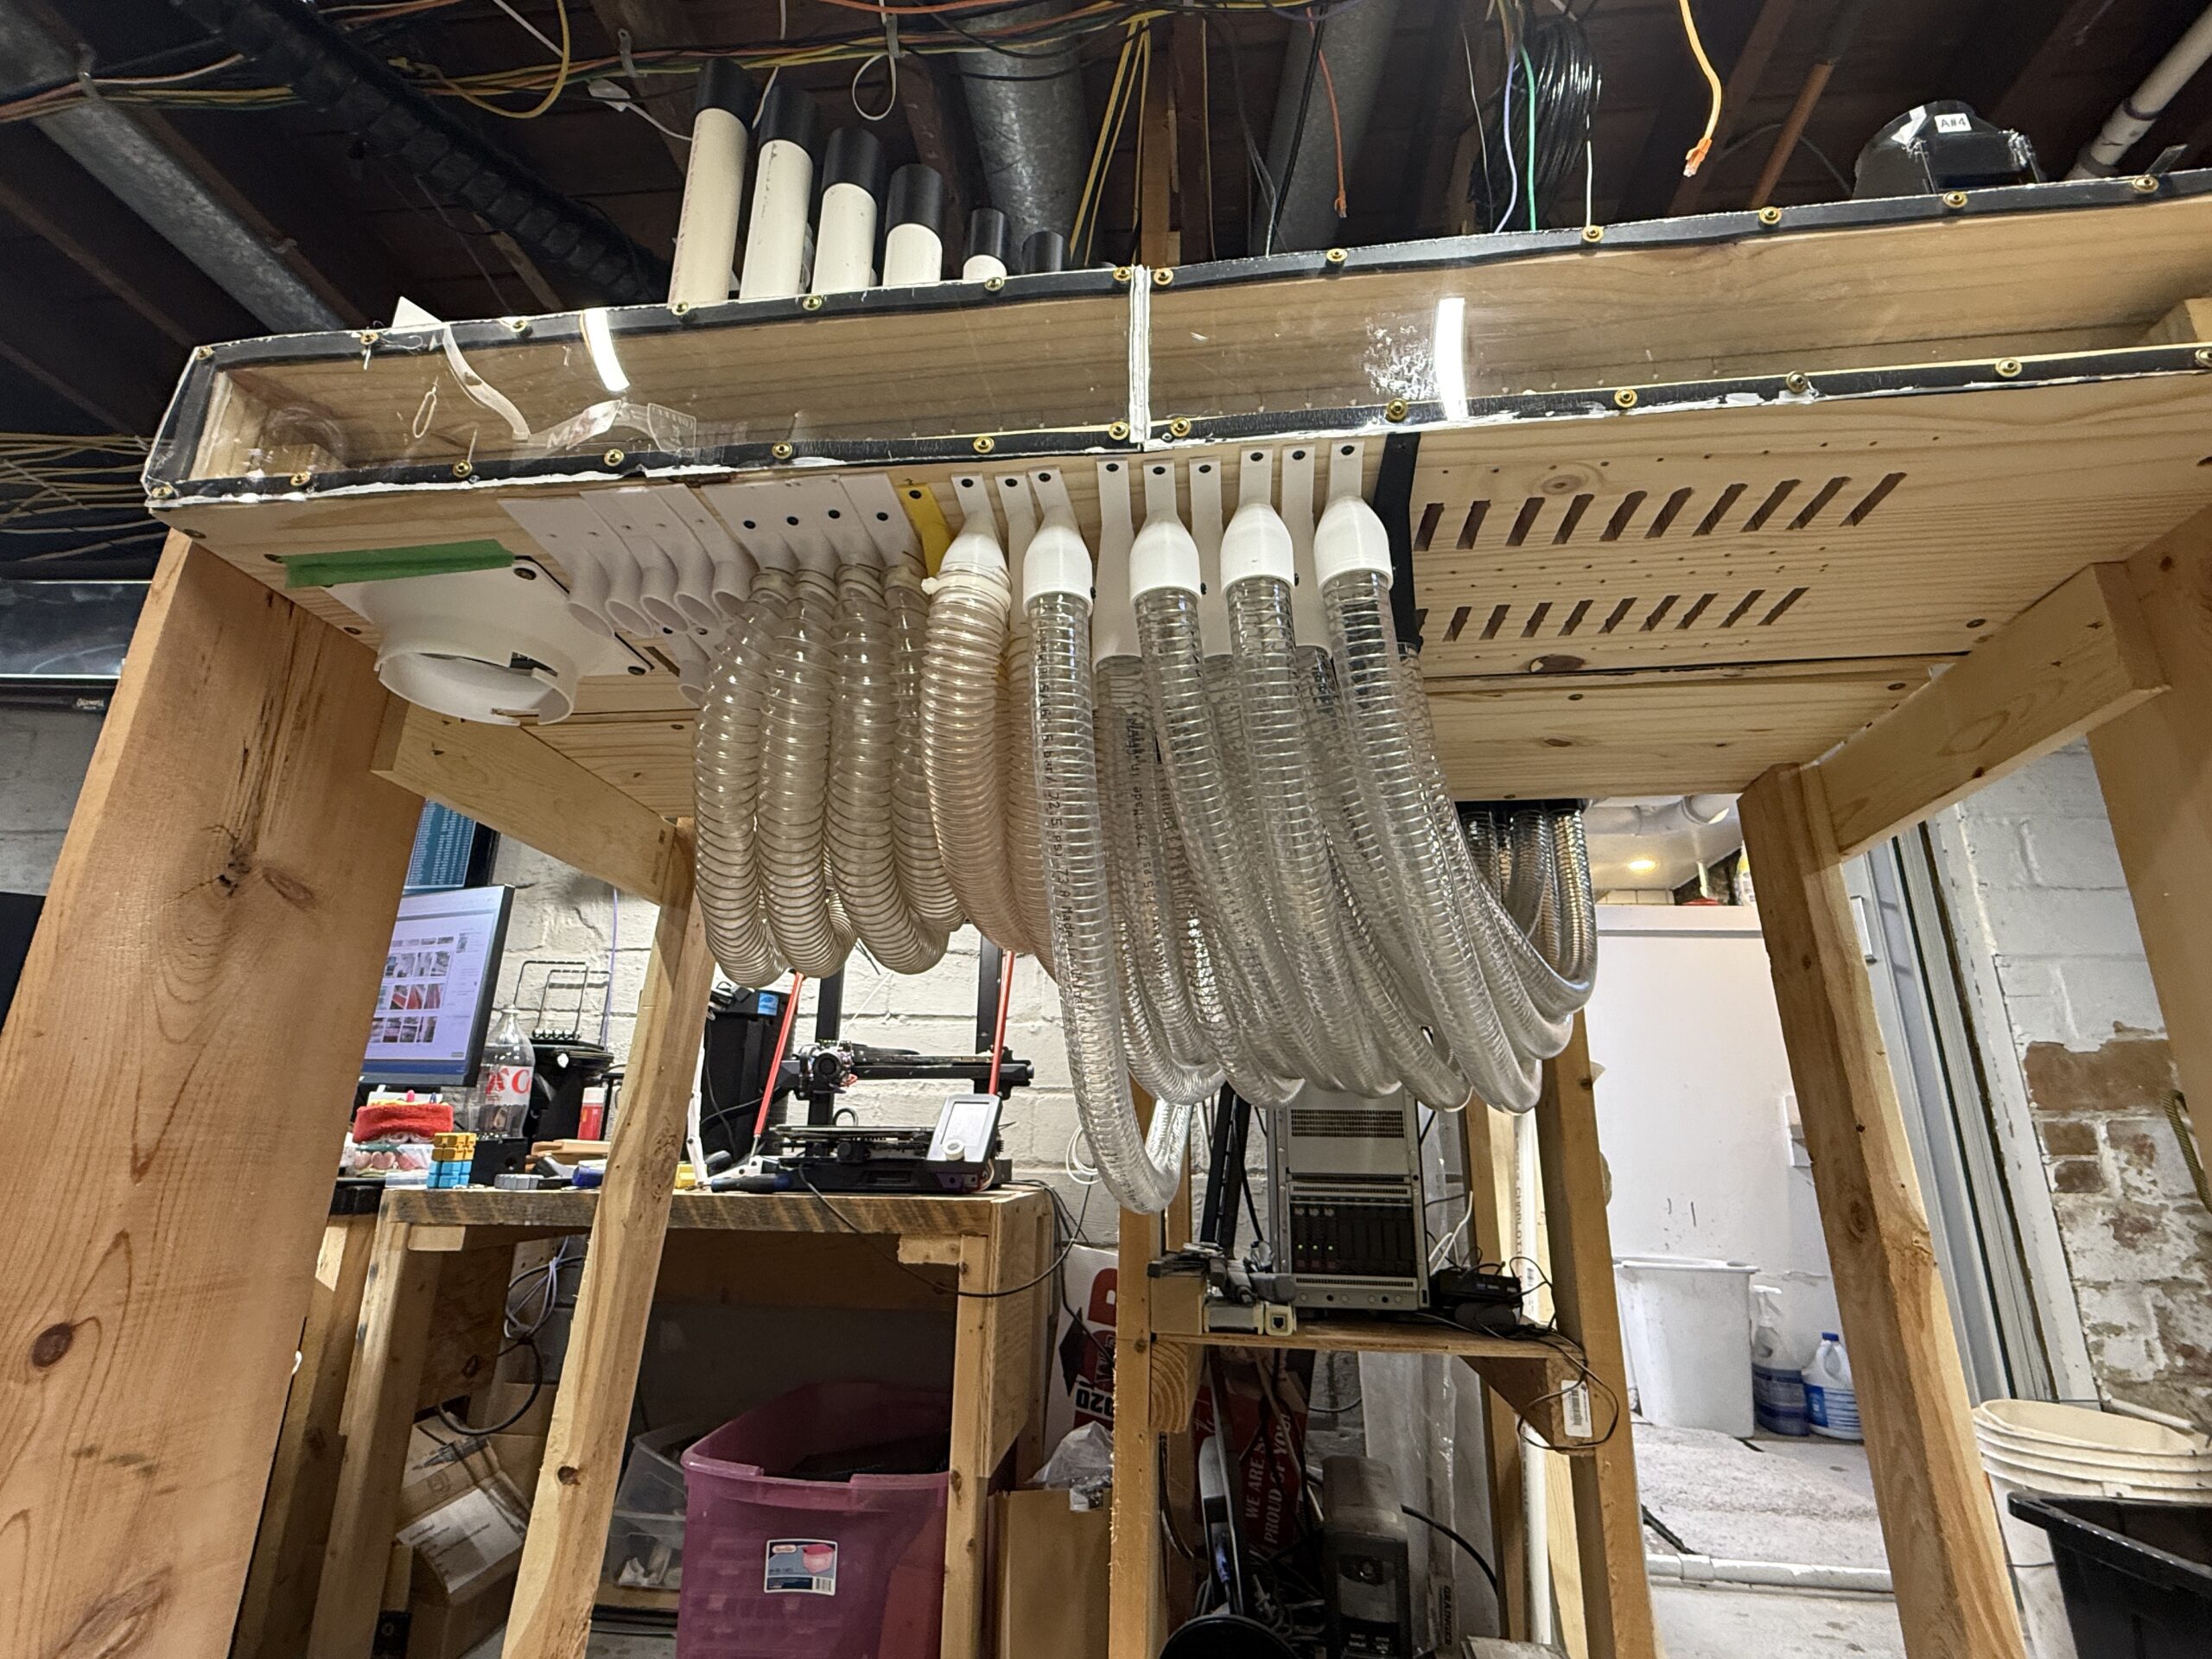
- Wind trunks upgraded to 4″ everywhere
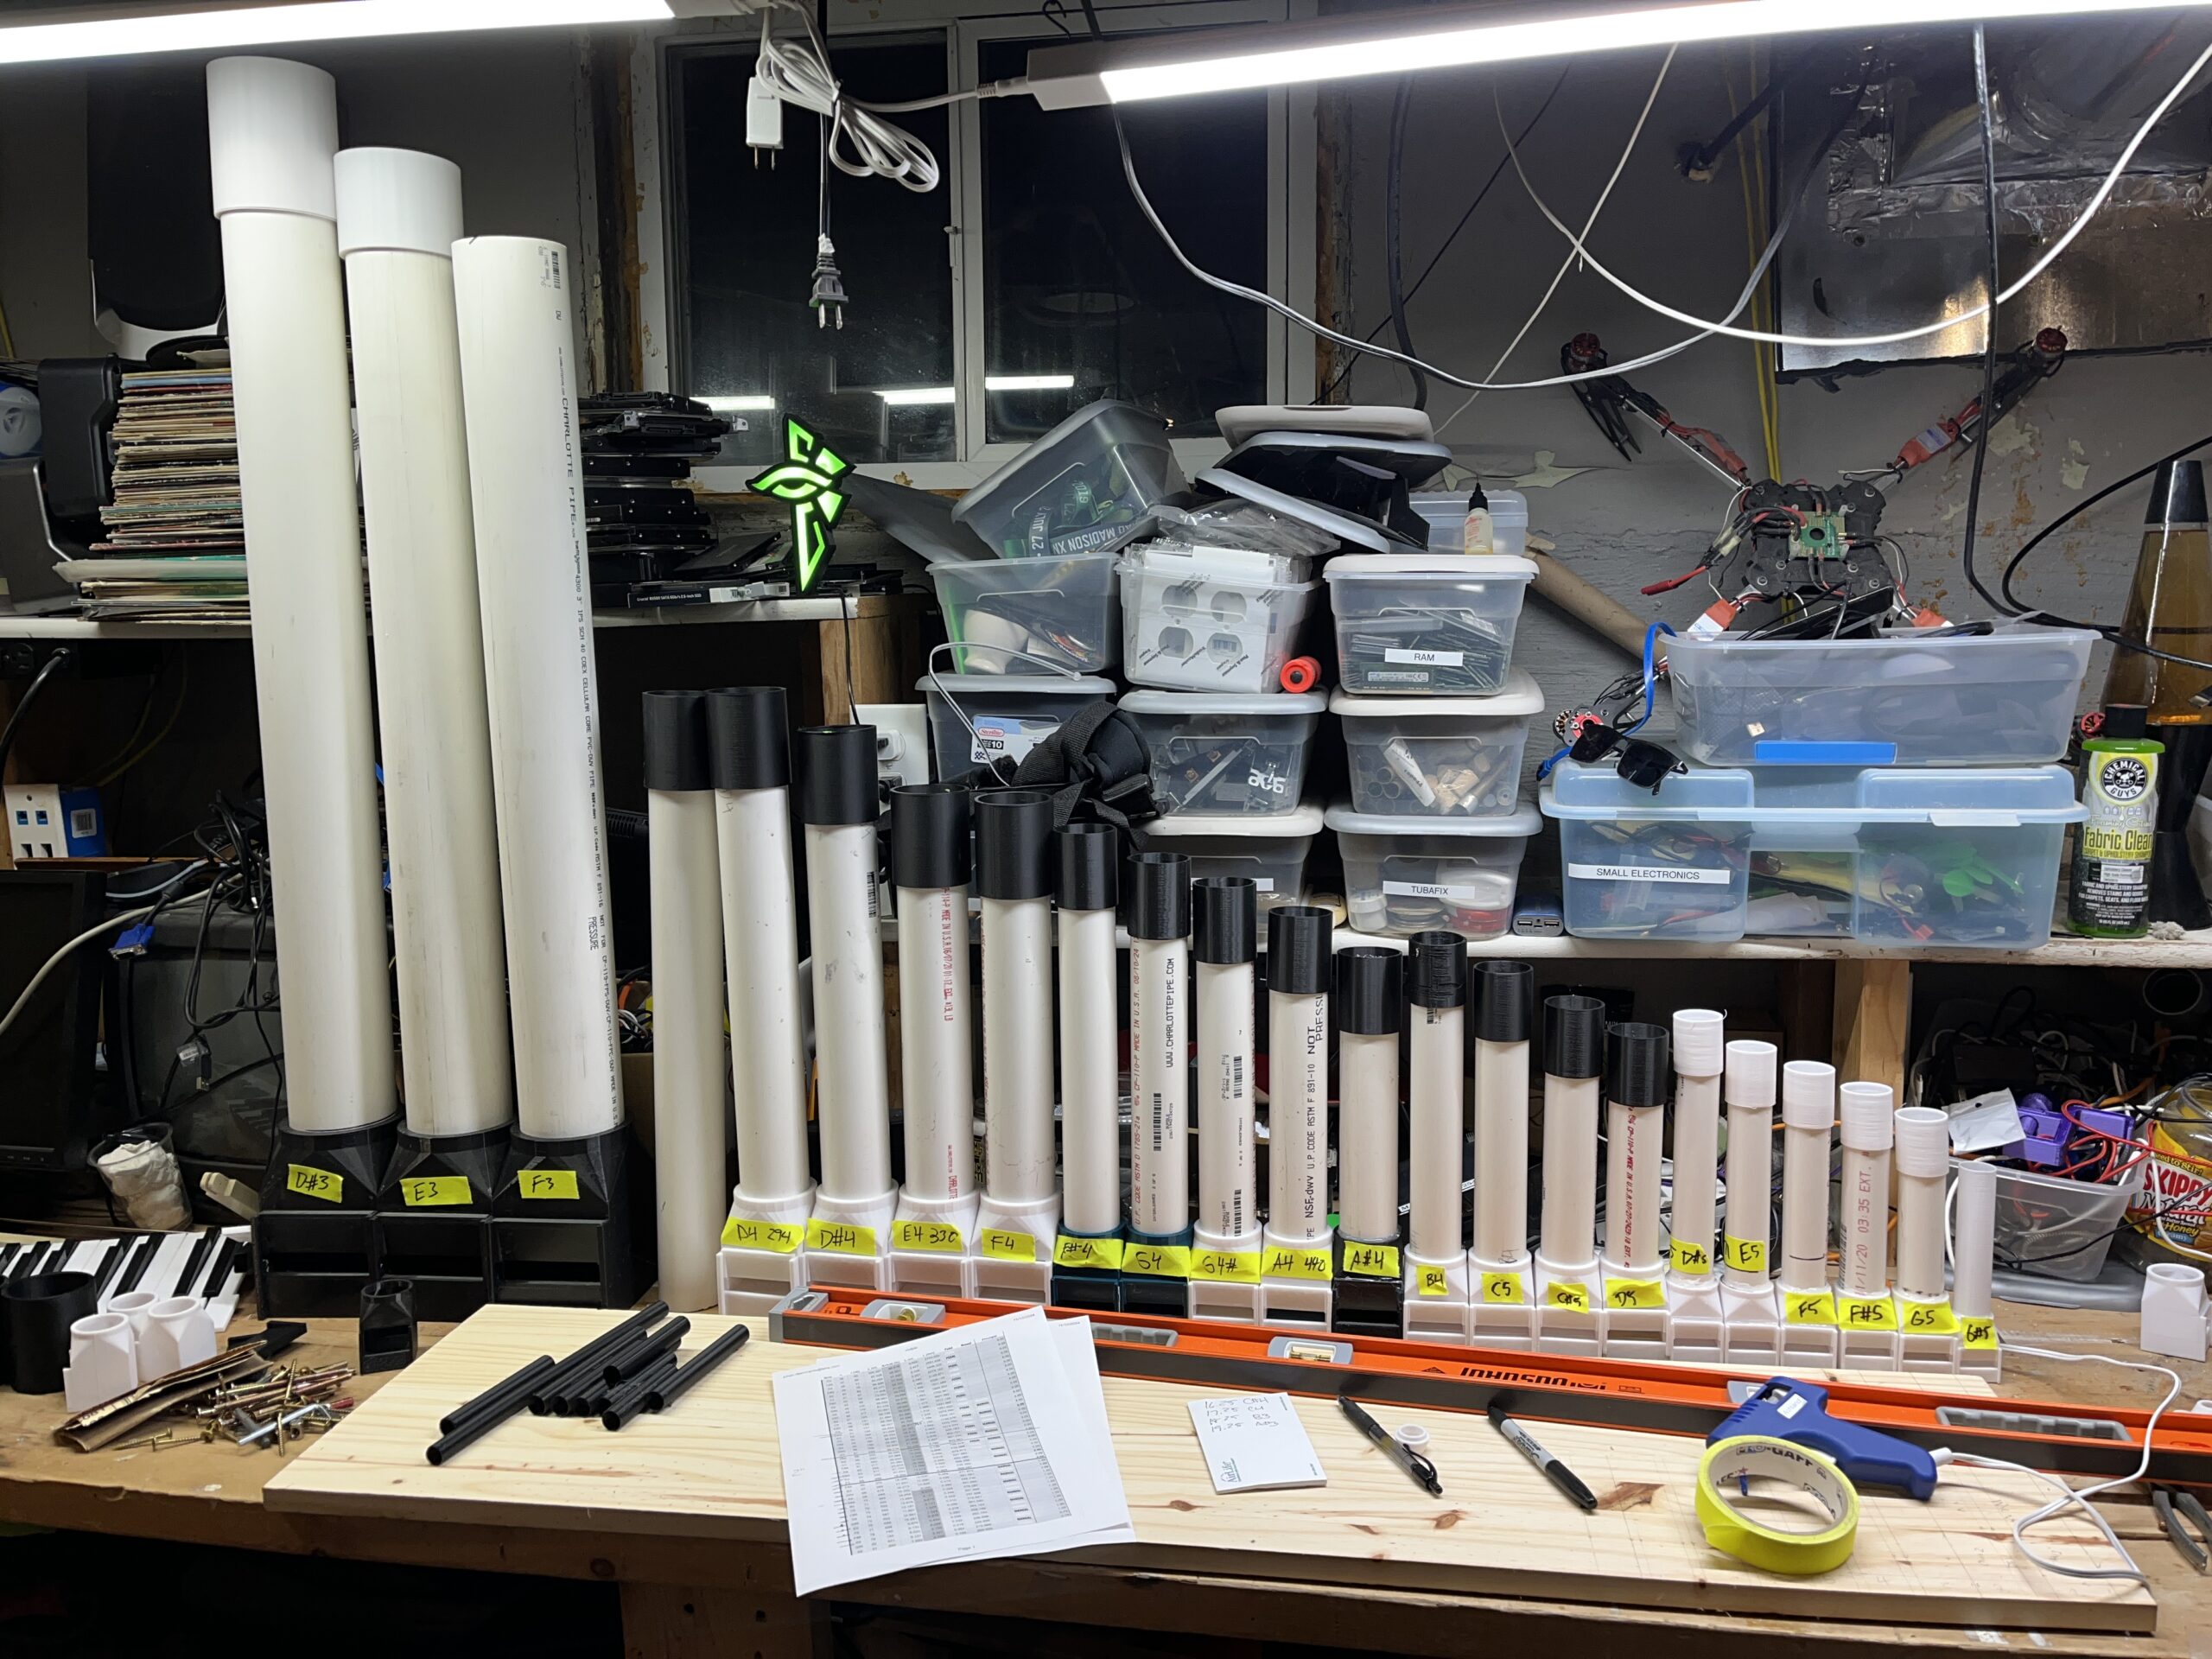
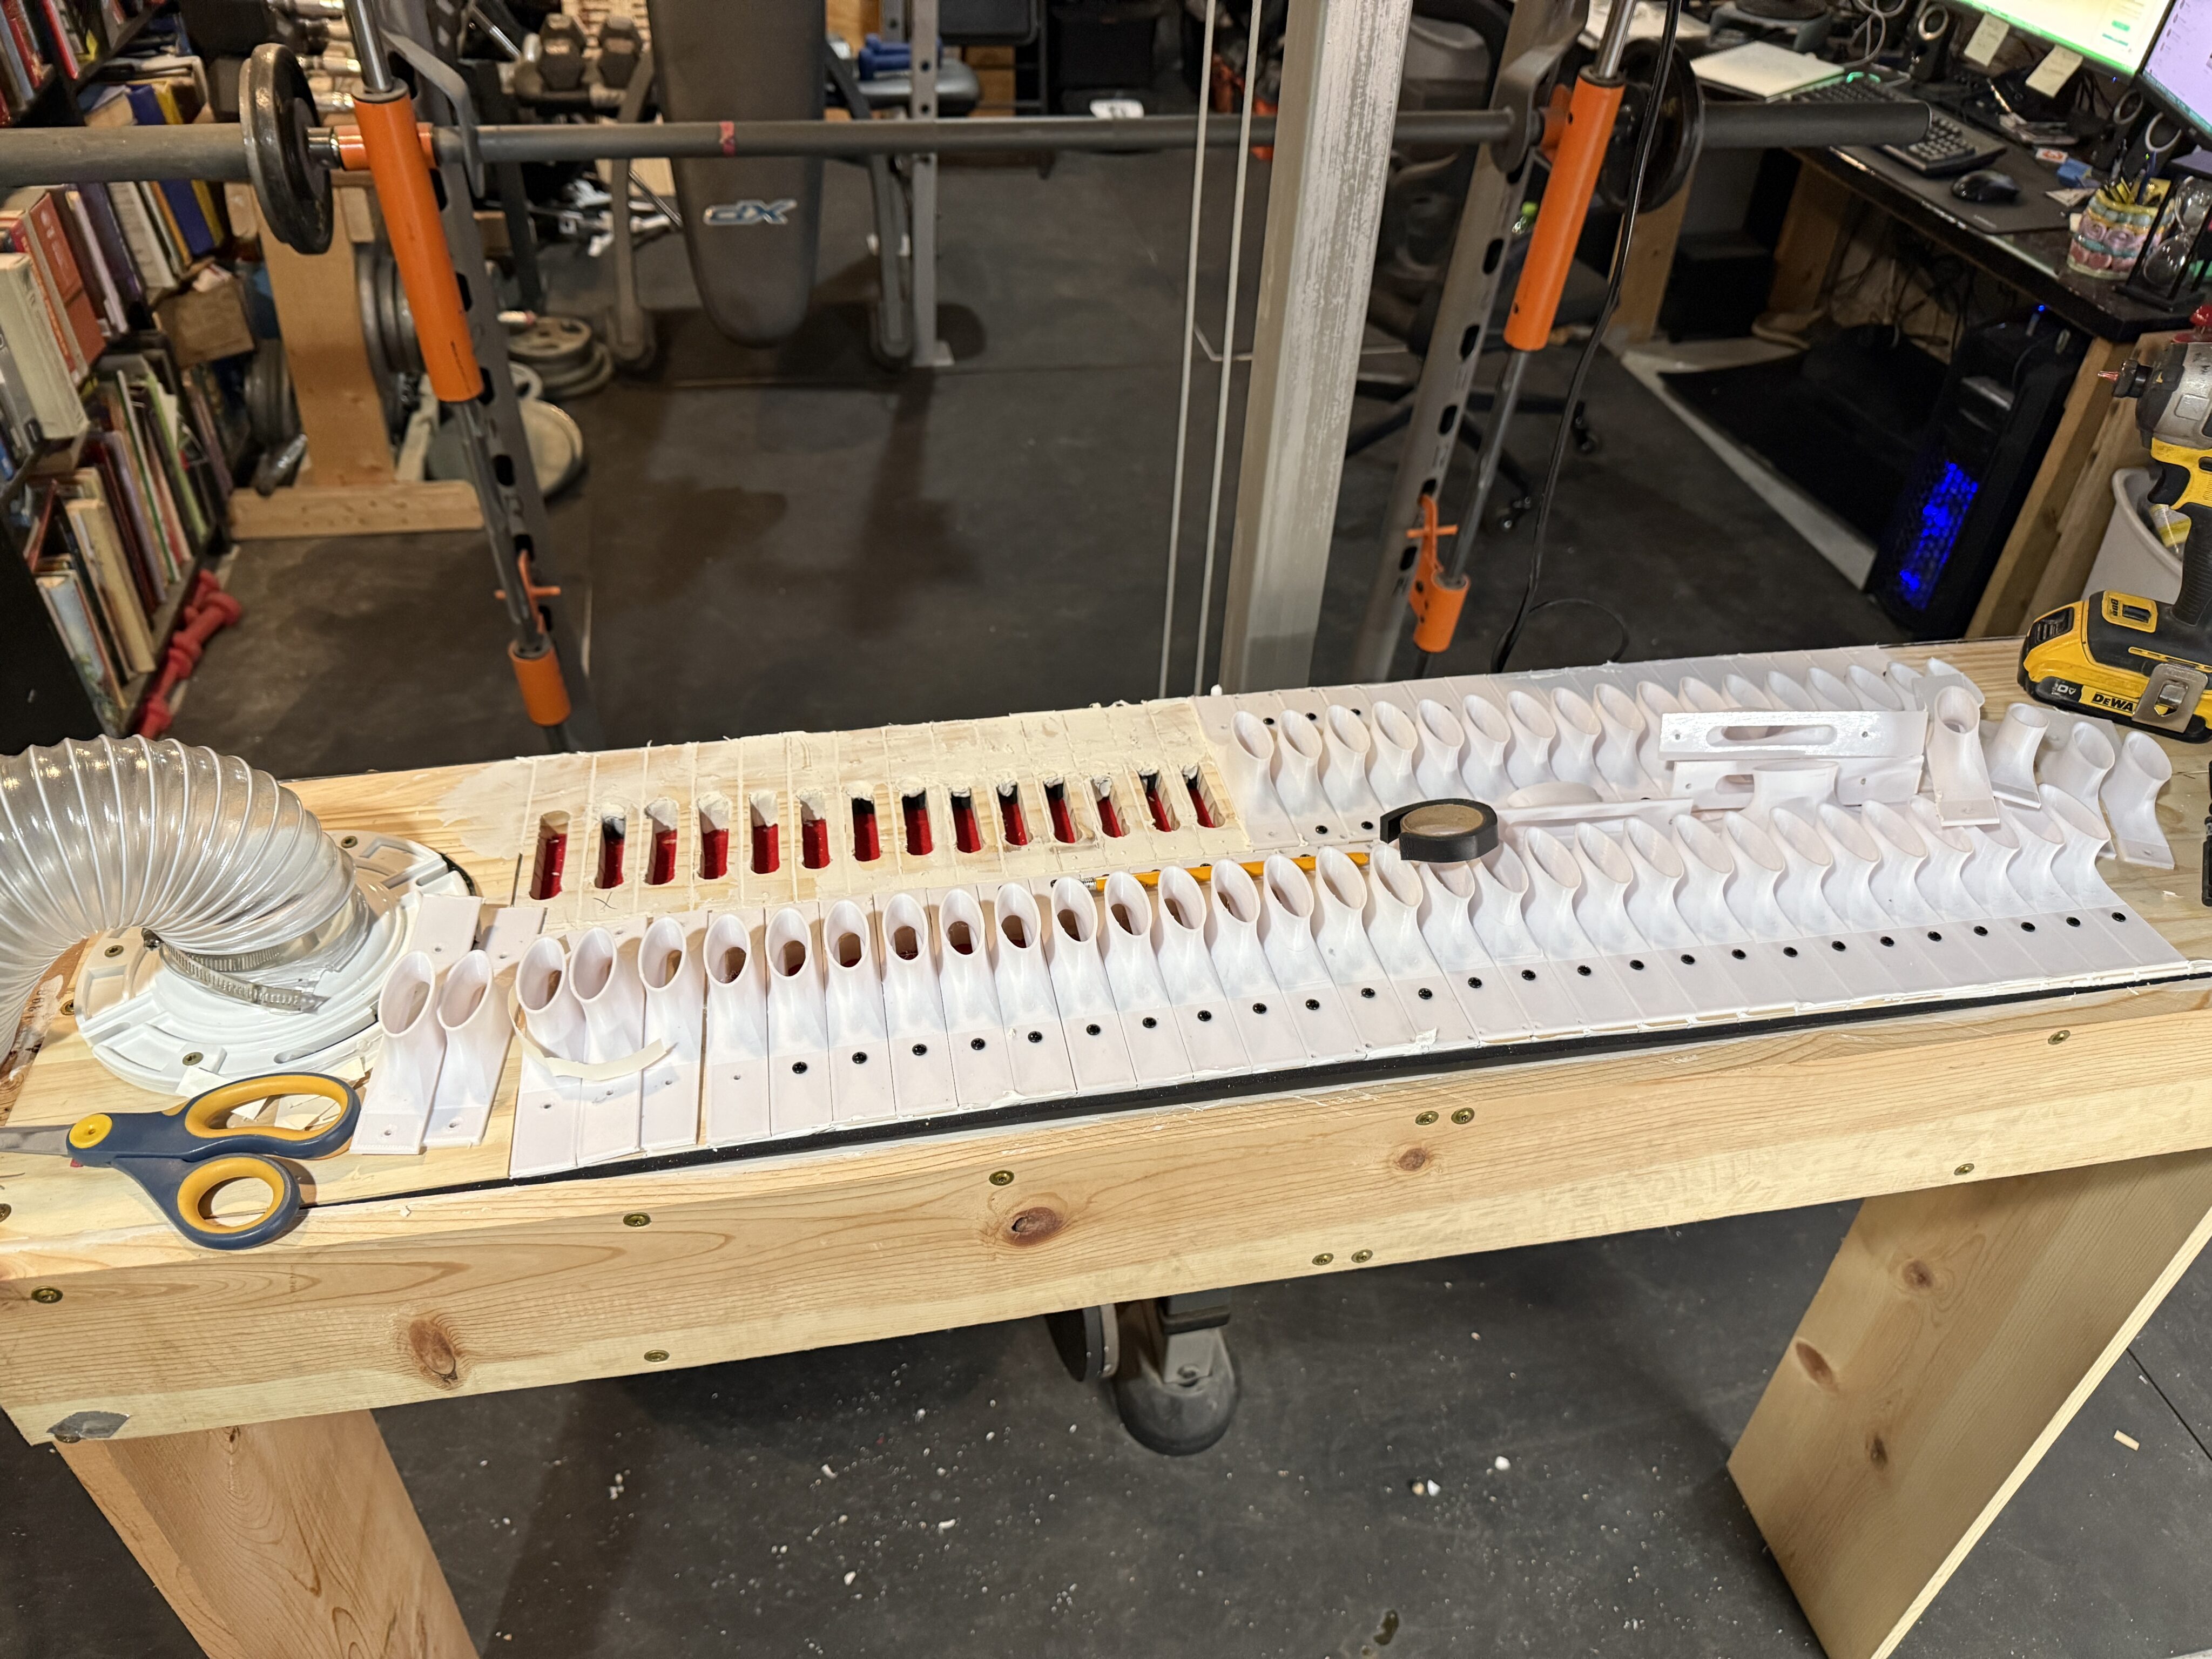
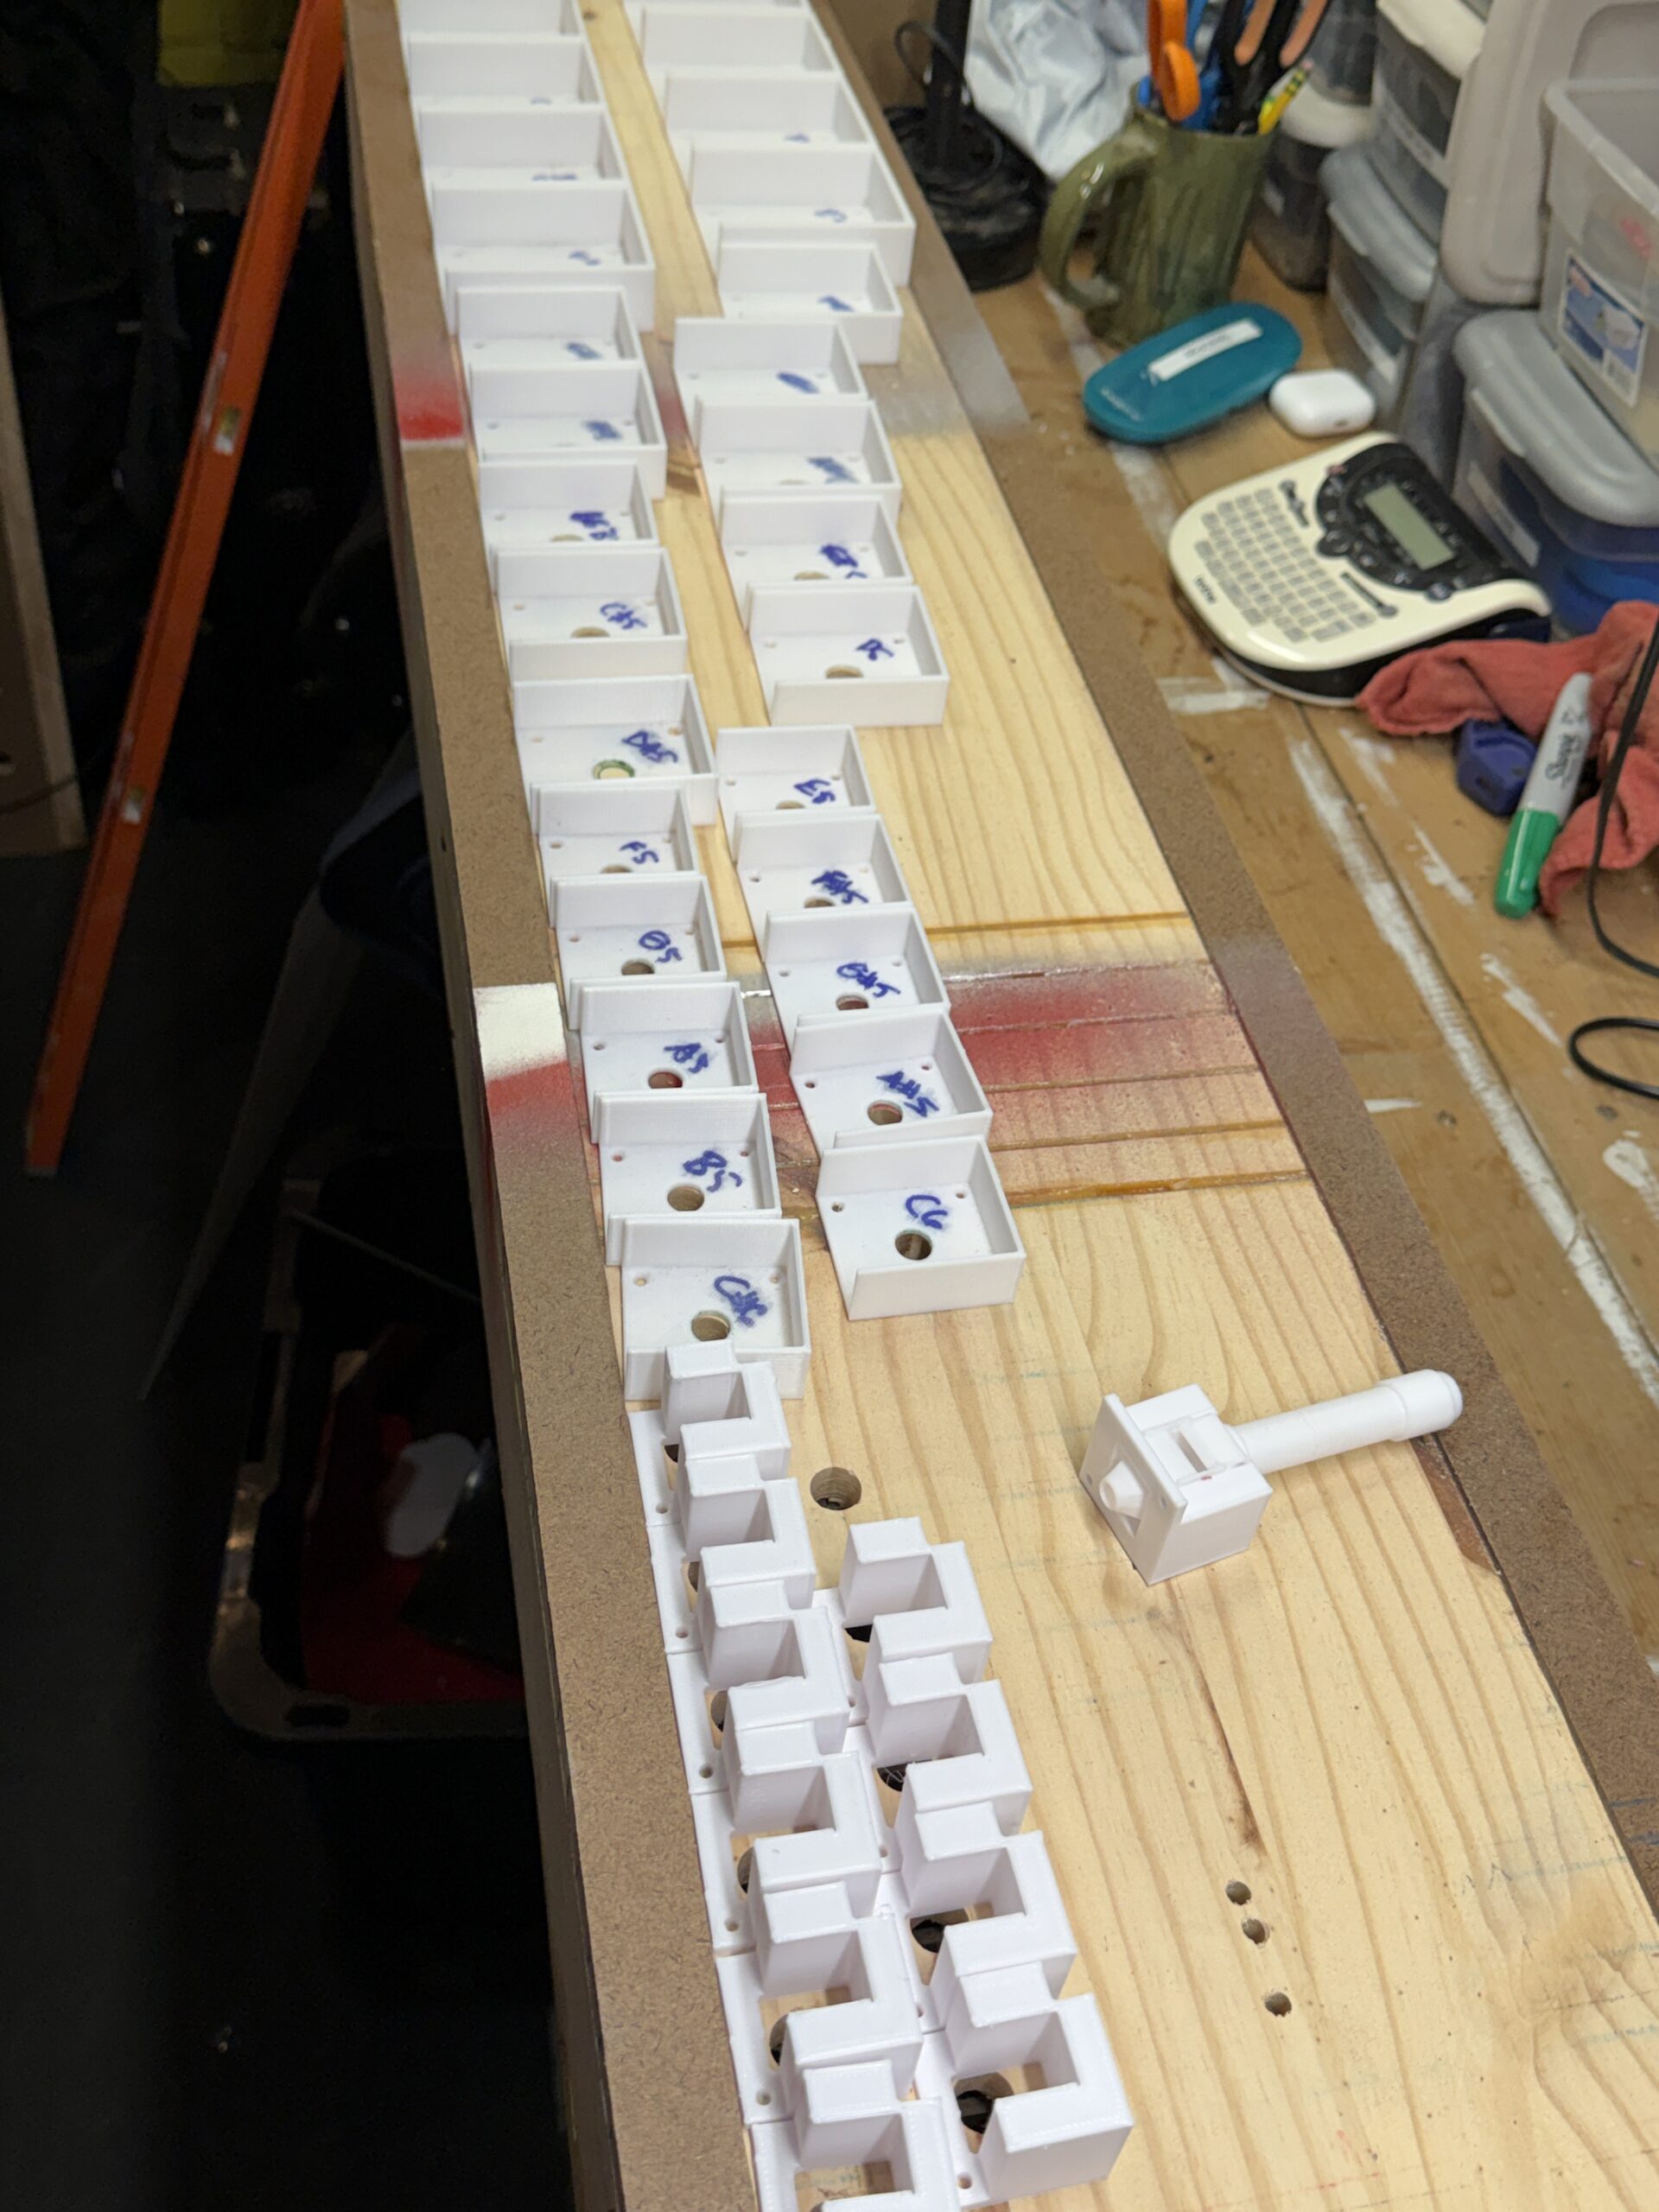
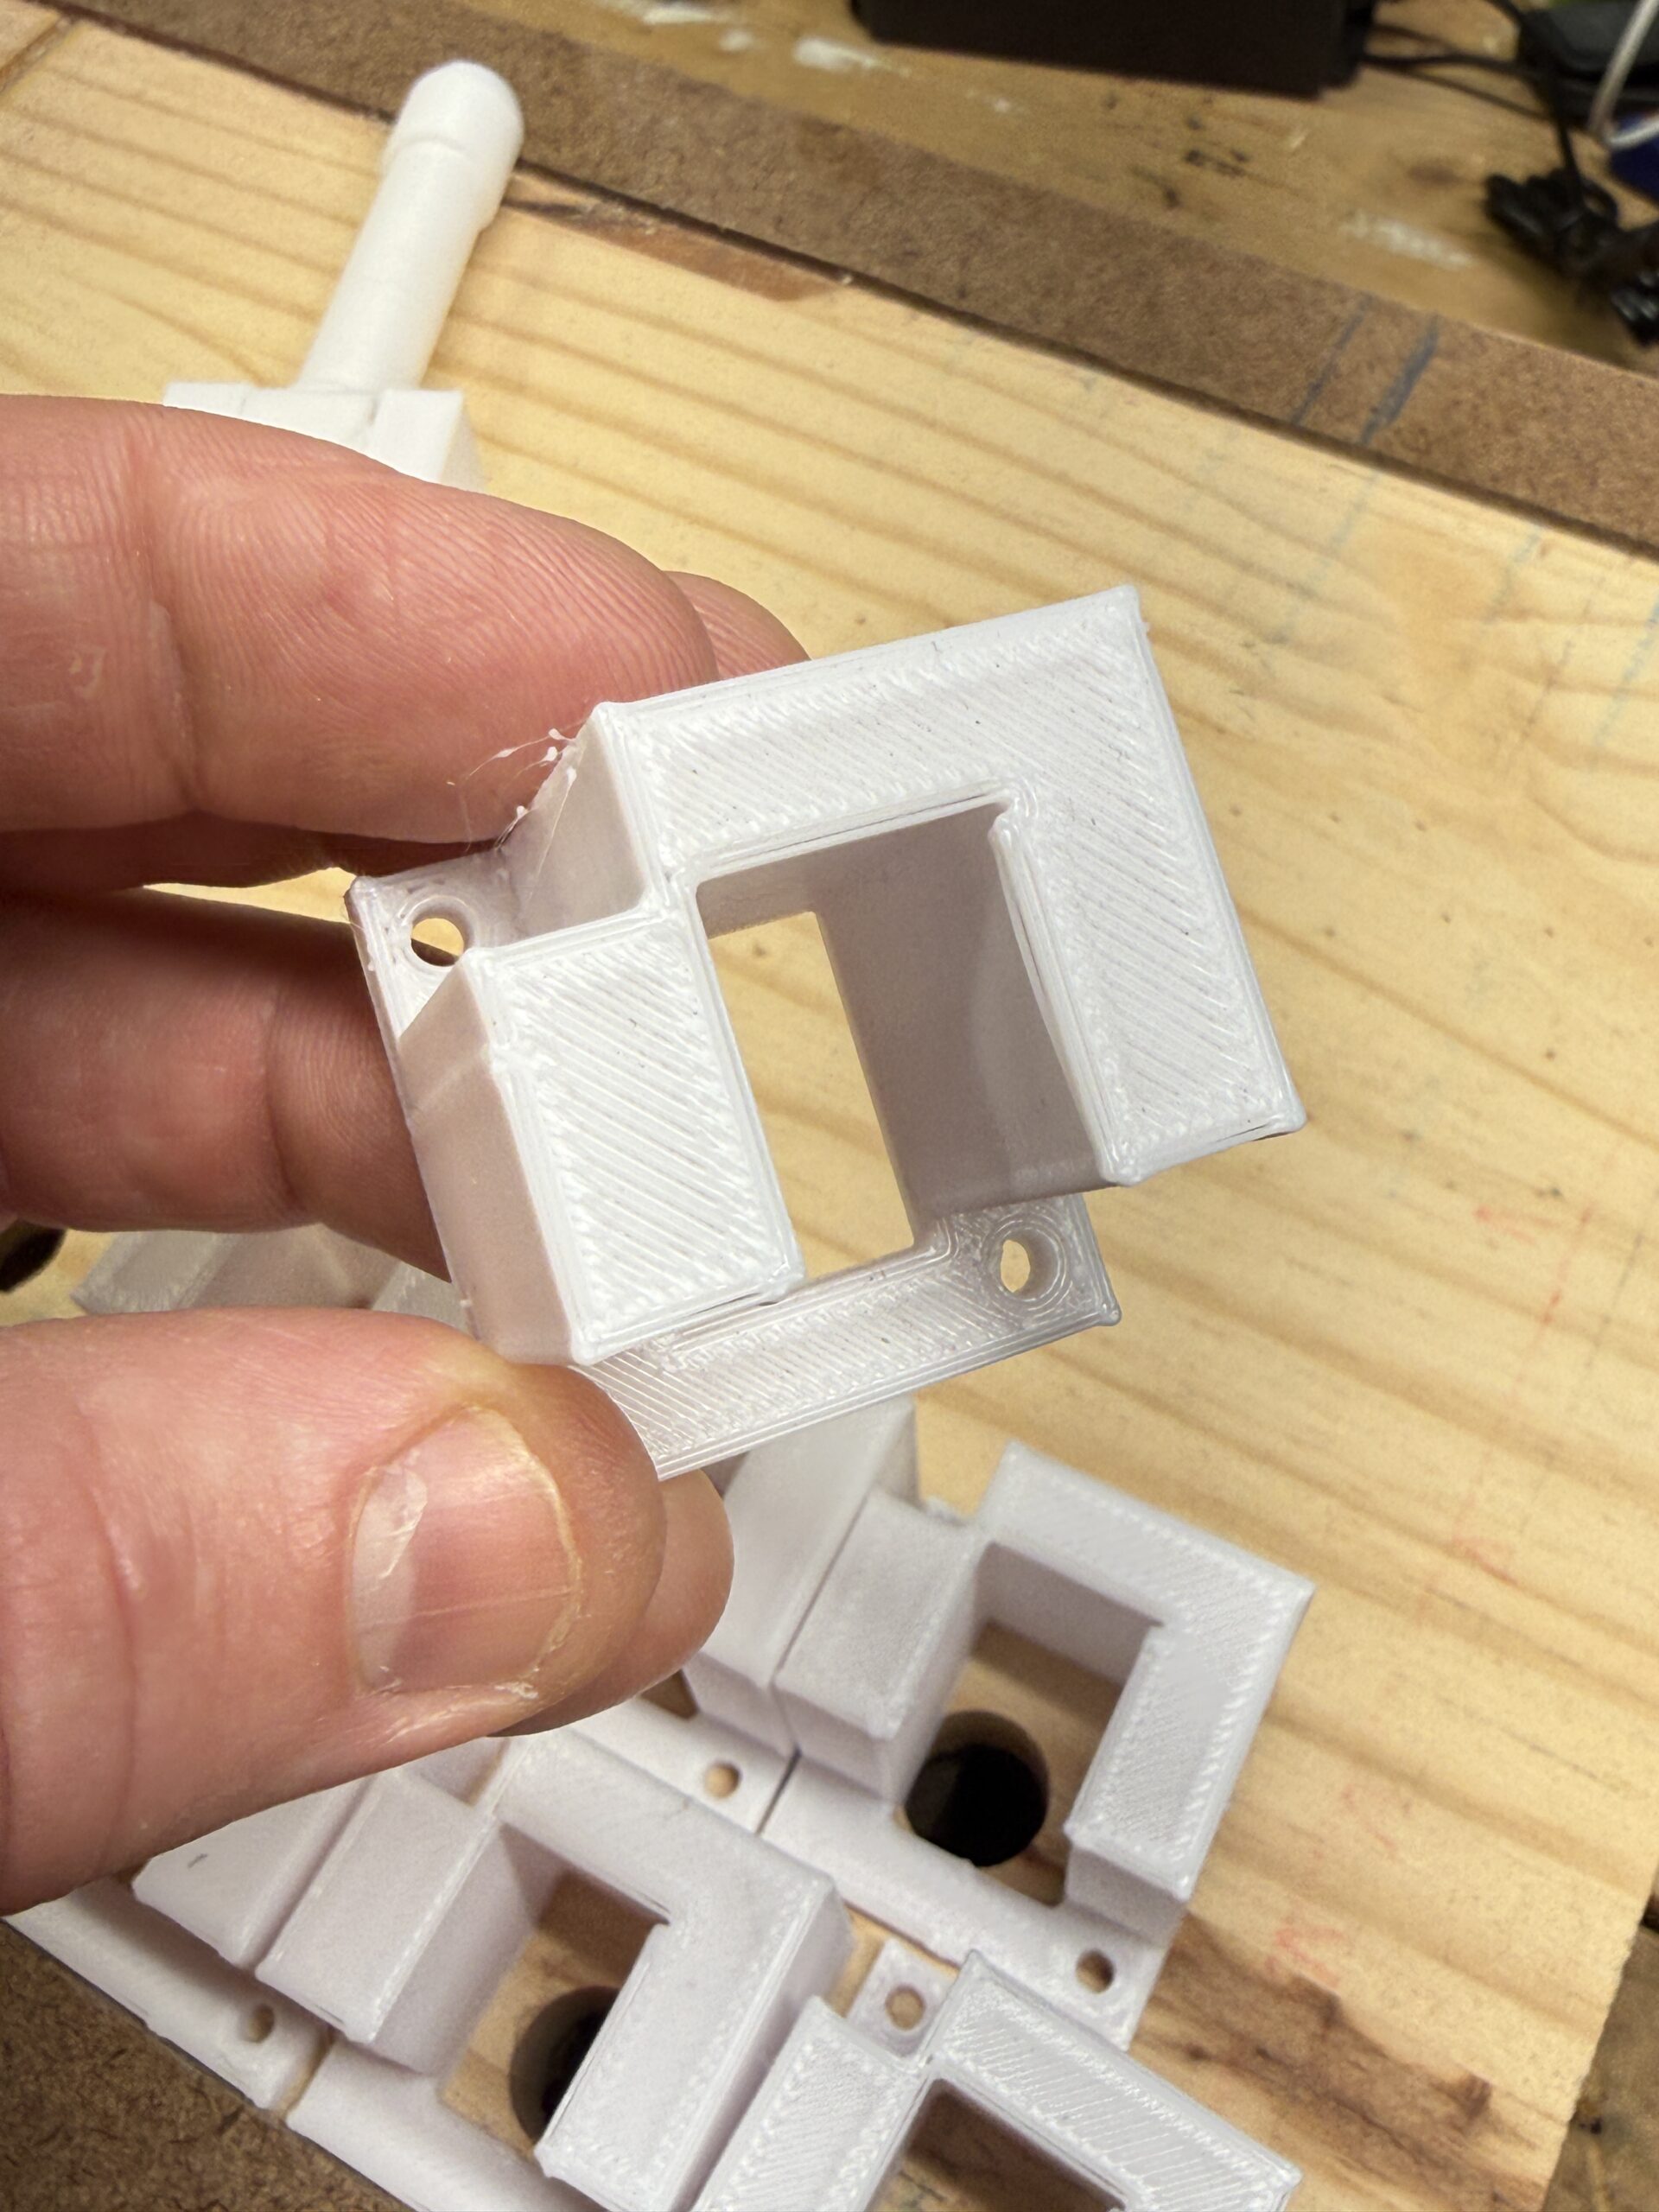
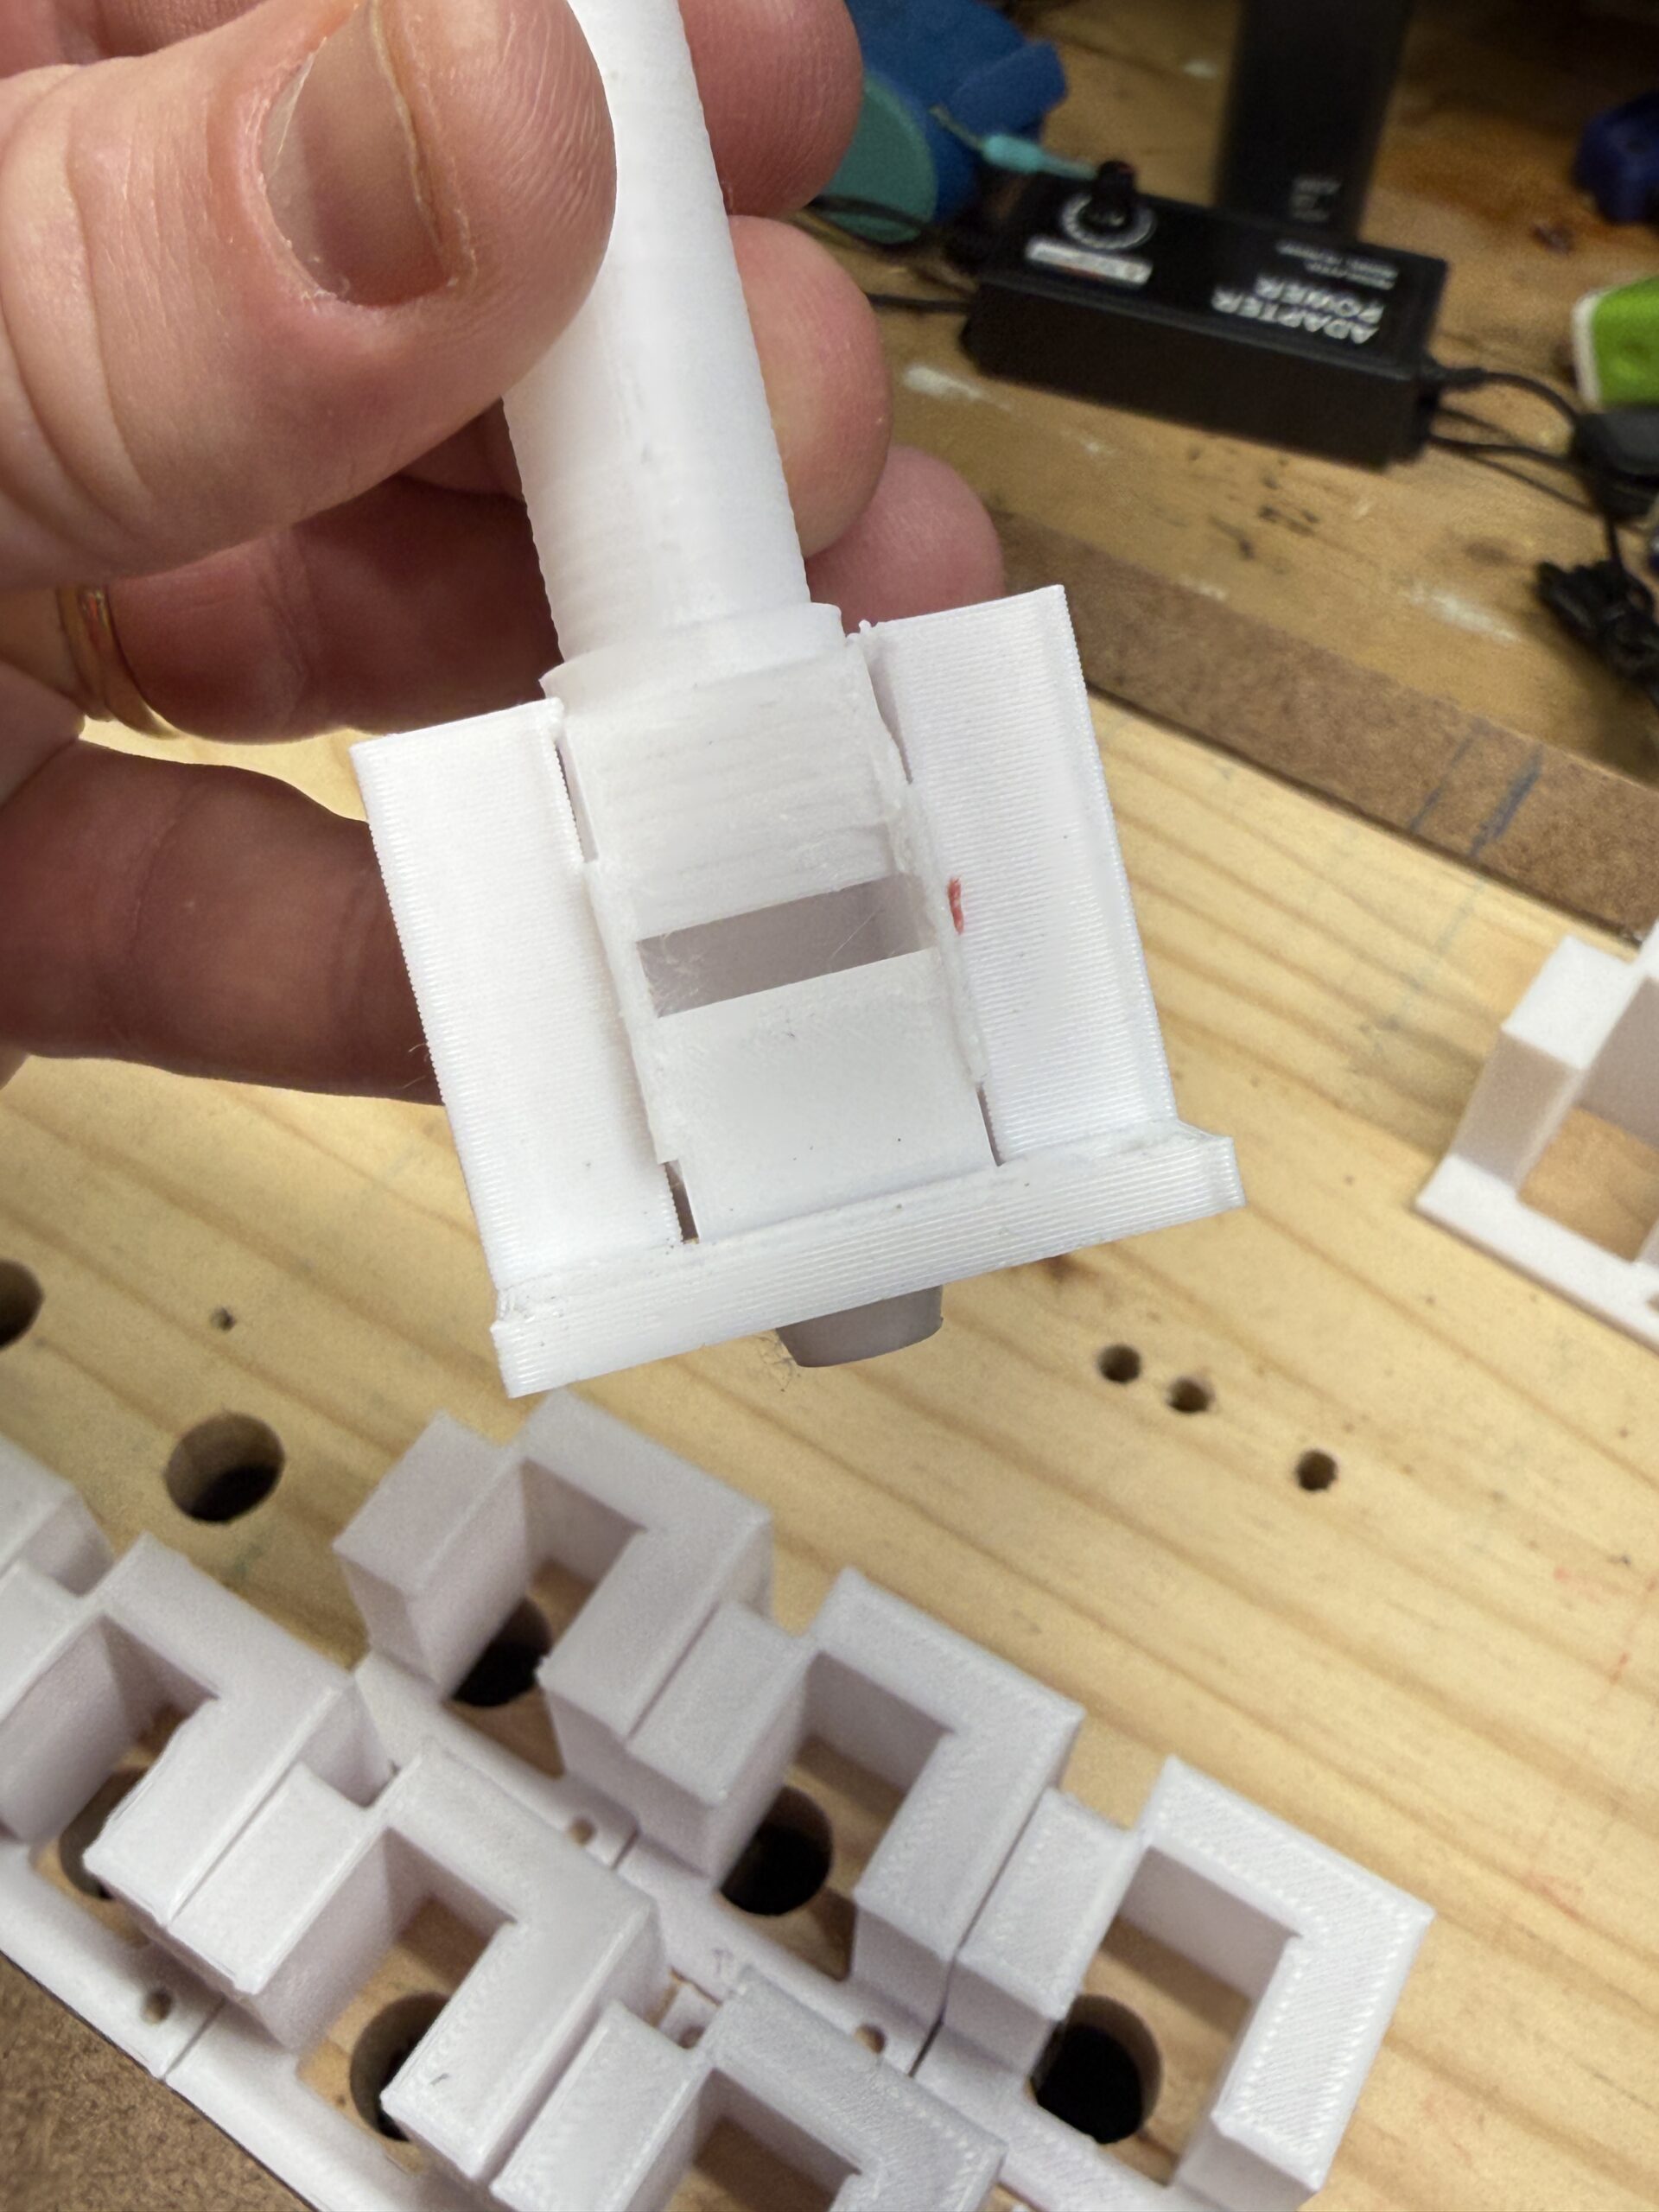
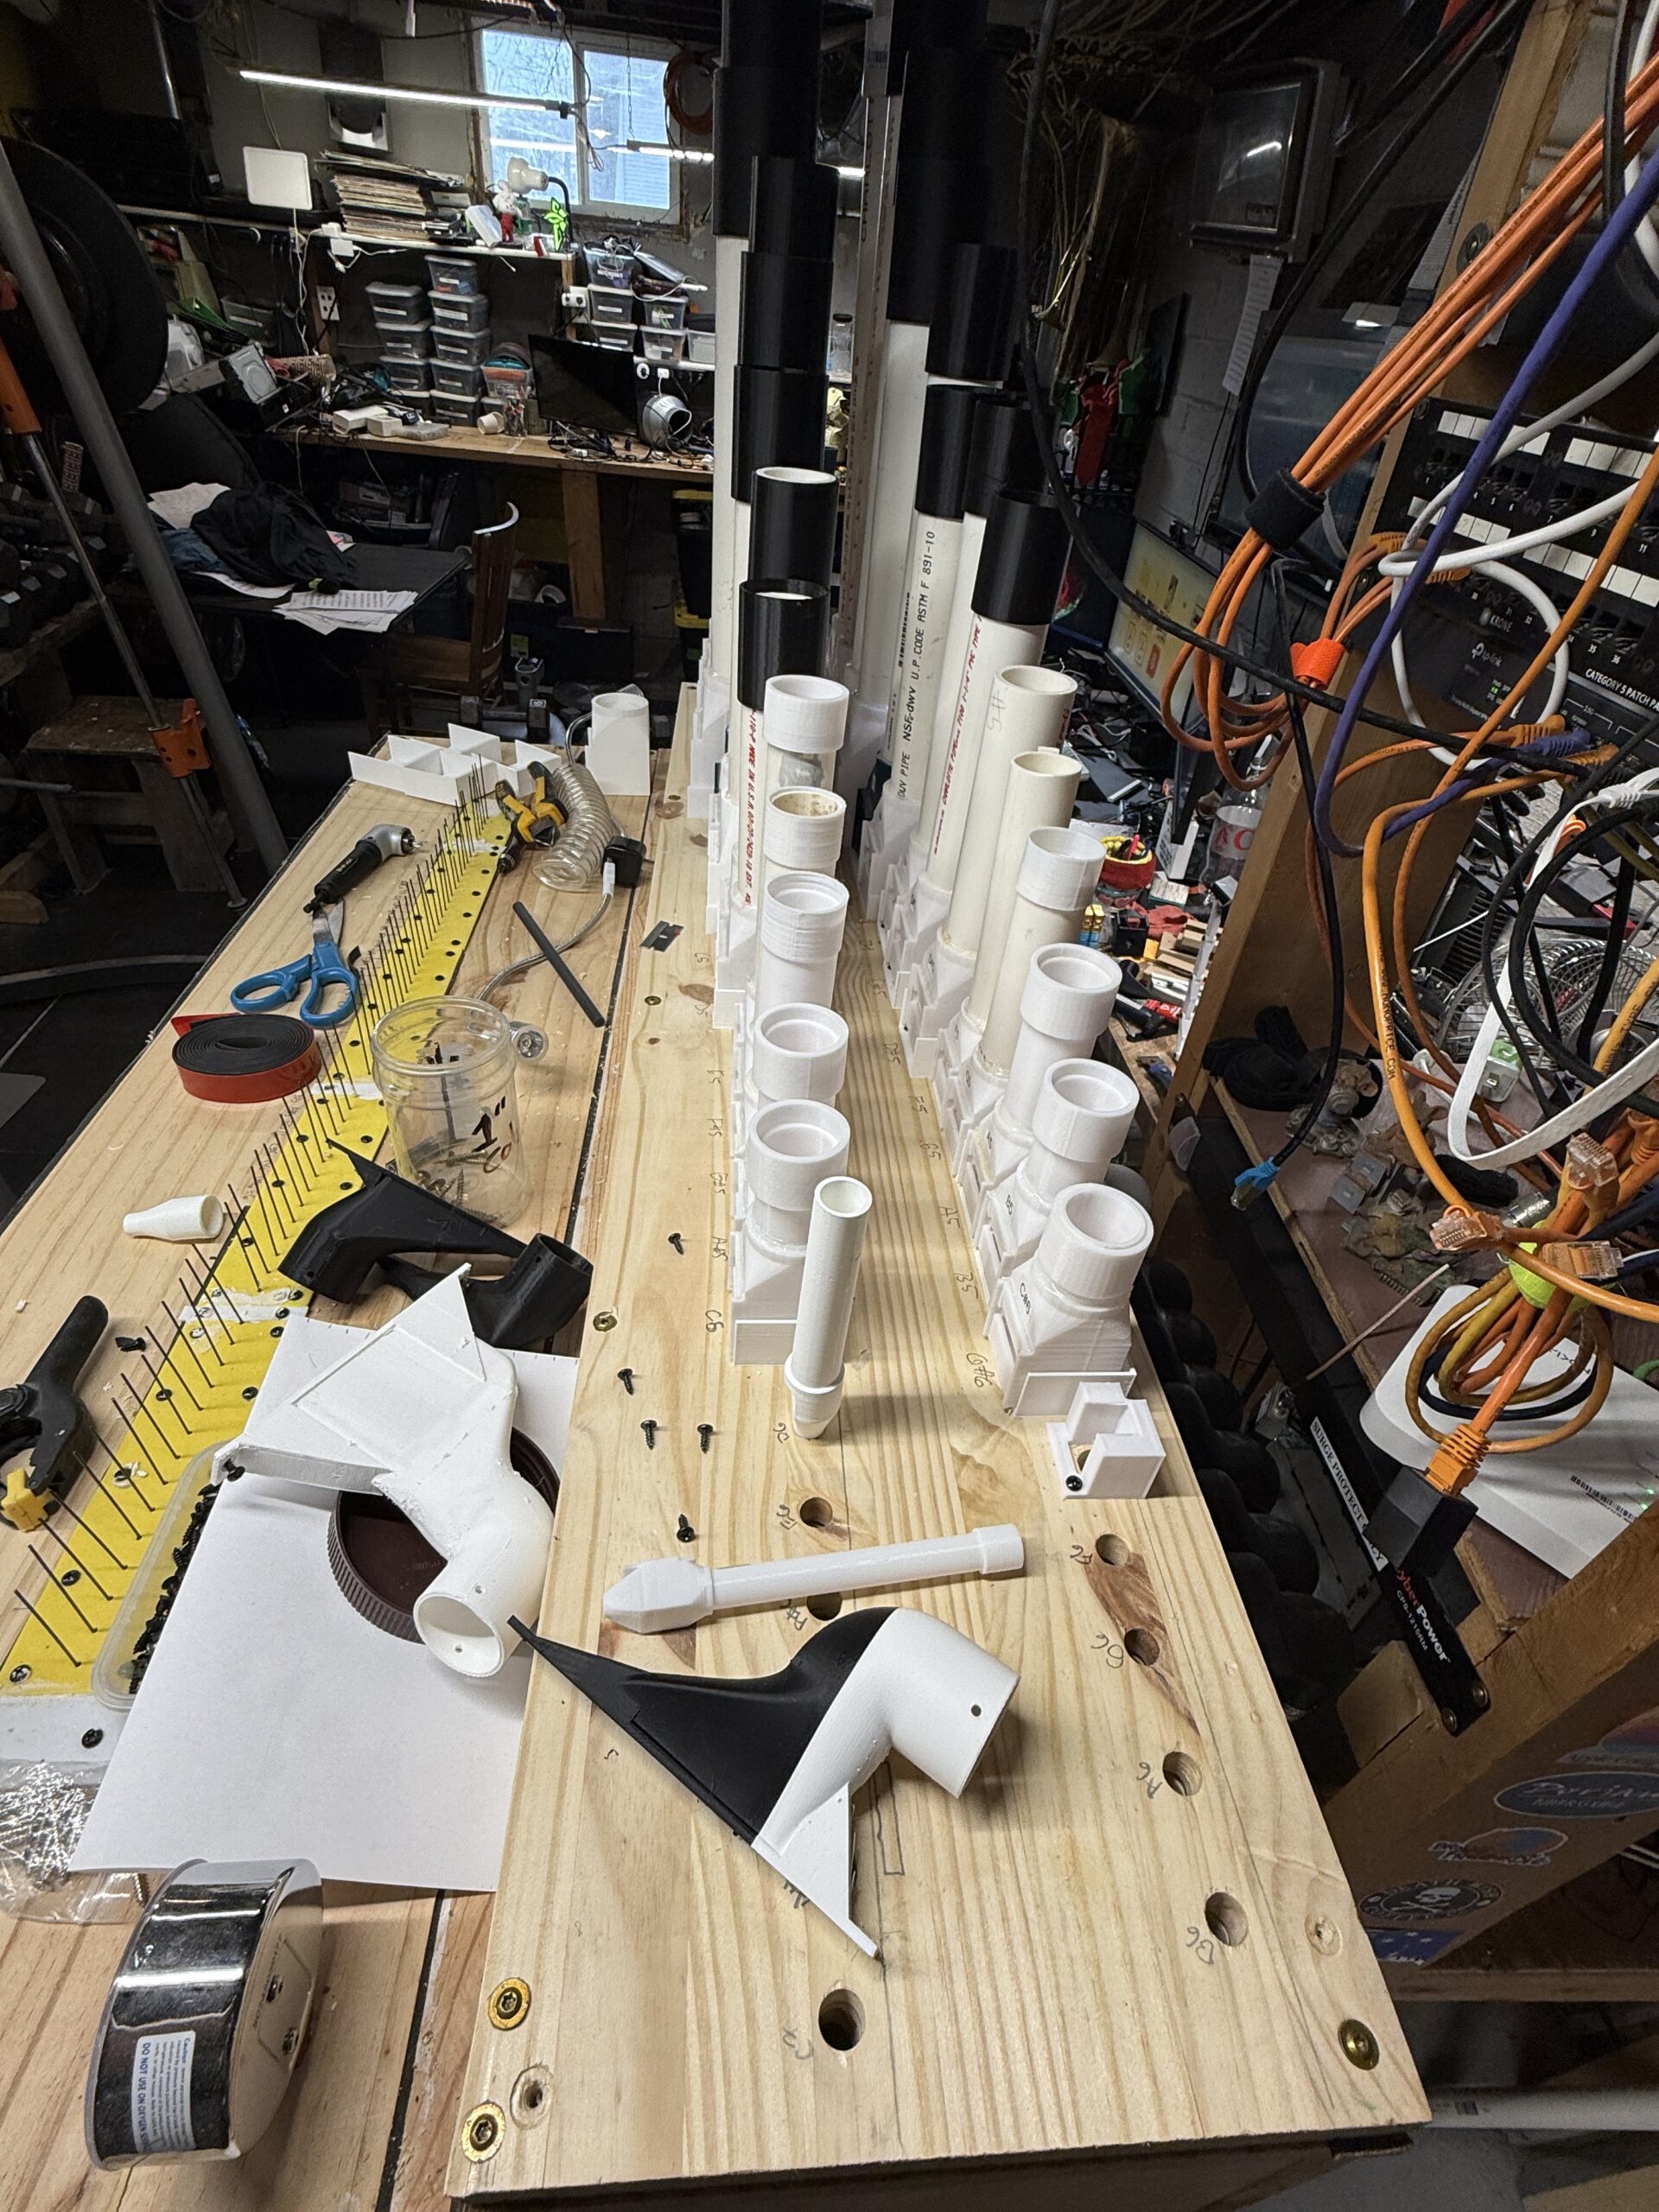
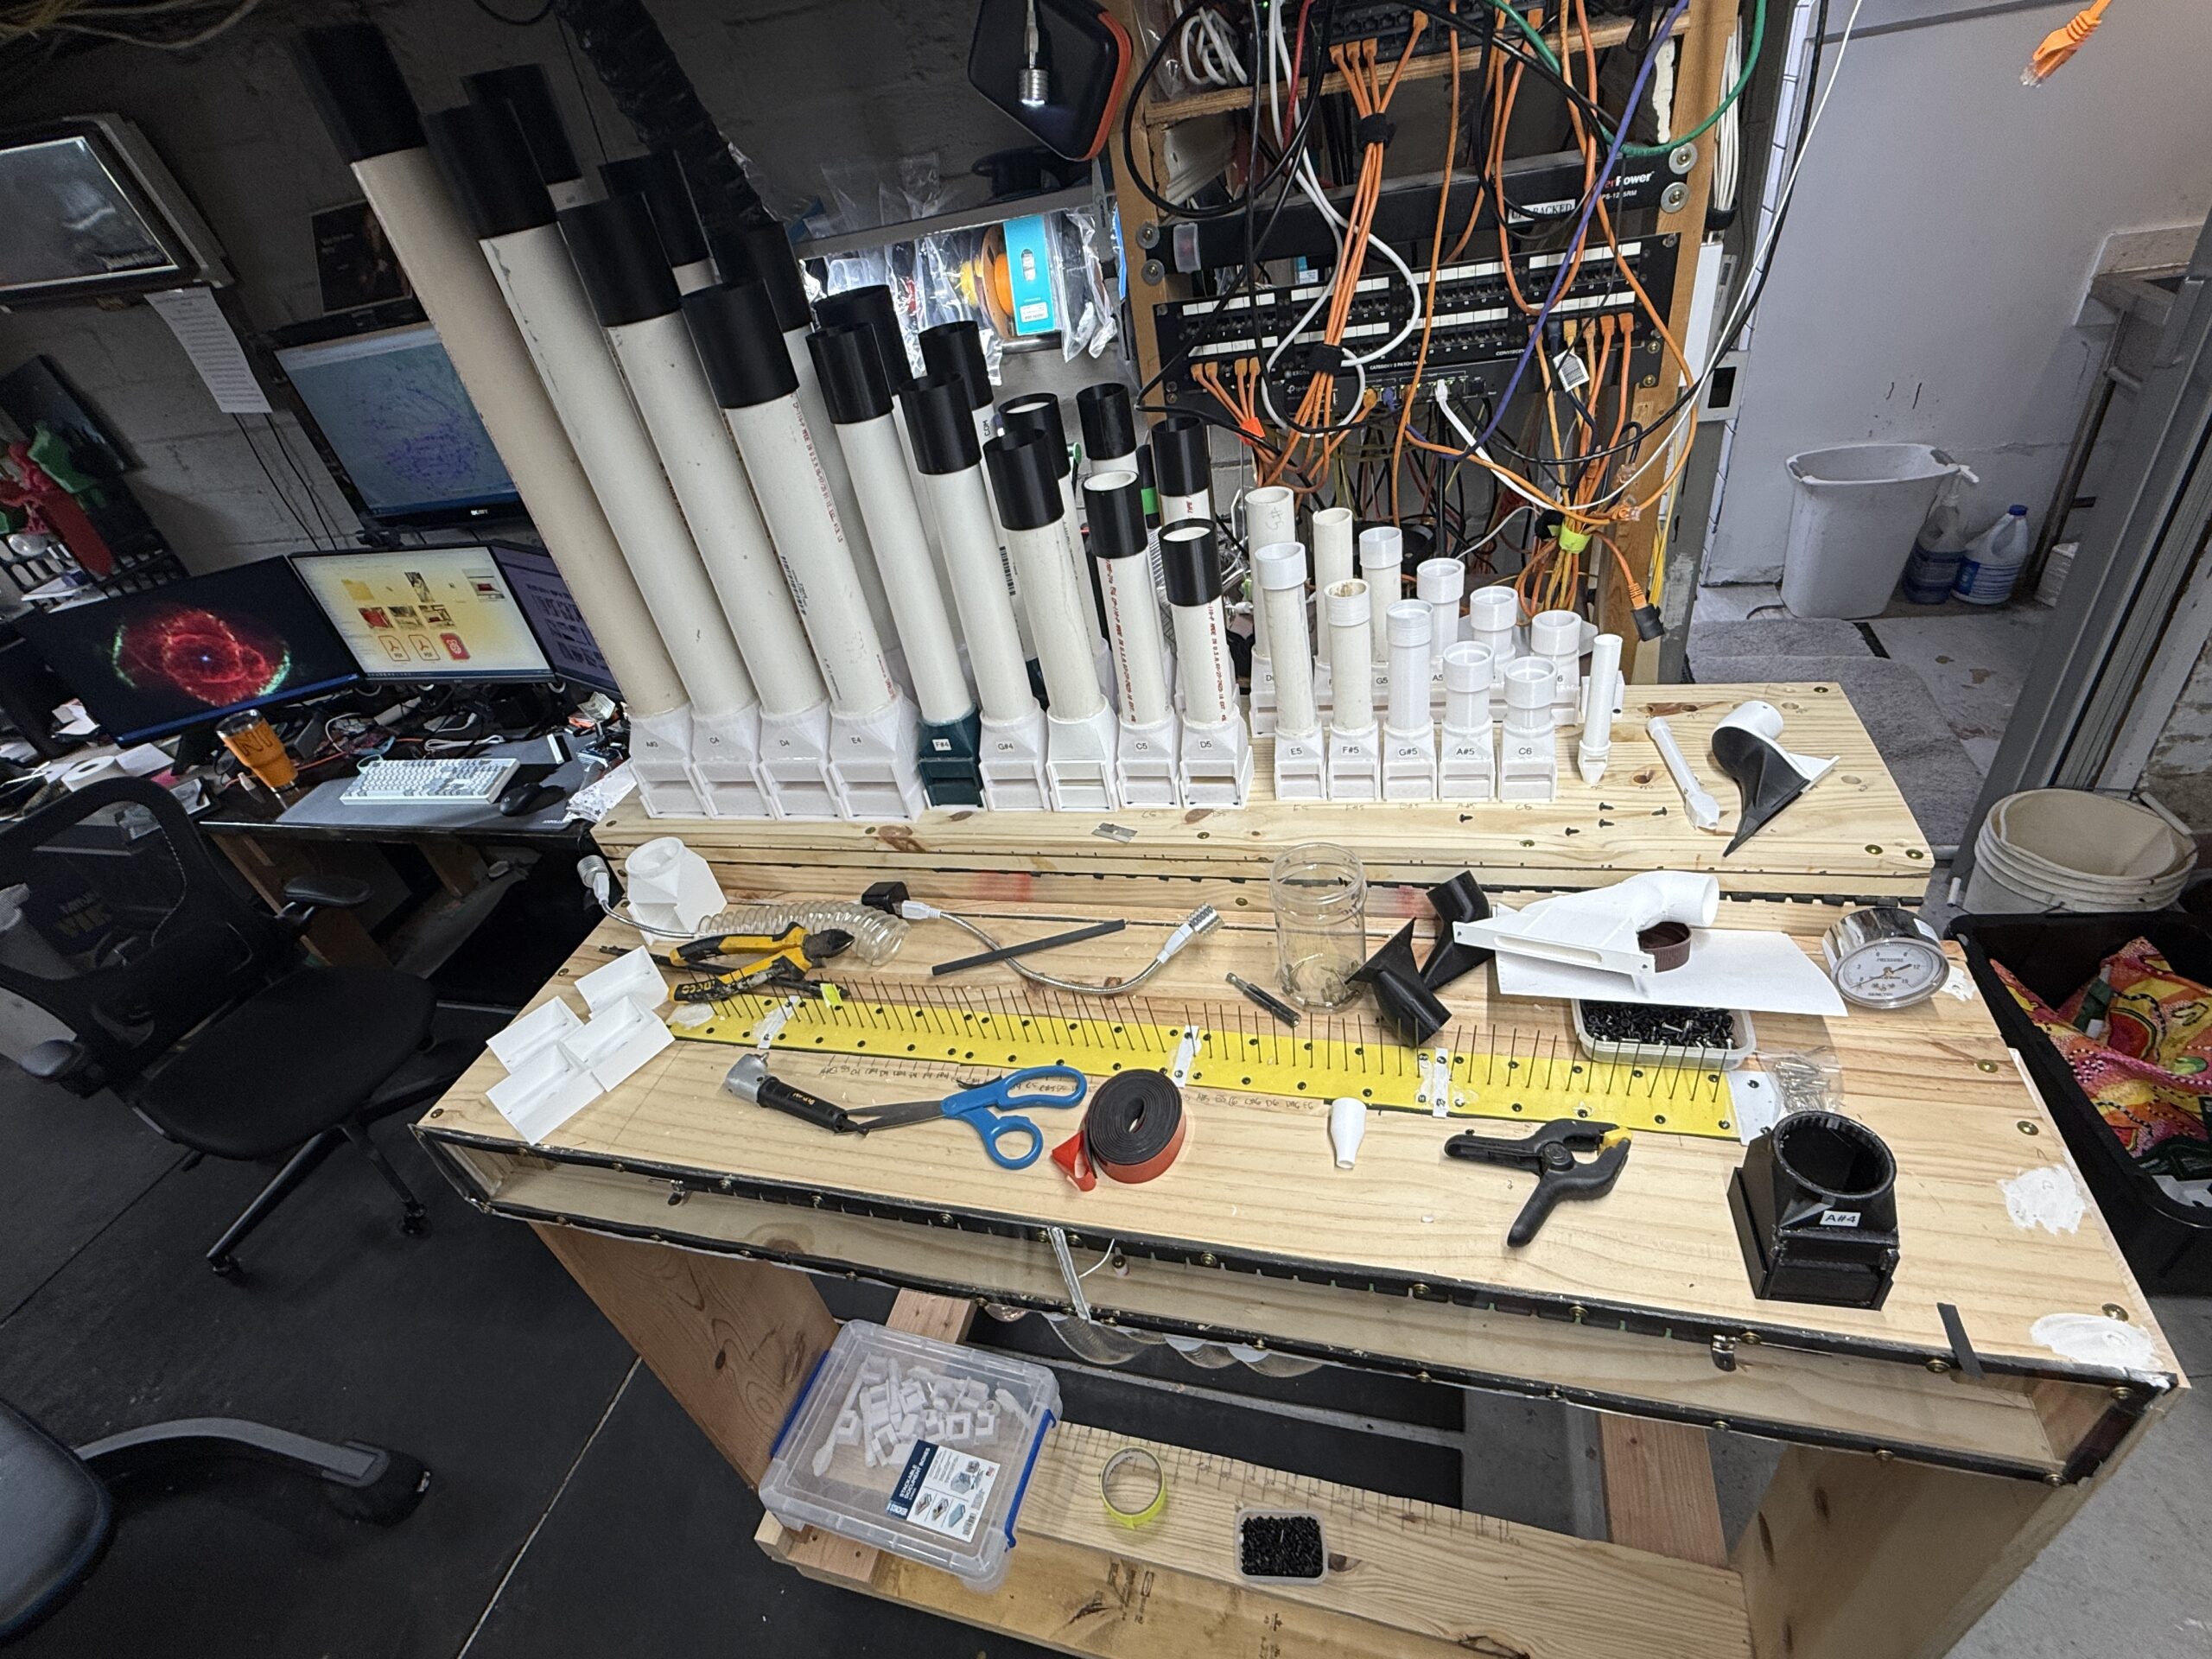
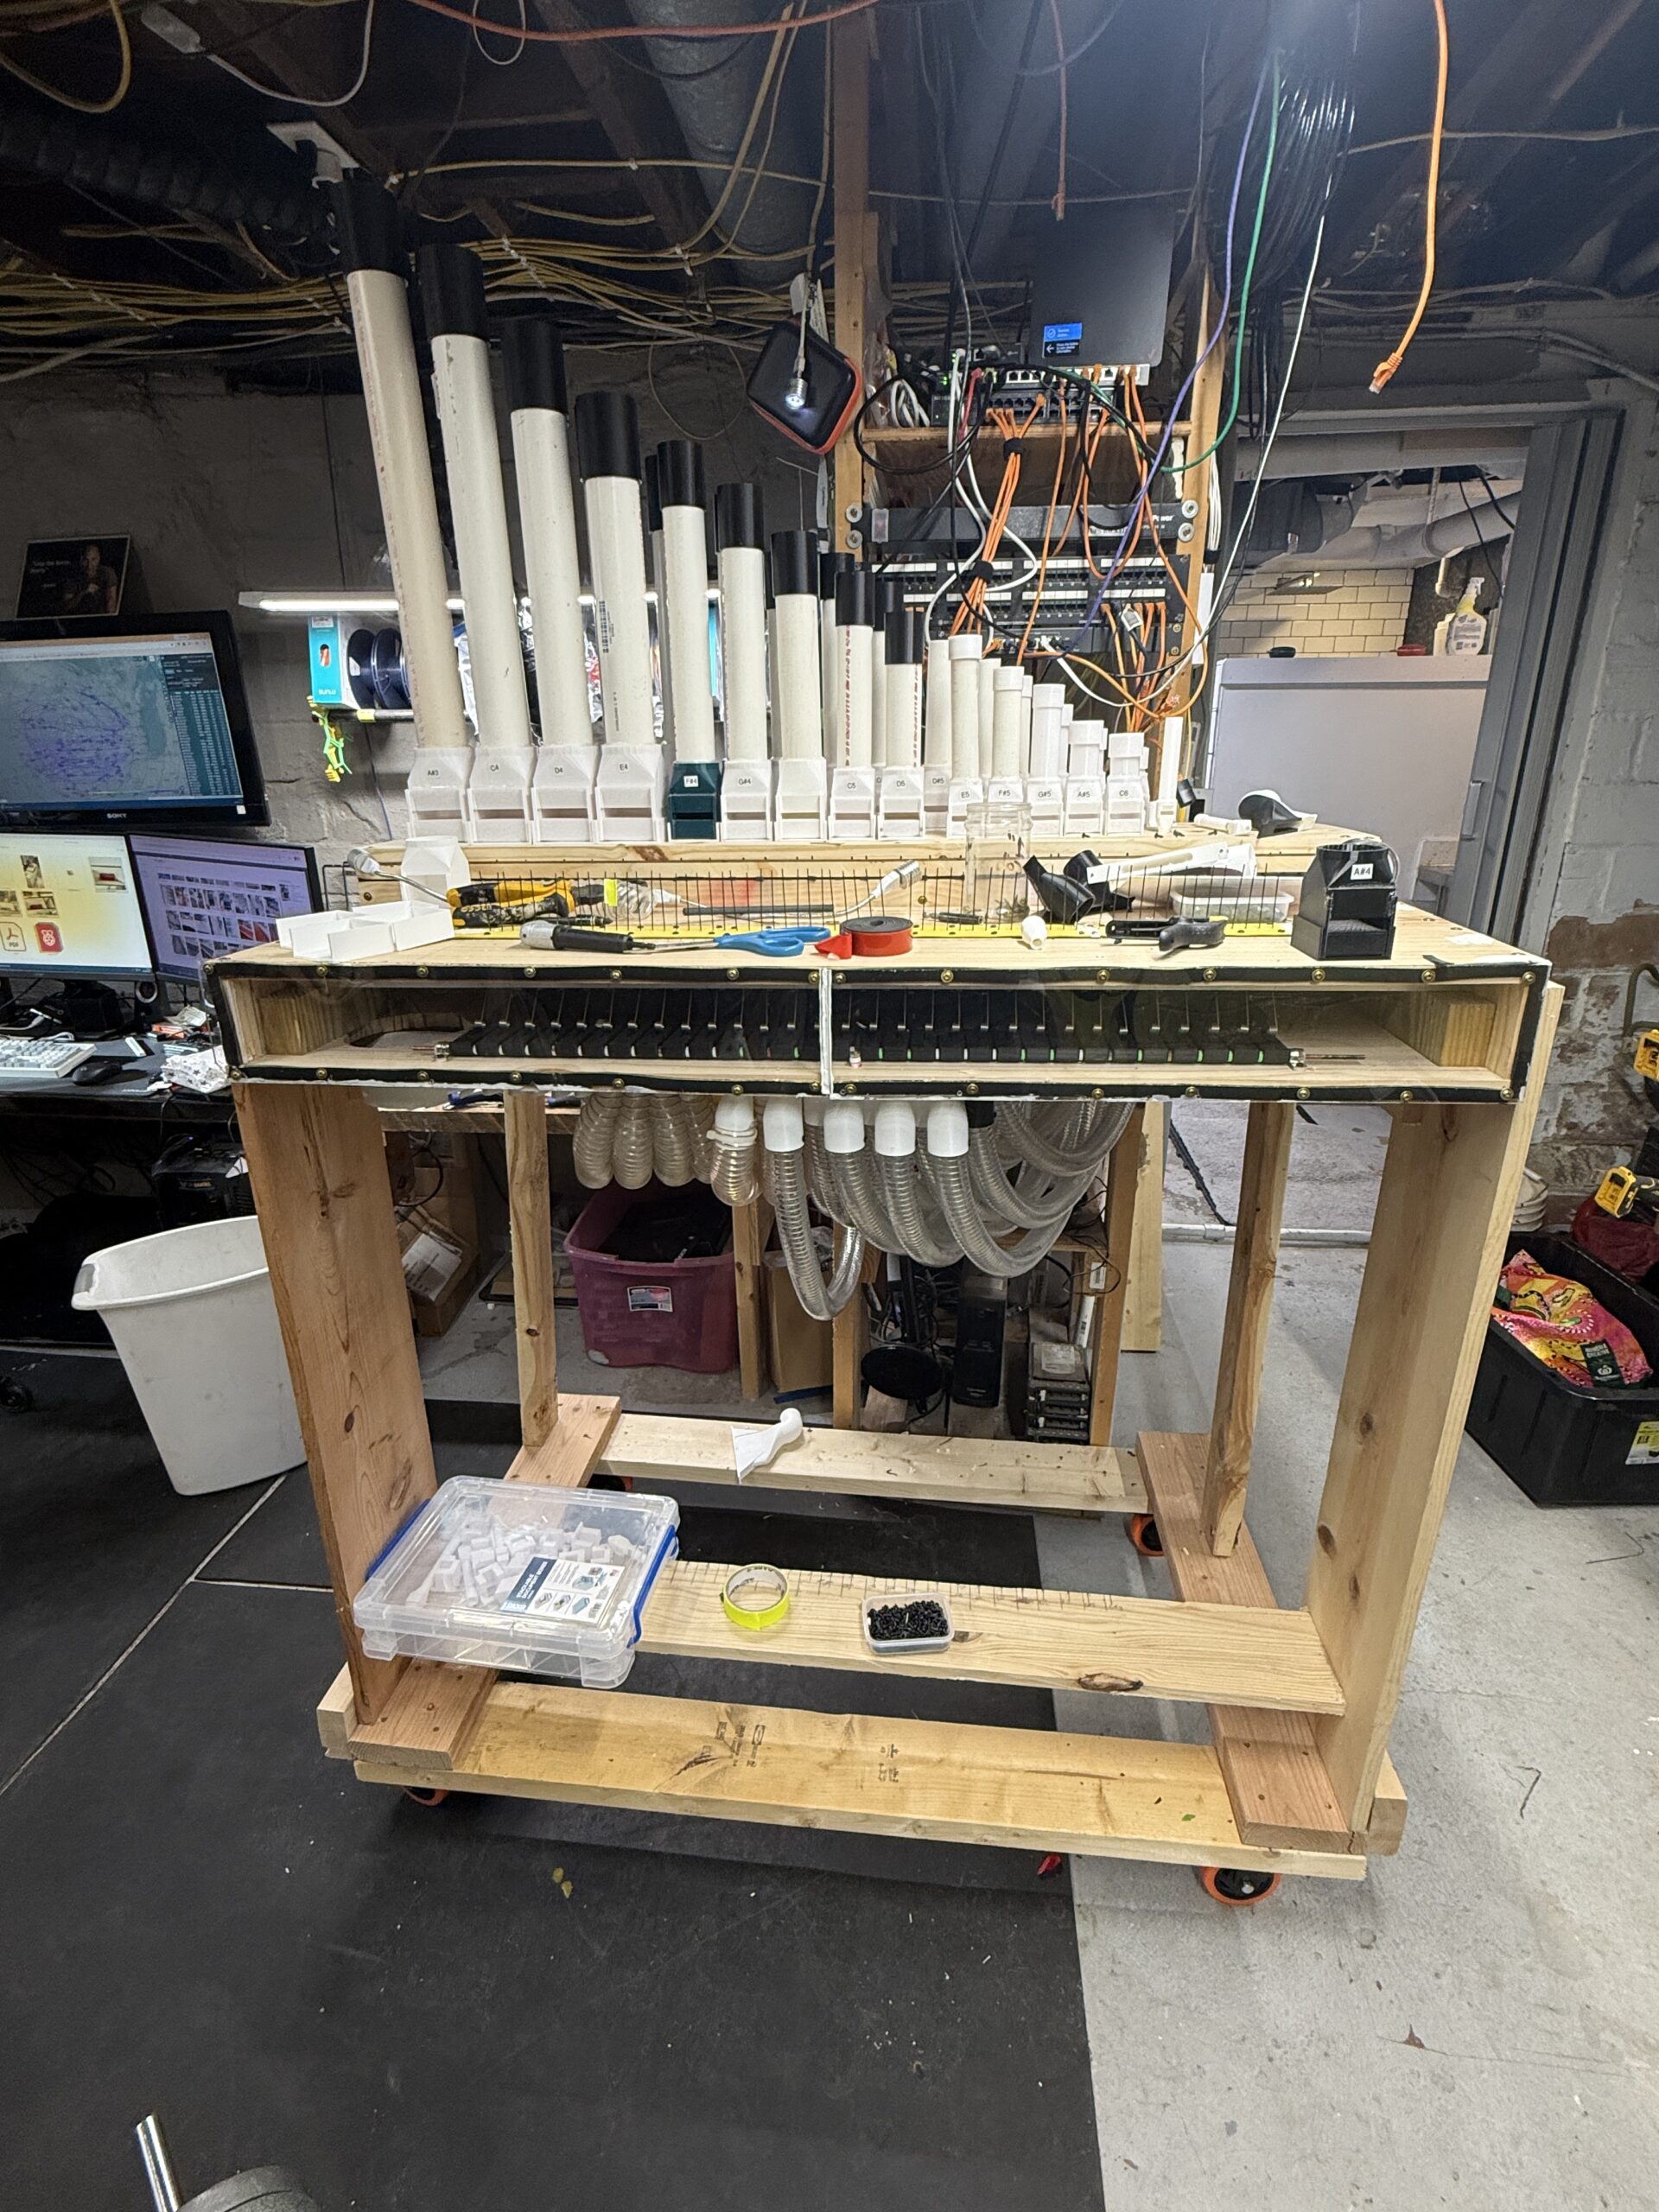
- Pipes A#4 through C6 mounted; not all tuned, but mounted, voicing to progress.
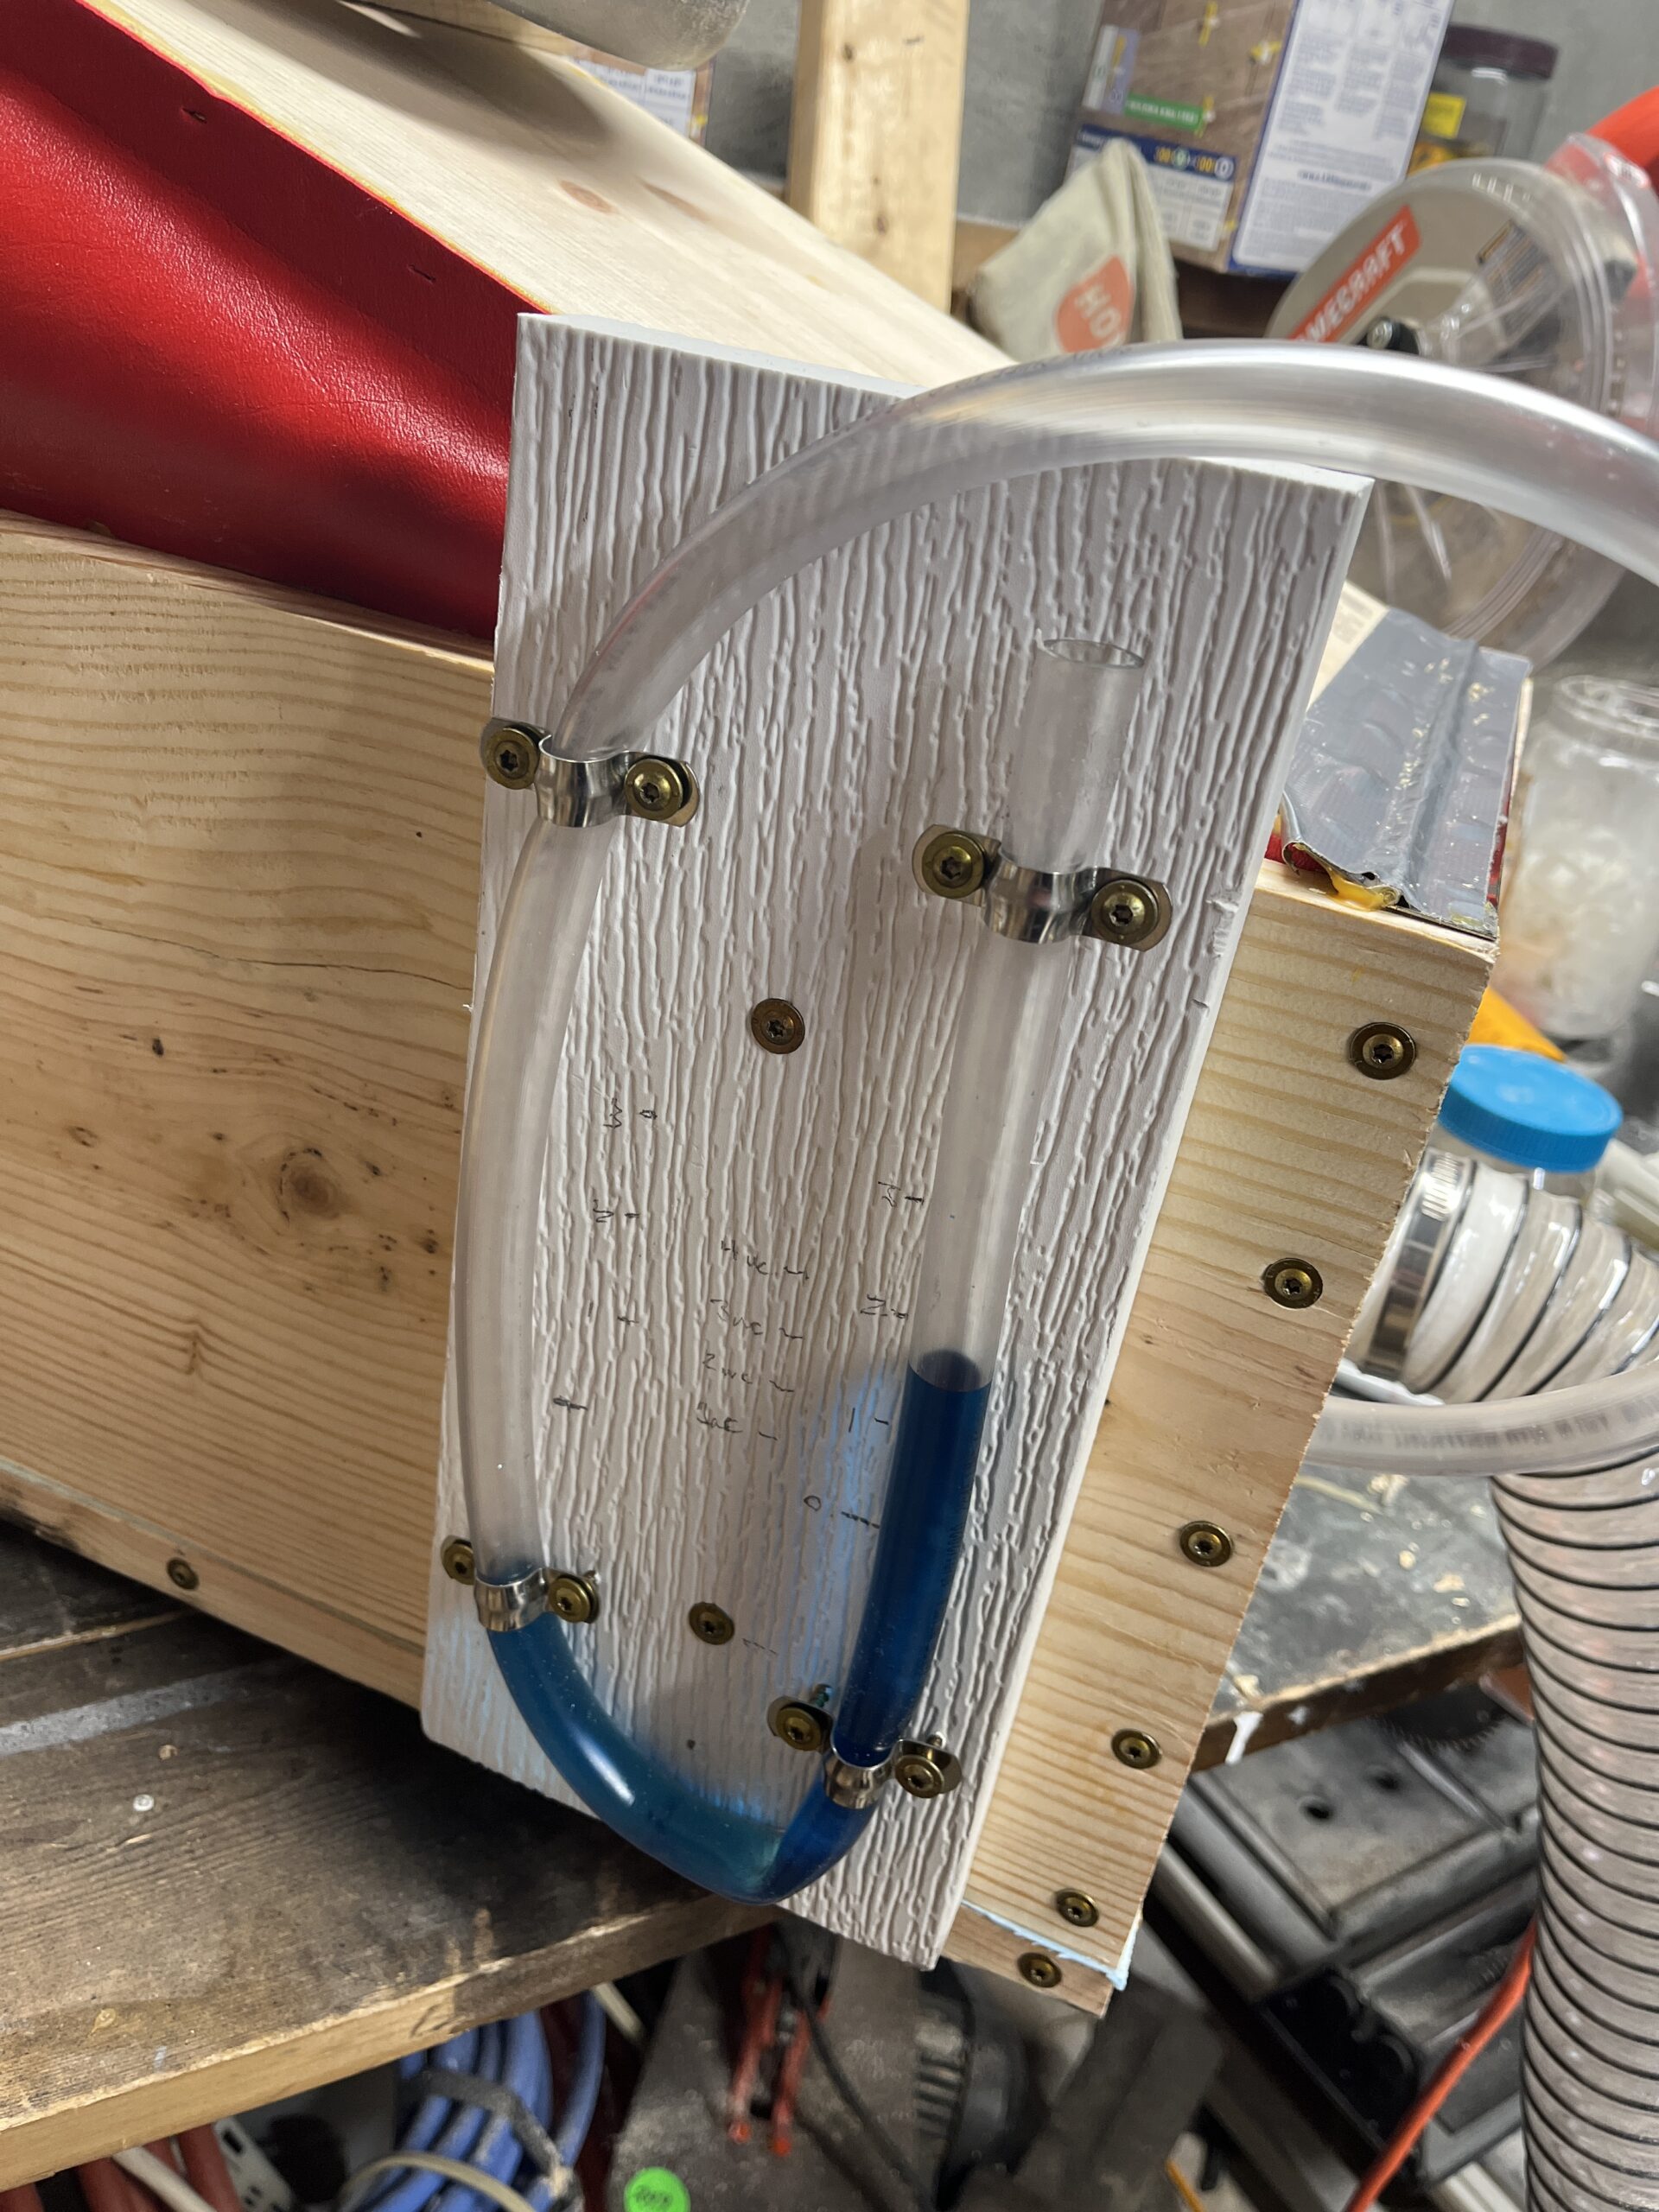
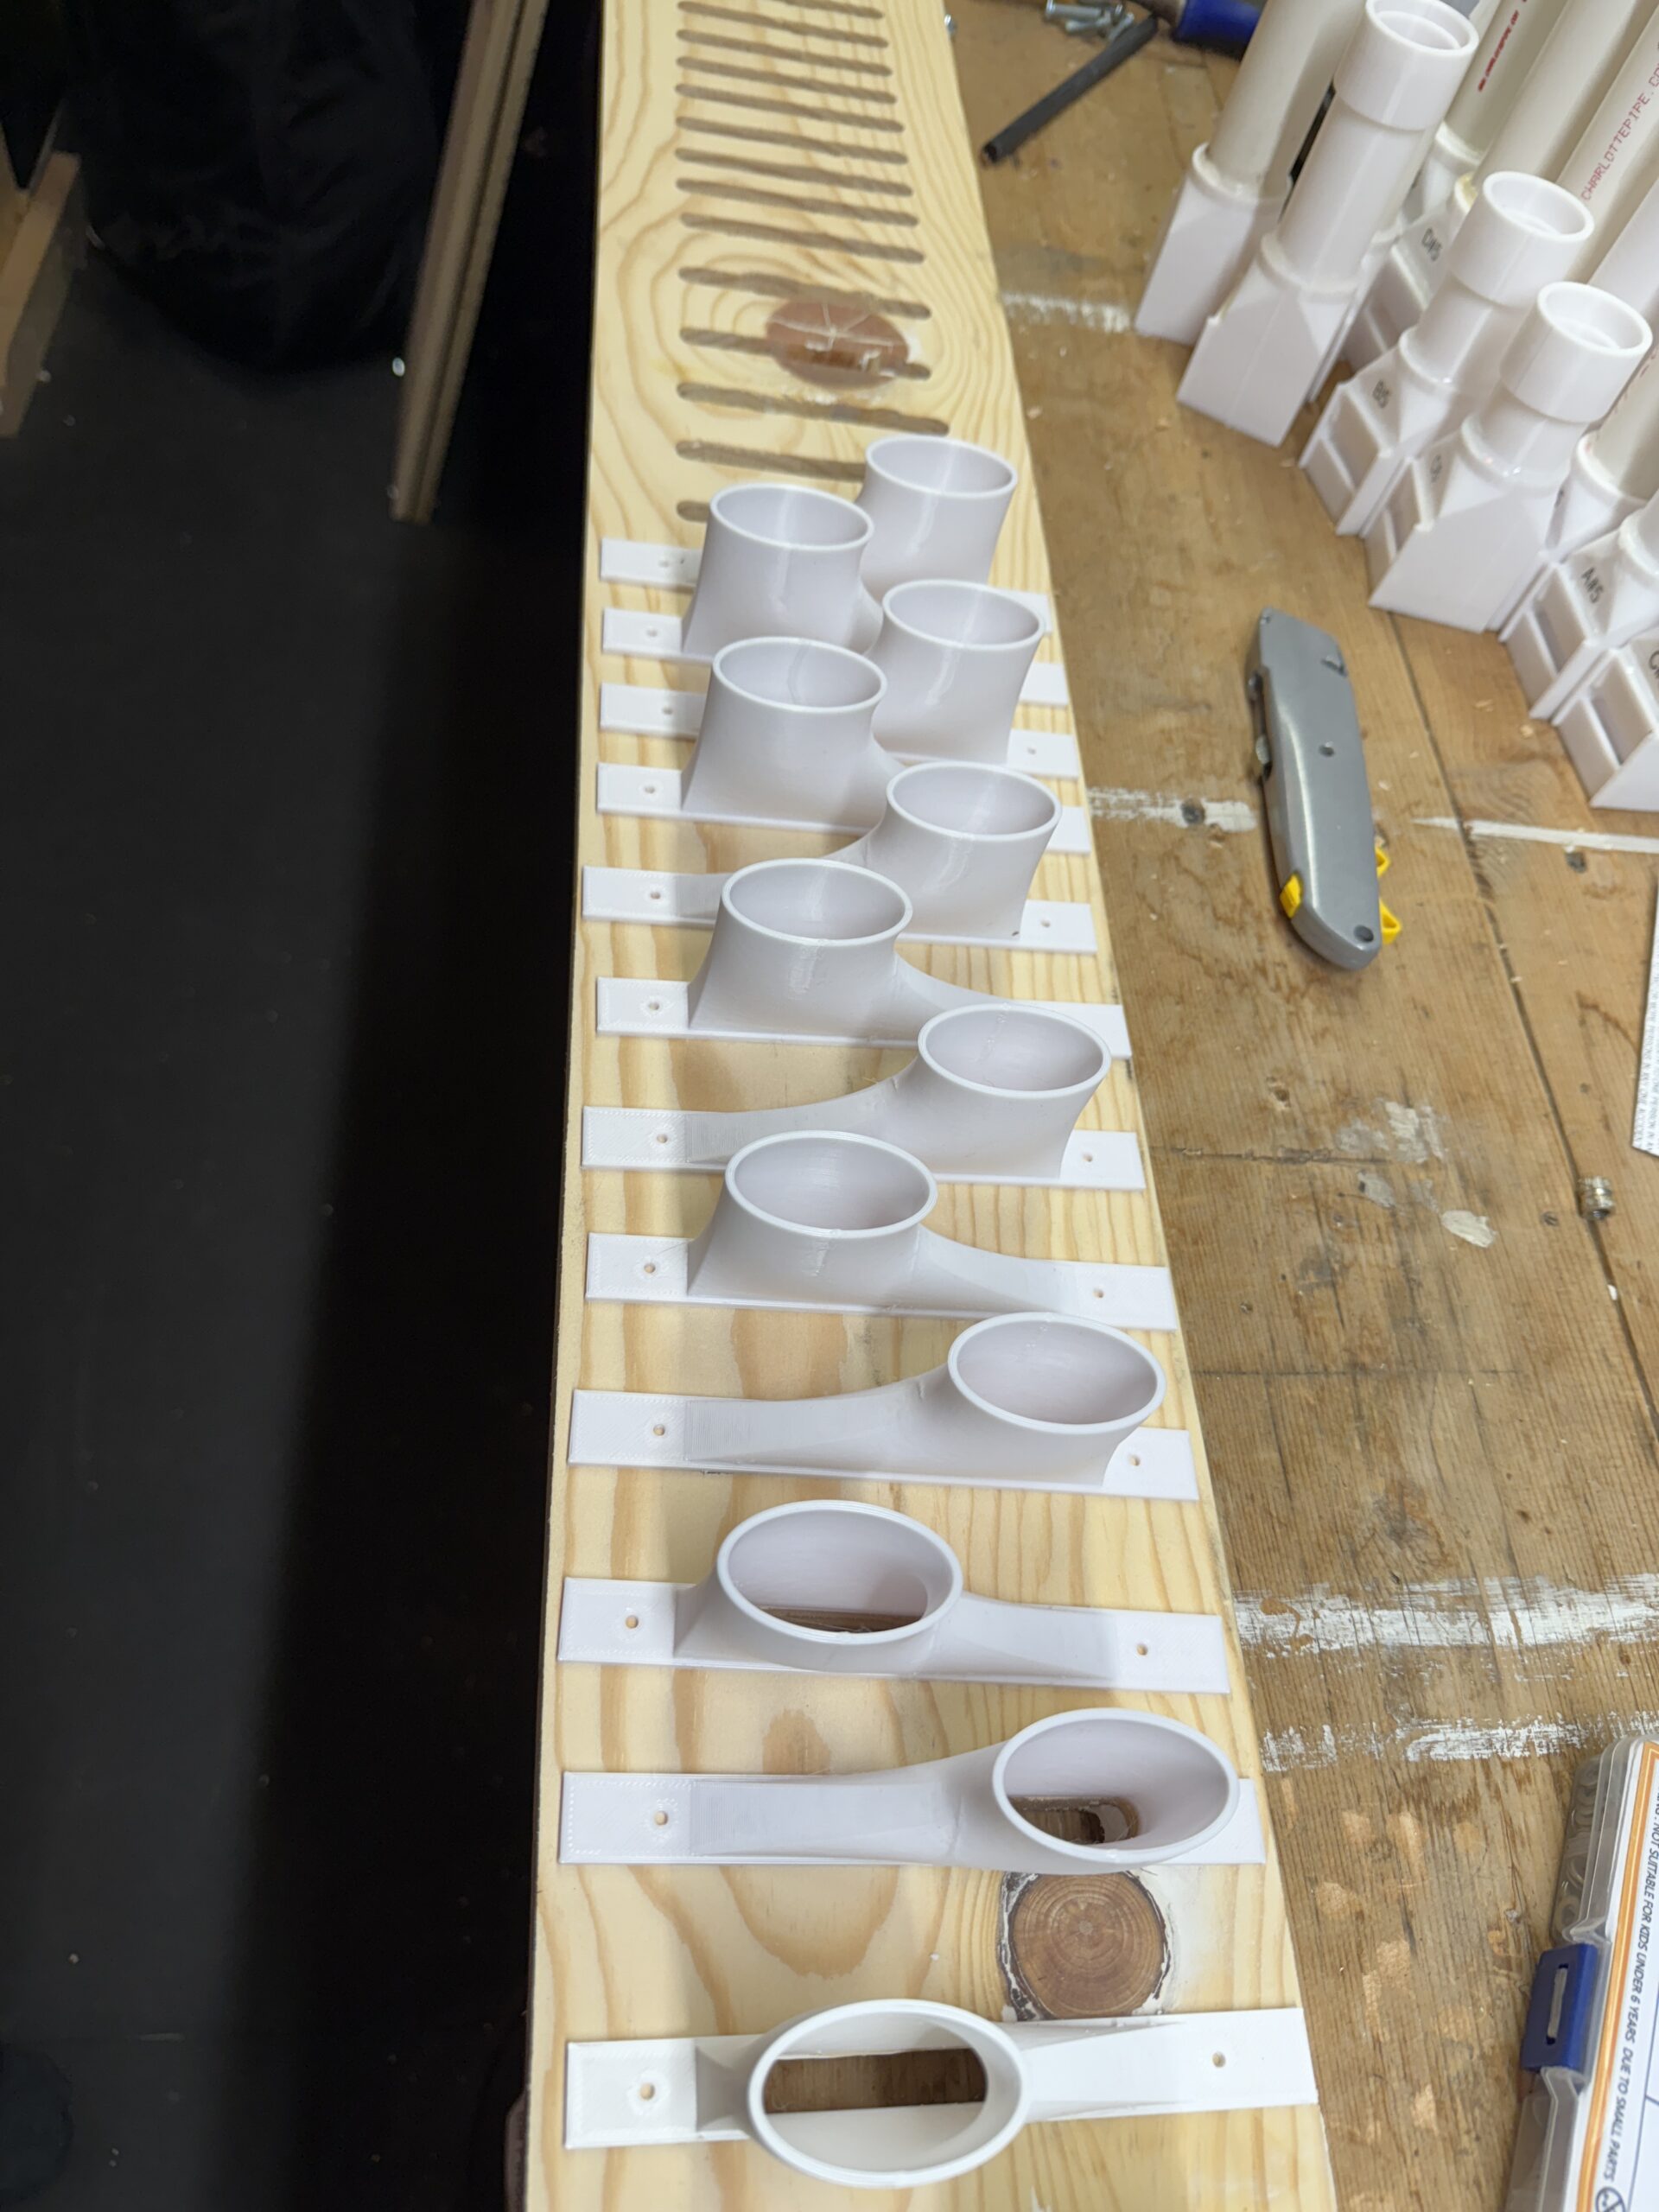
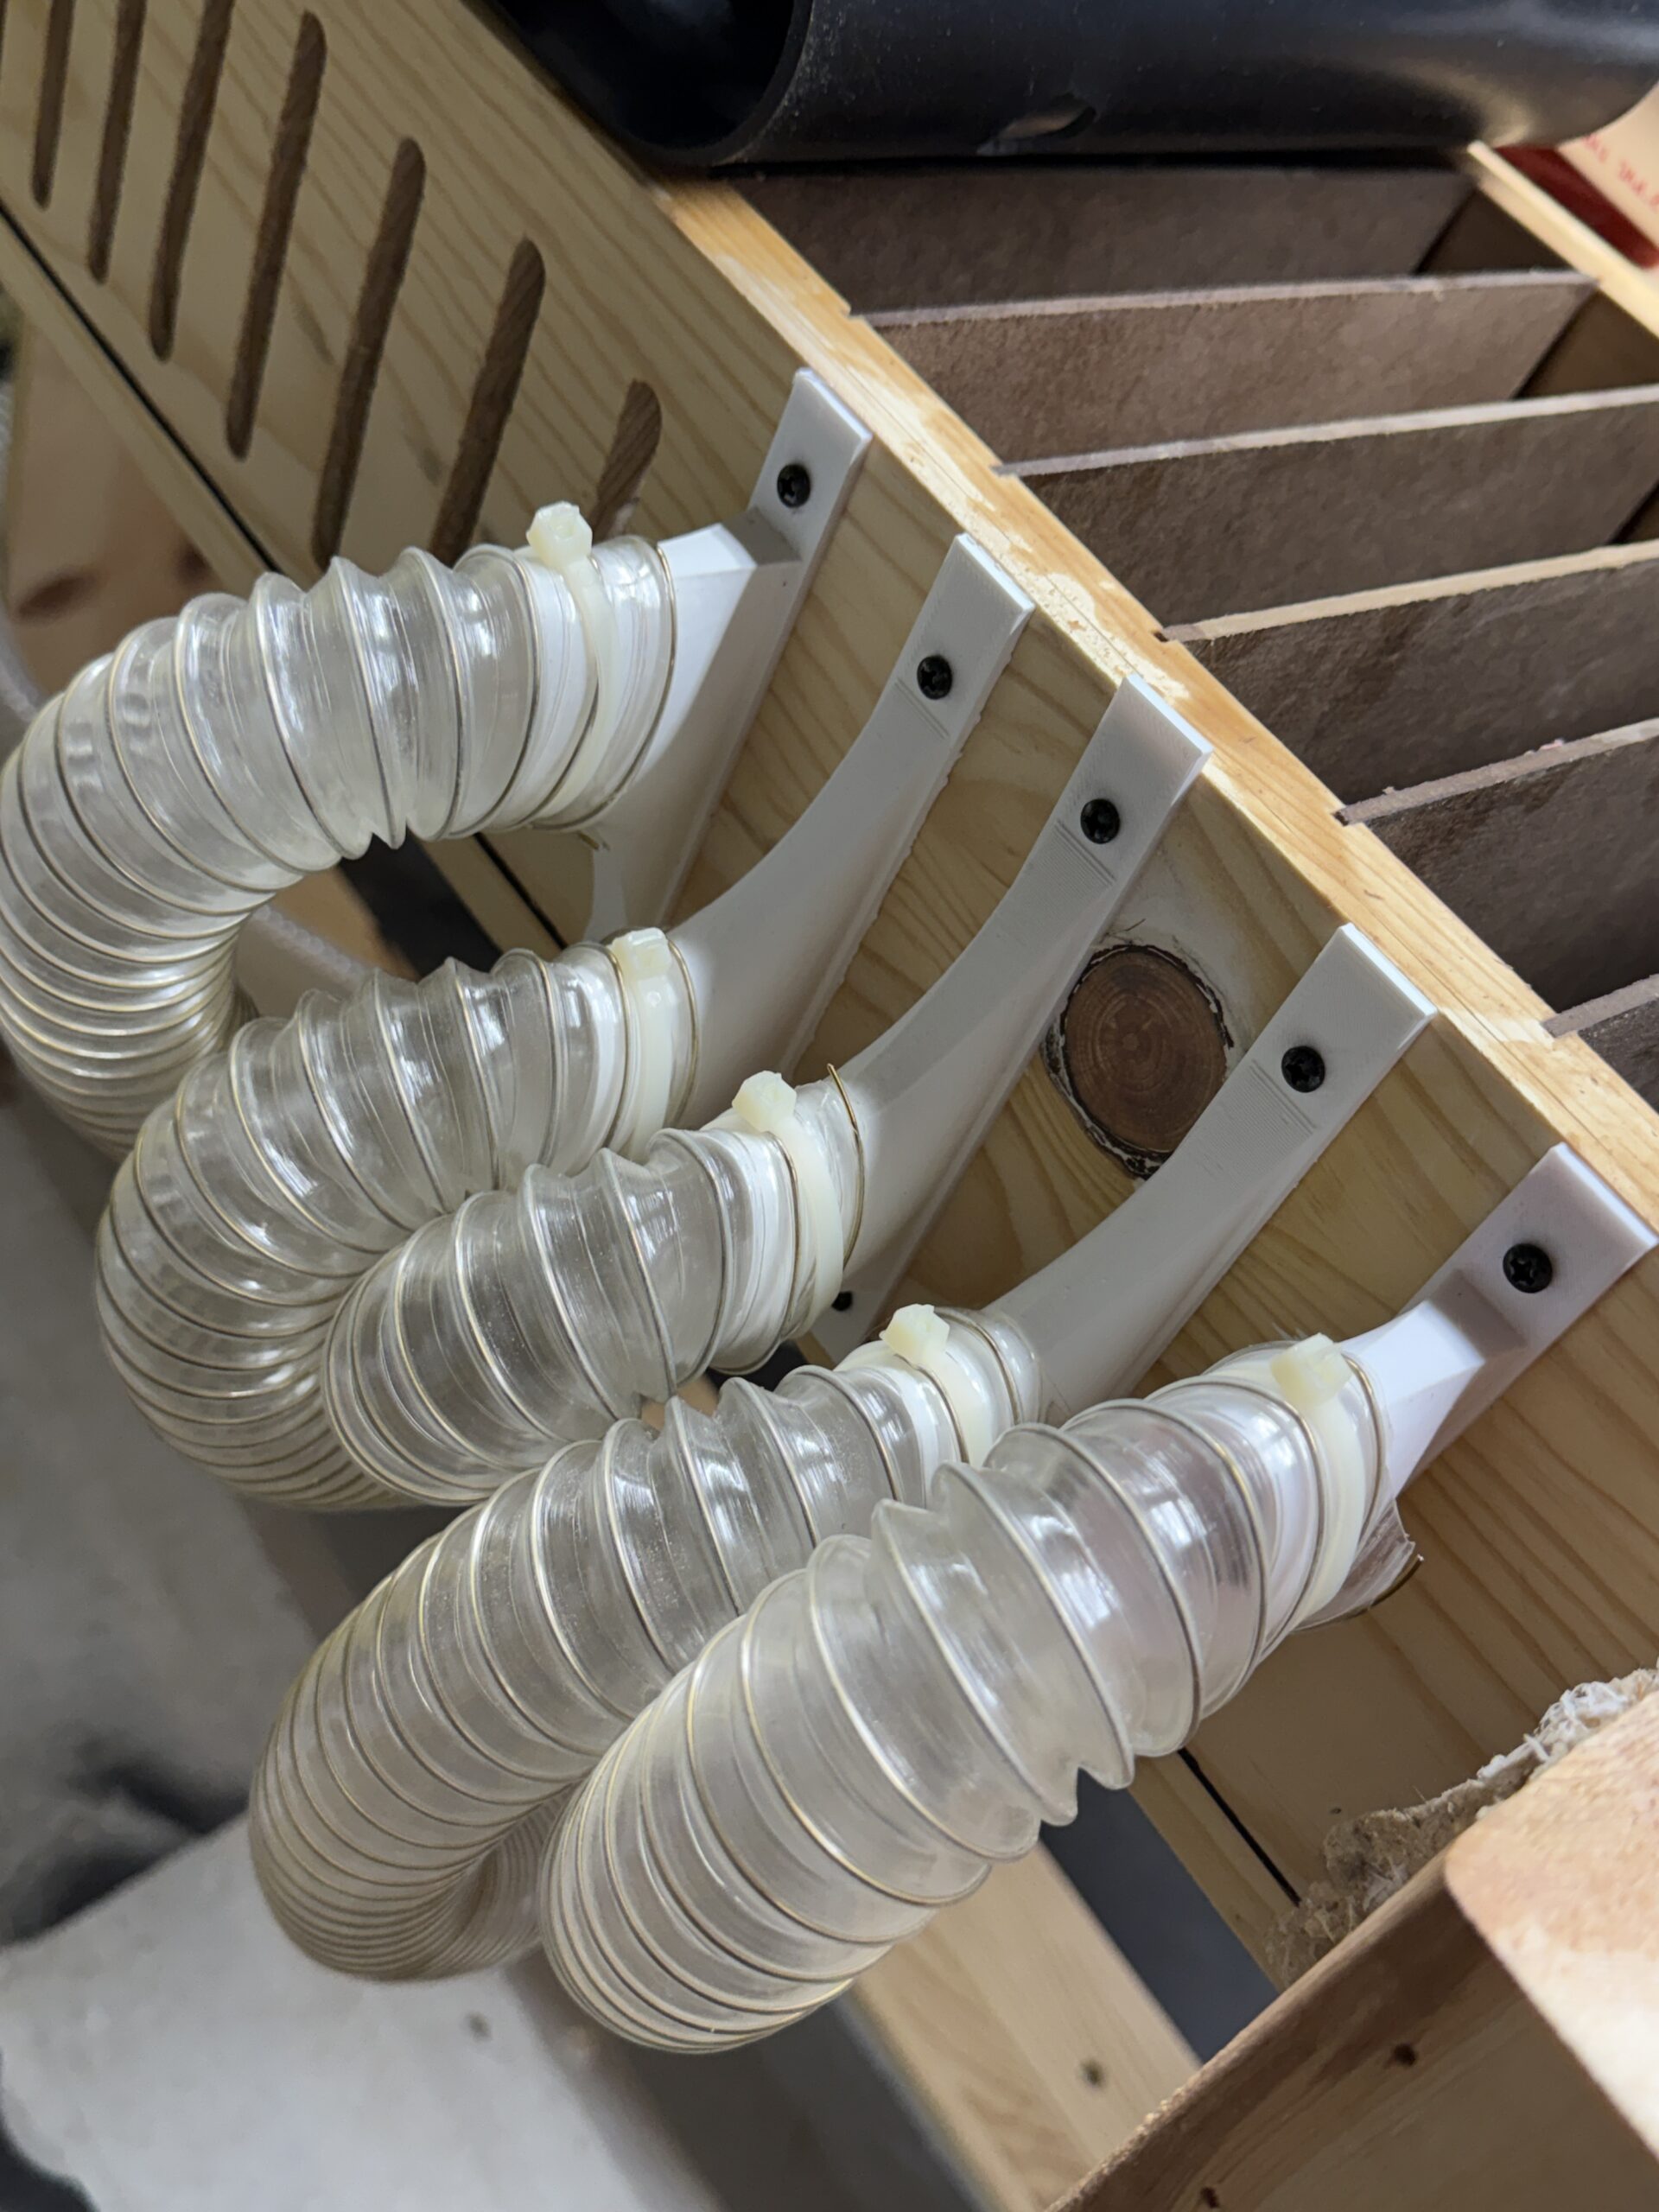
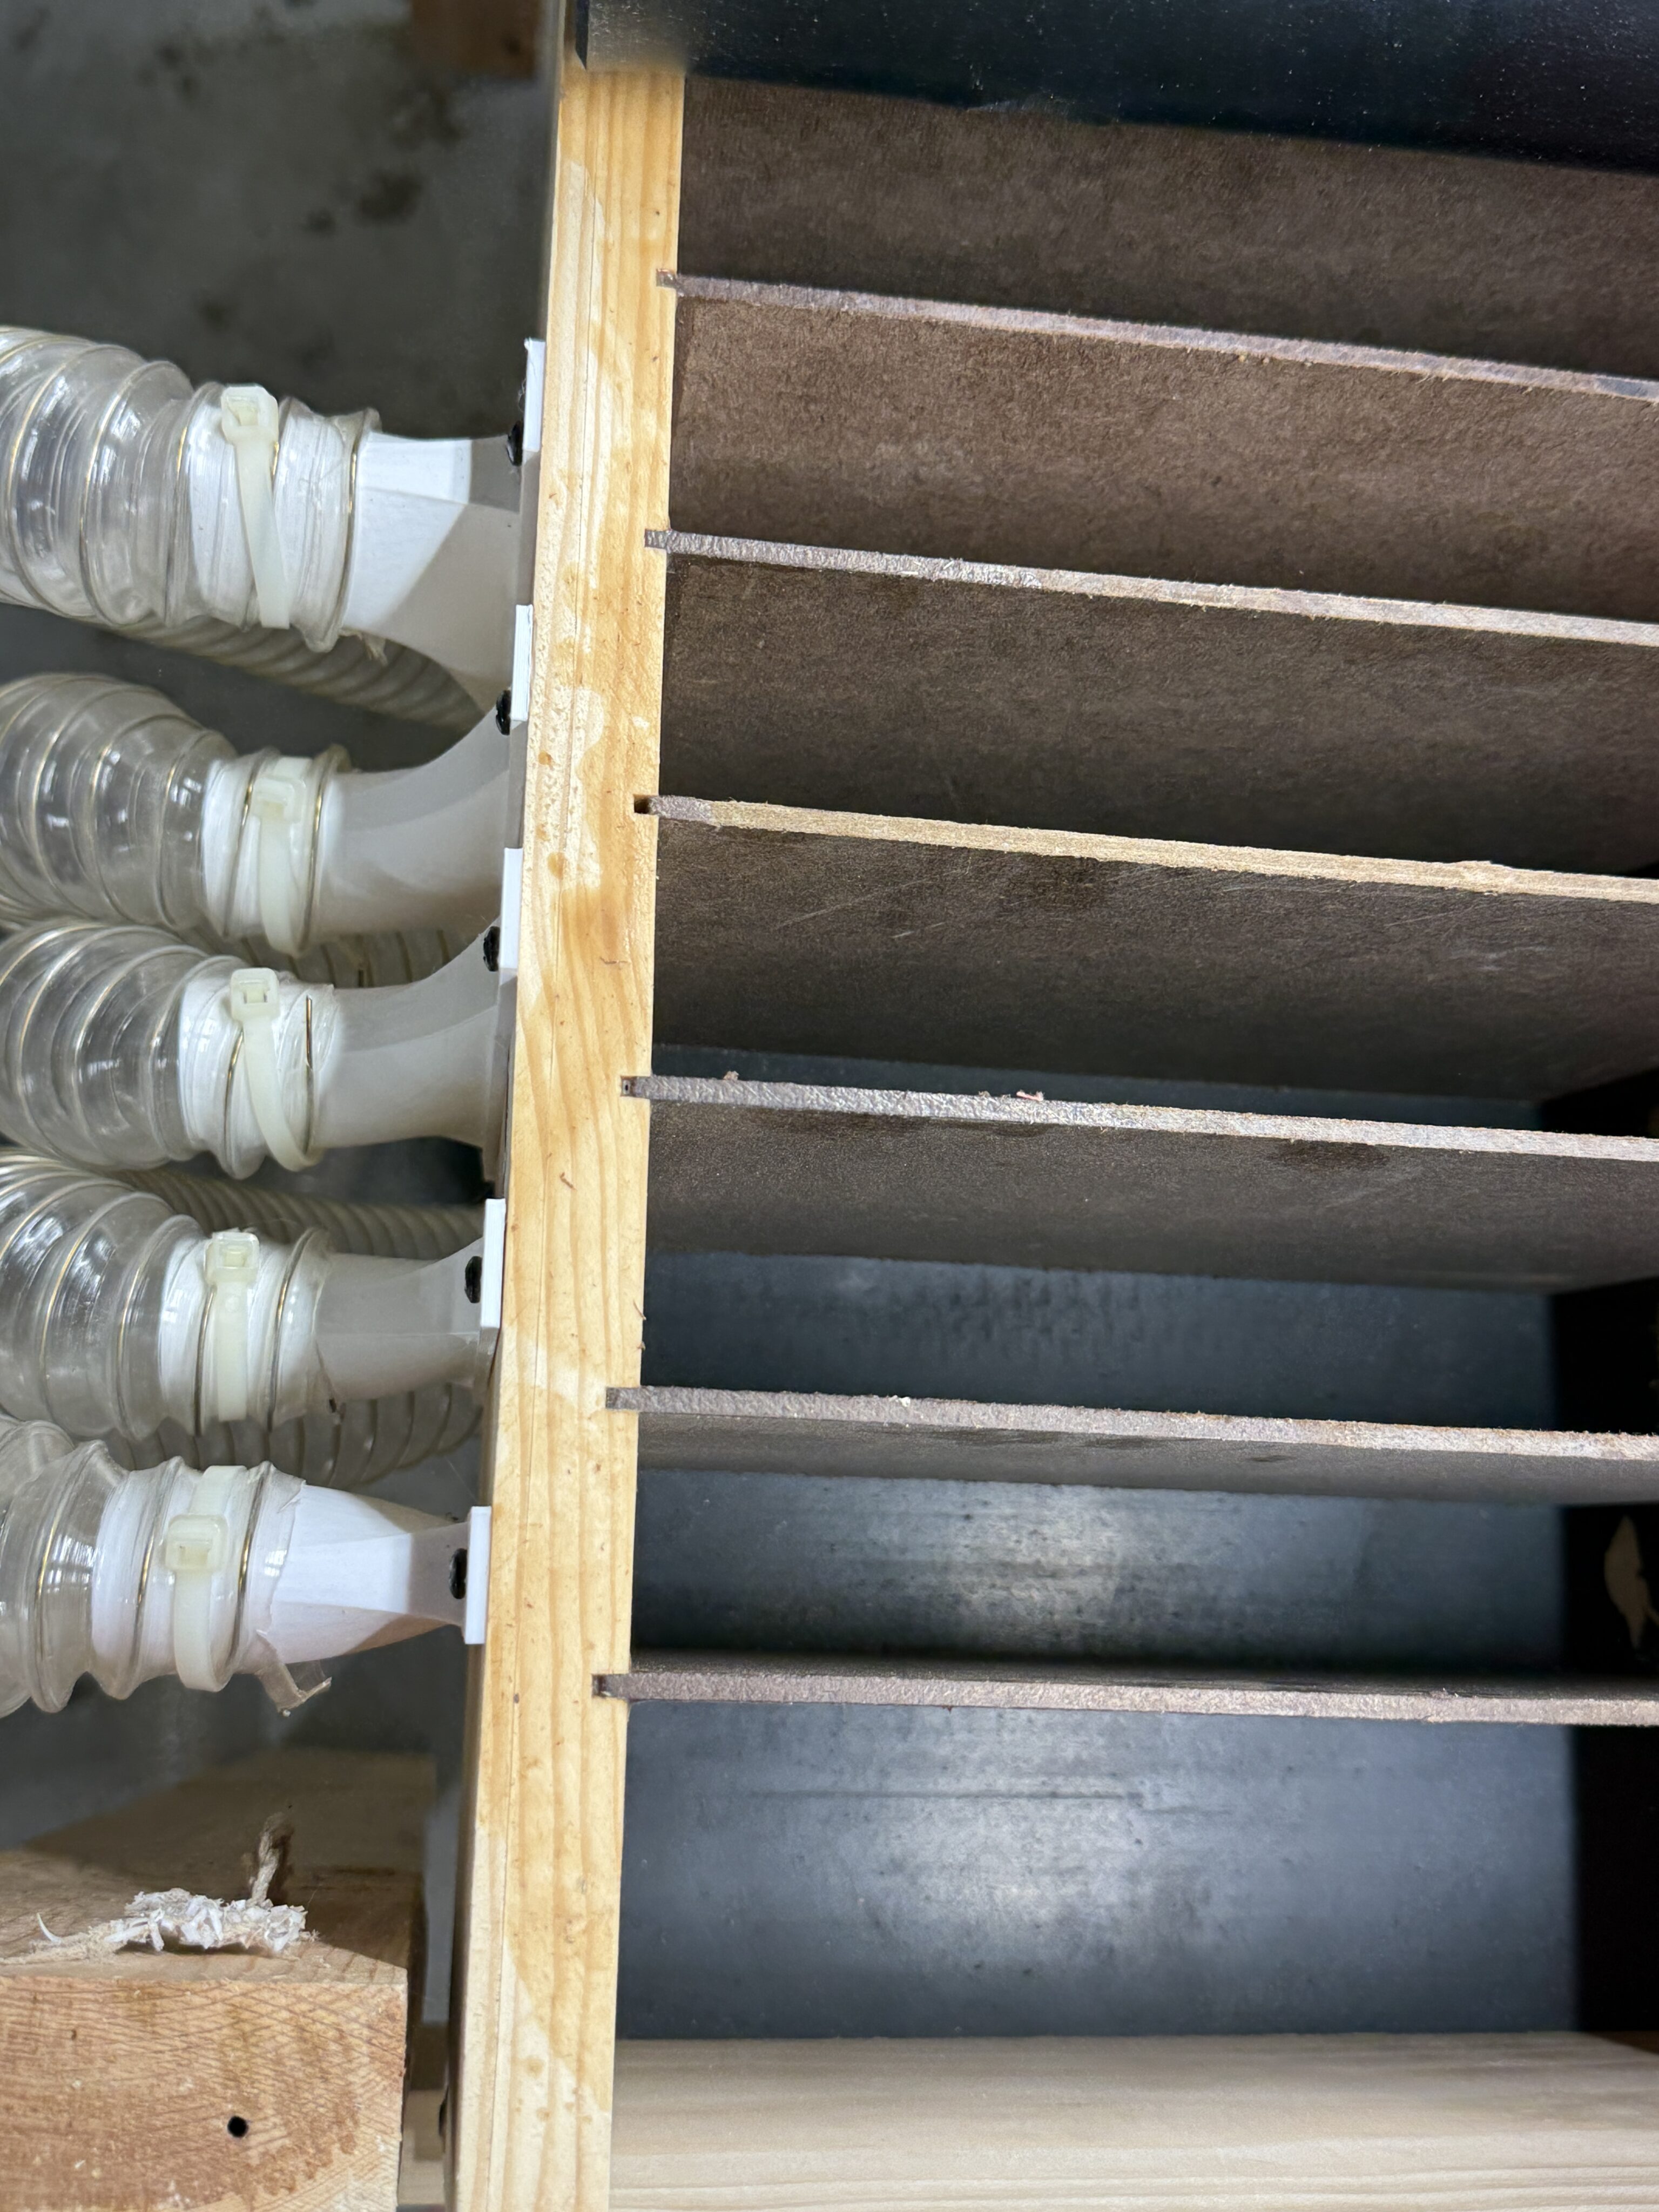
- Most pipes are now plumbed with wind channel piping, but not all
- Custom designed and printed all the piping interfaces AGAIN but this time they work tons better.
- Two types of wind channel piping — flexipipe in 2″ and semi-rigid vinyl in 1″
- Redesigning and printing the pipes above C6 because right now the ones I have sound like a dying parakeet.
- JANUARY 2026
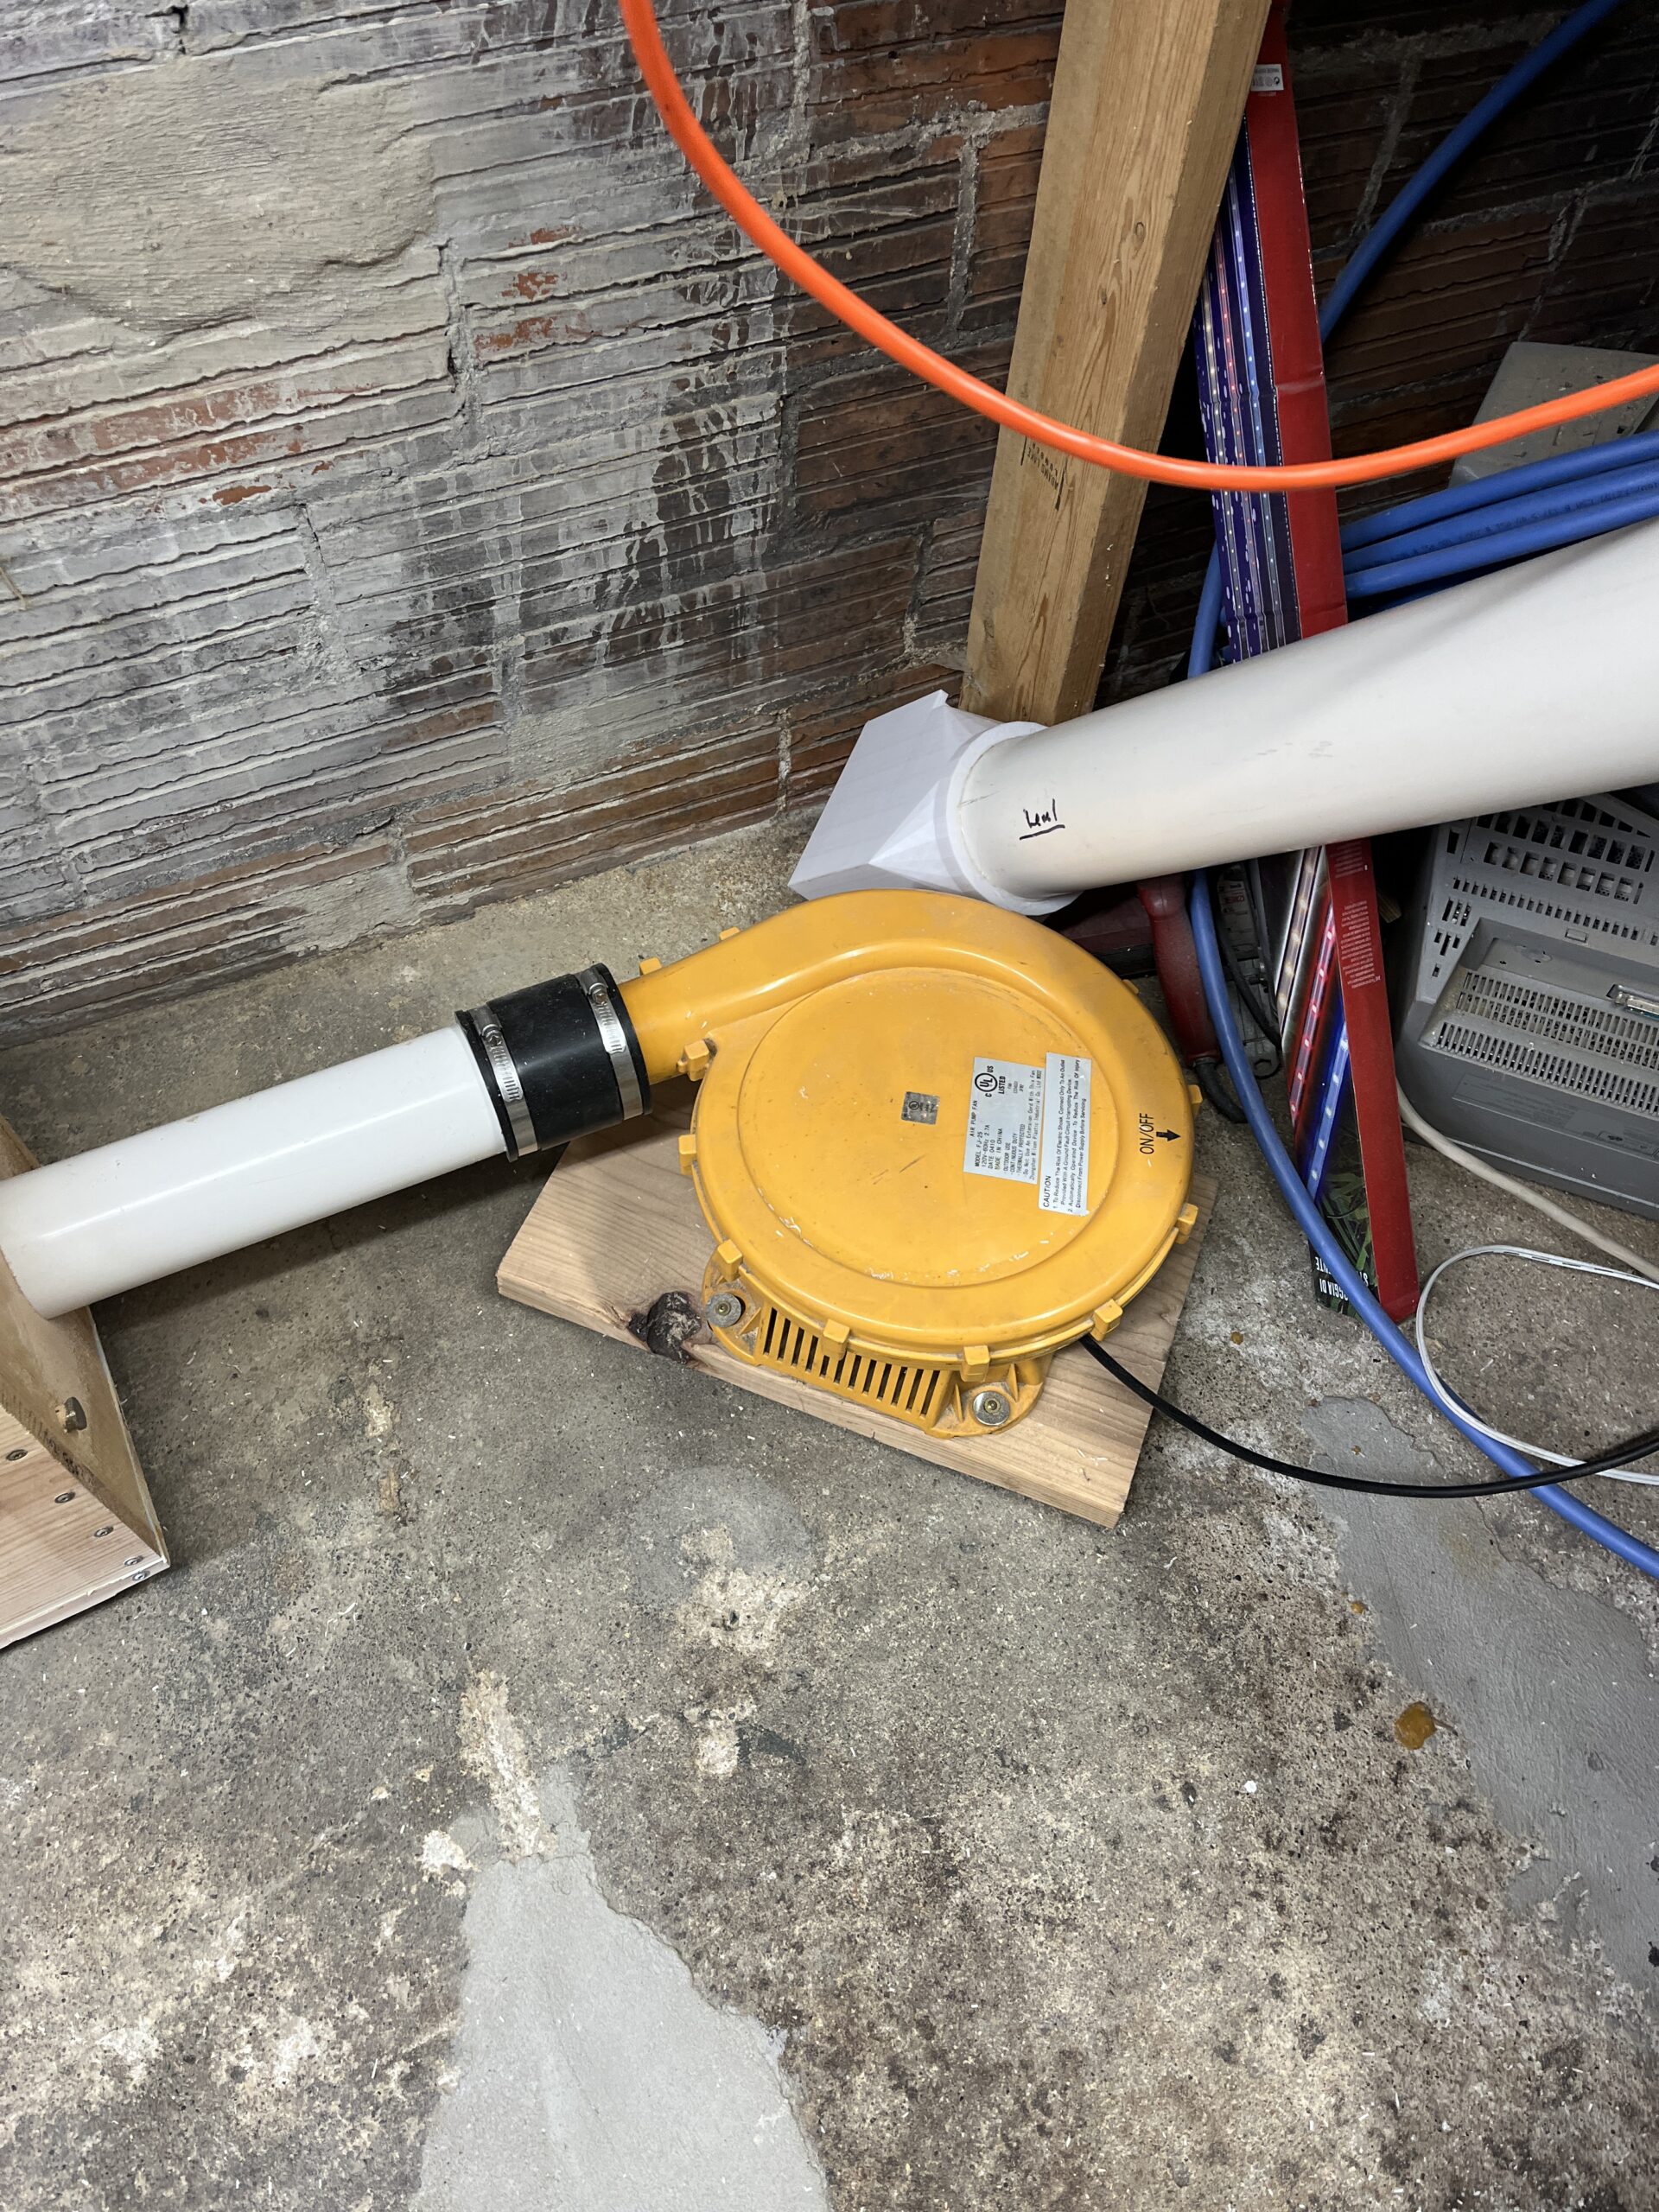
- I have bought a new blower from eBay (Chinese make) that does 9″ W.C. pressure and ~550cfm. This is hooked up and I now have a consistent 3.5″ W.C. at the windchest but I’m working on piping and reservoir changes to accomplish more.
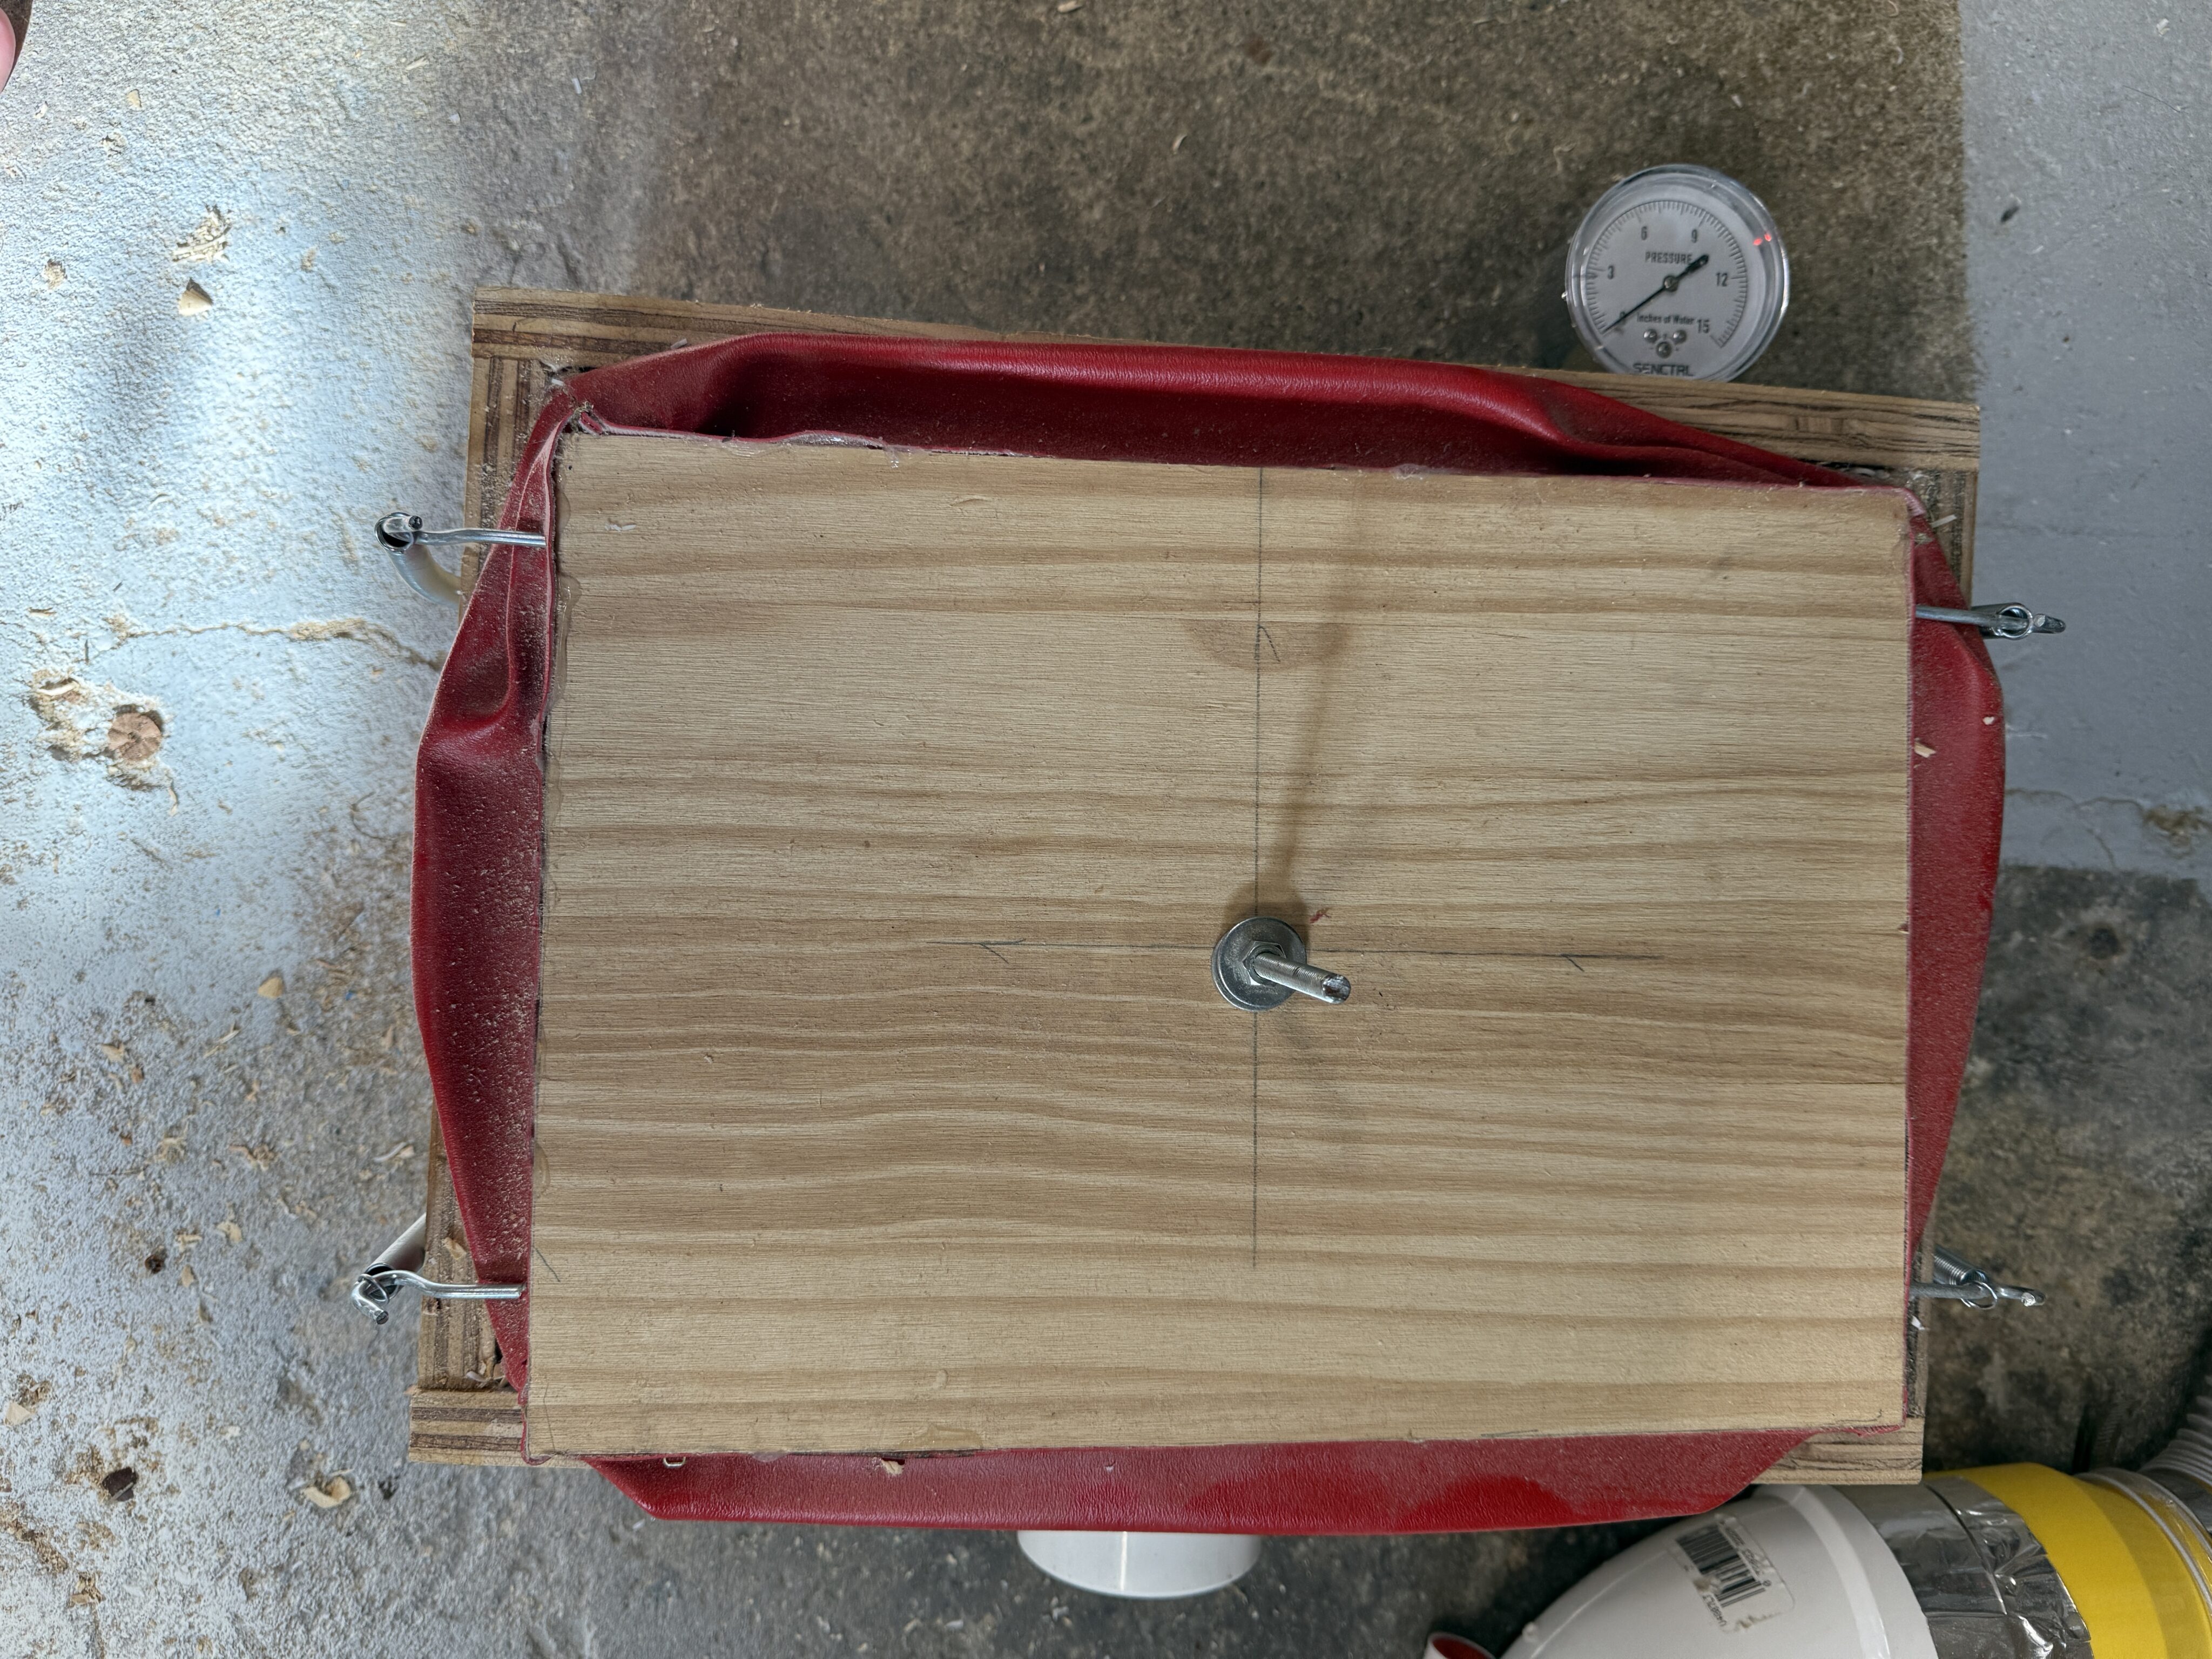
- Wind reservoir and regulator constructed (3″ W.C., weight-loaded); this needs to be rebuilt larger as it’s not enough capacity; on my to-do list.
- Downstream wind regulator constructed (2″-3″ W.C., spring loaded); this also needs to be sized upwards to handle the load; on my to-do list.
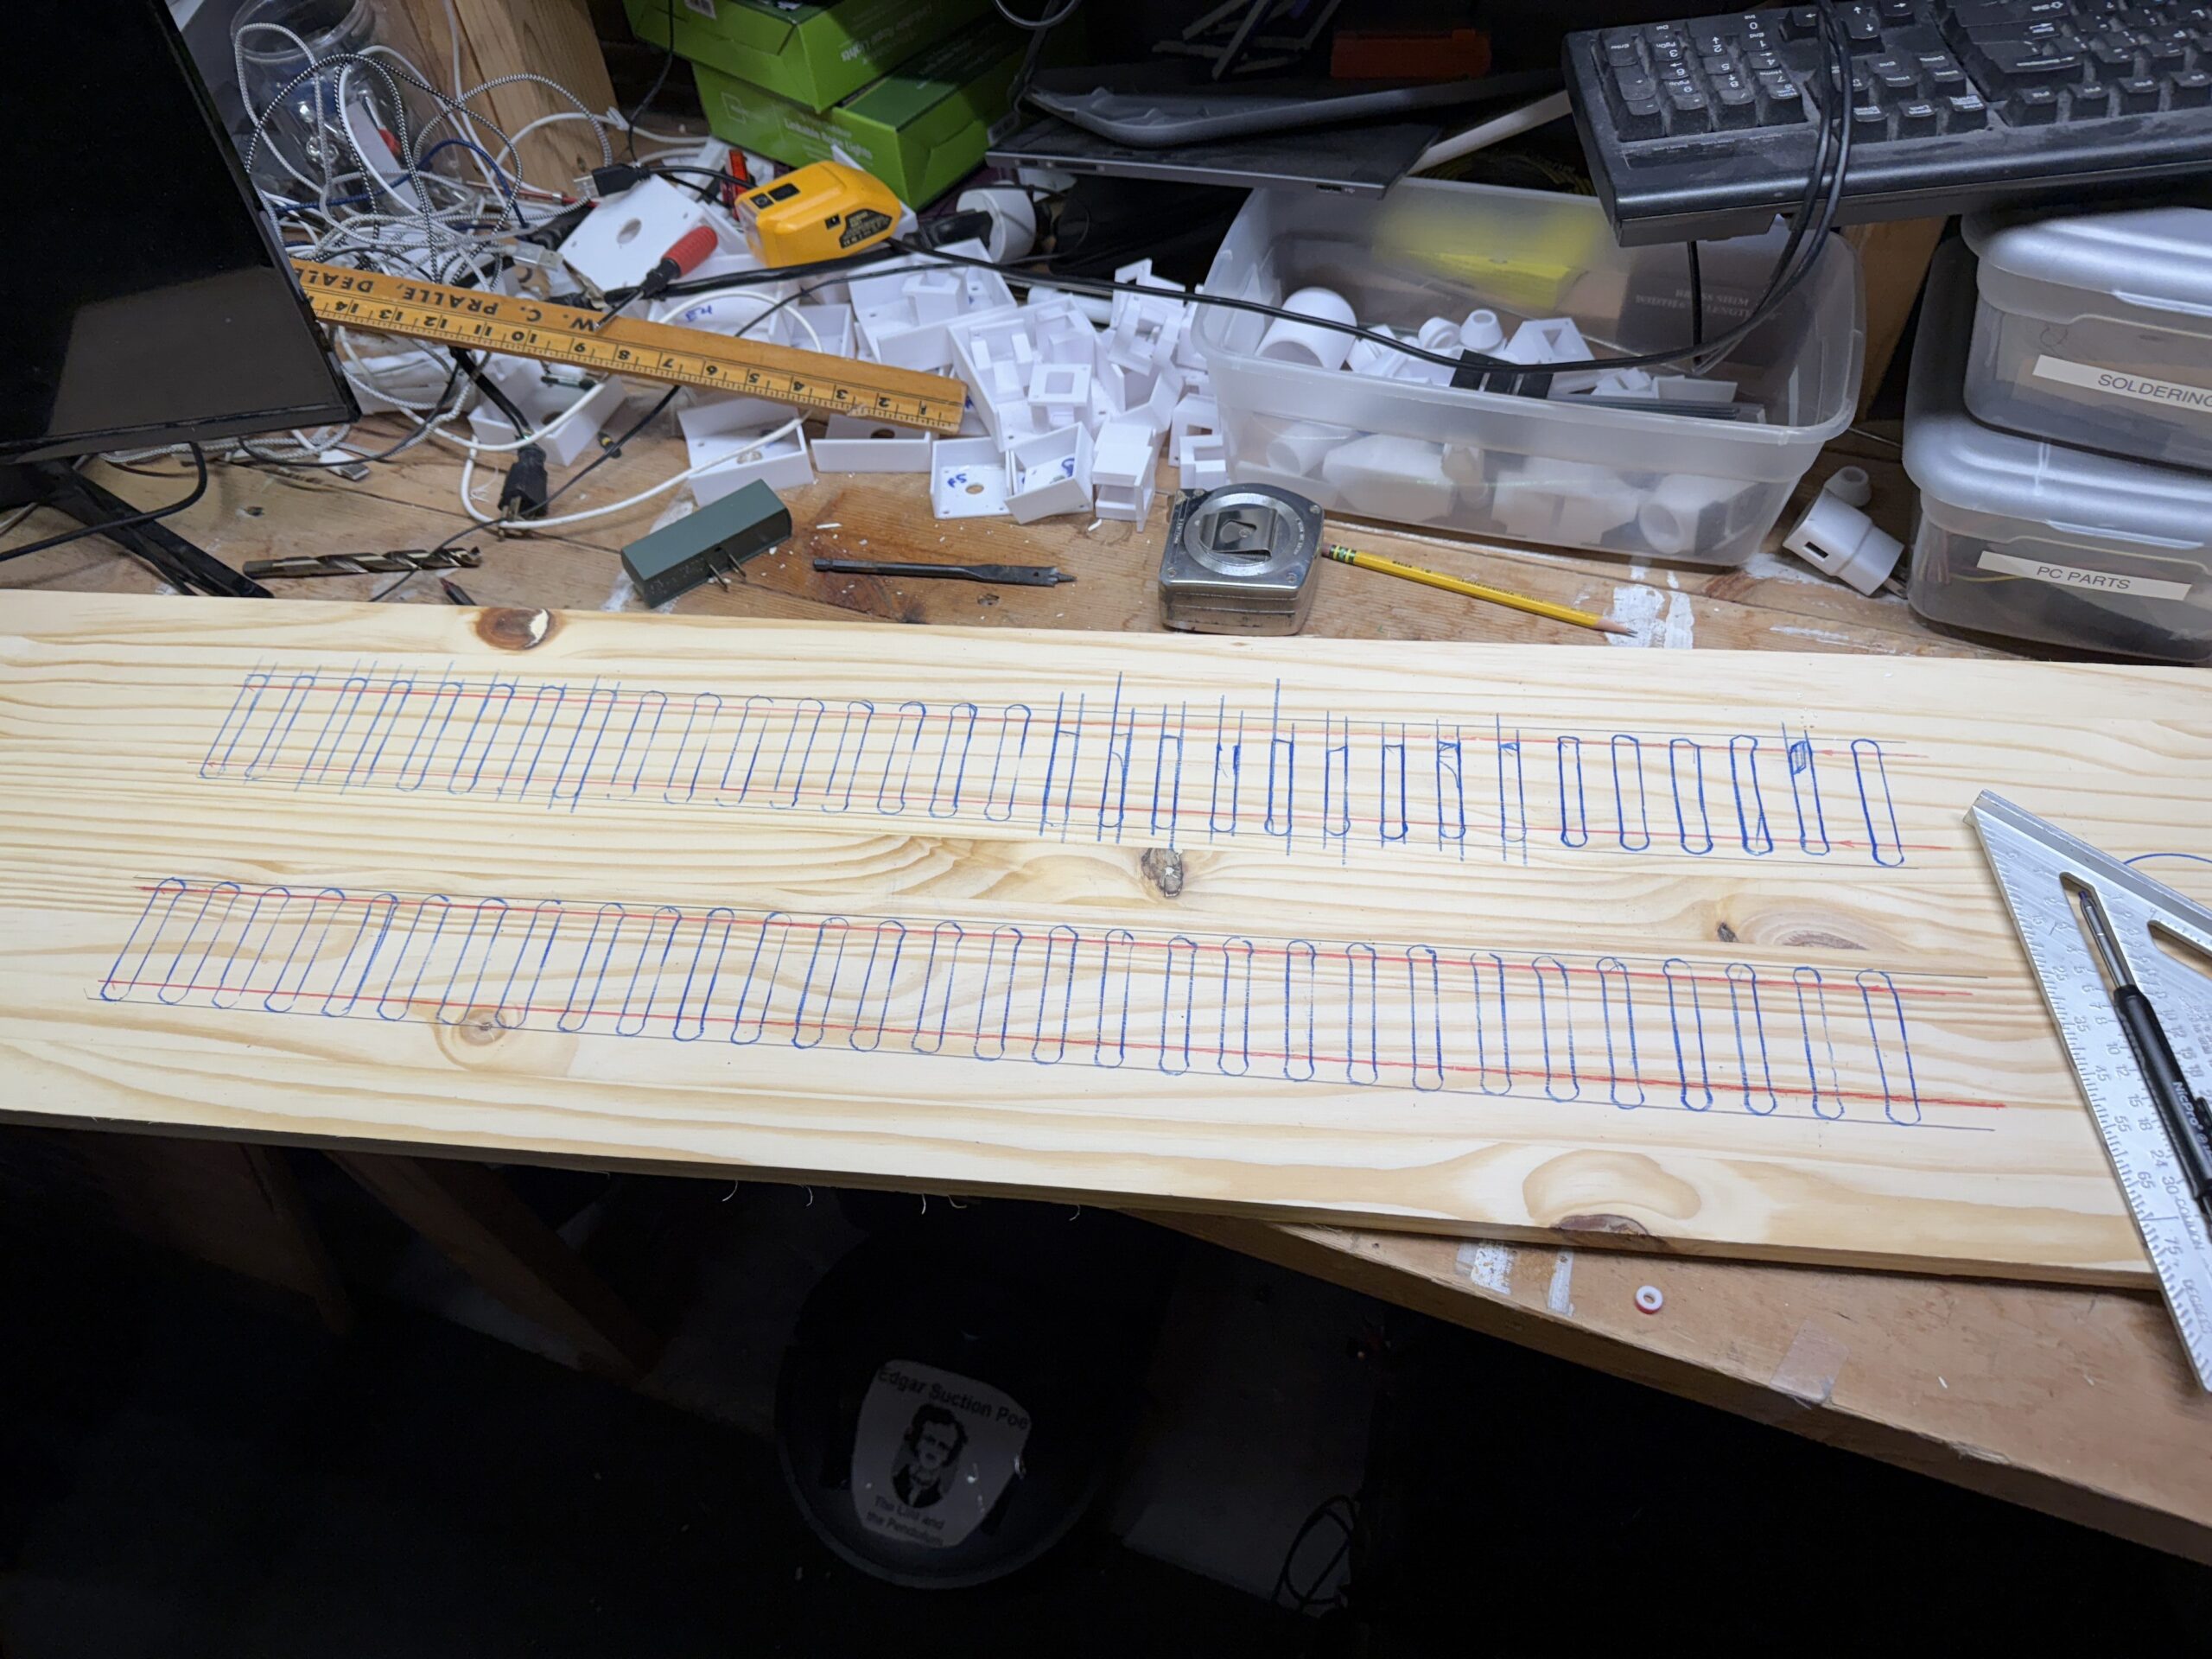
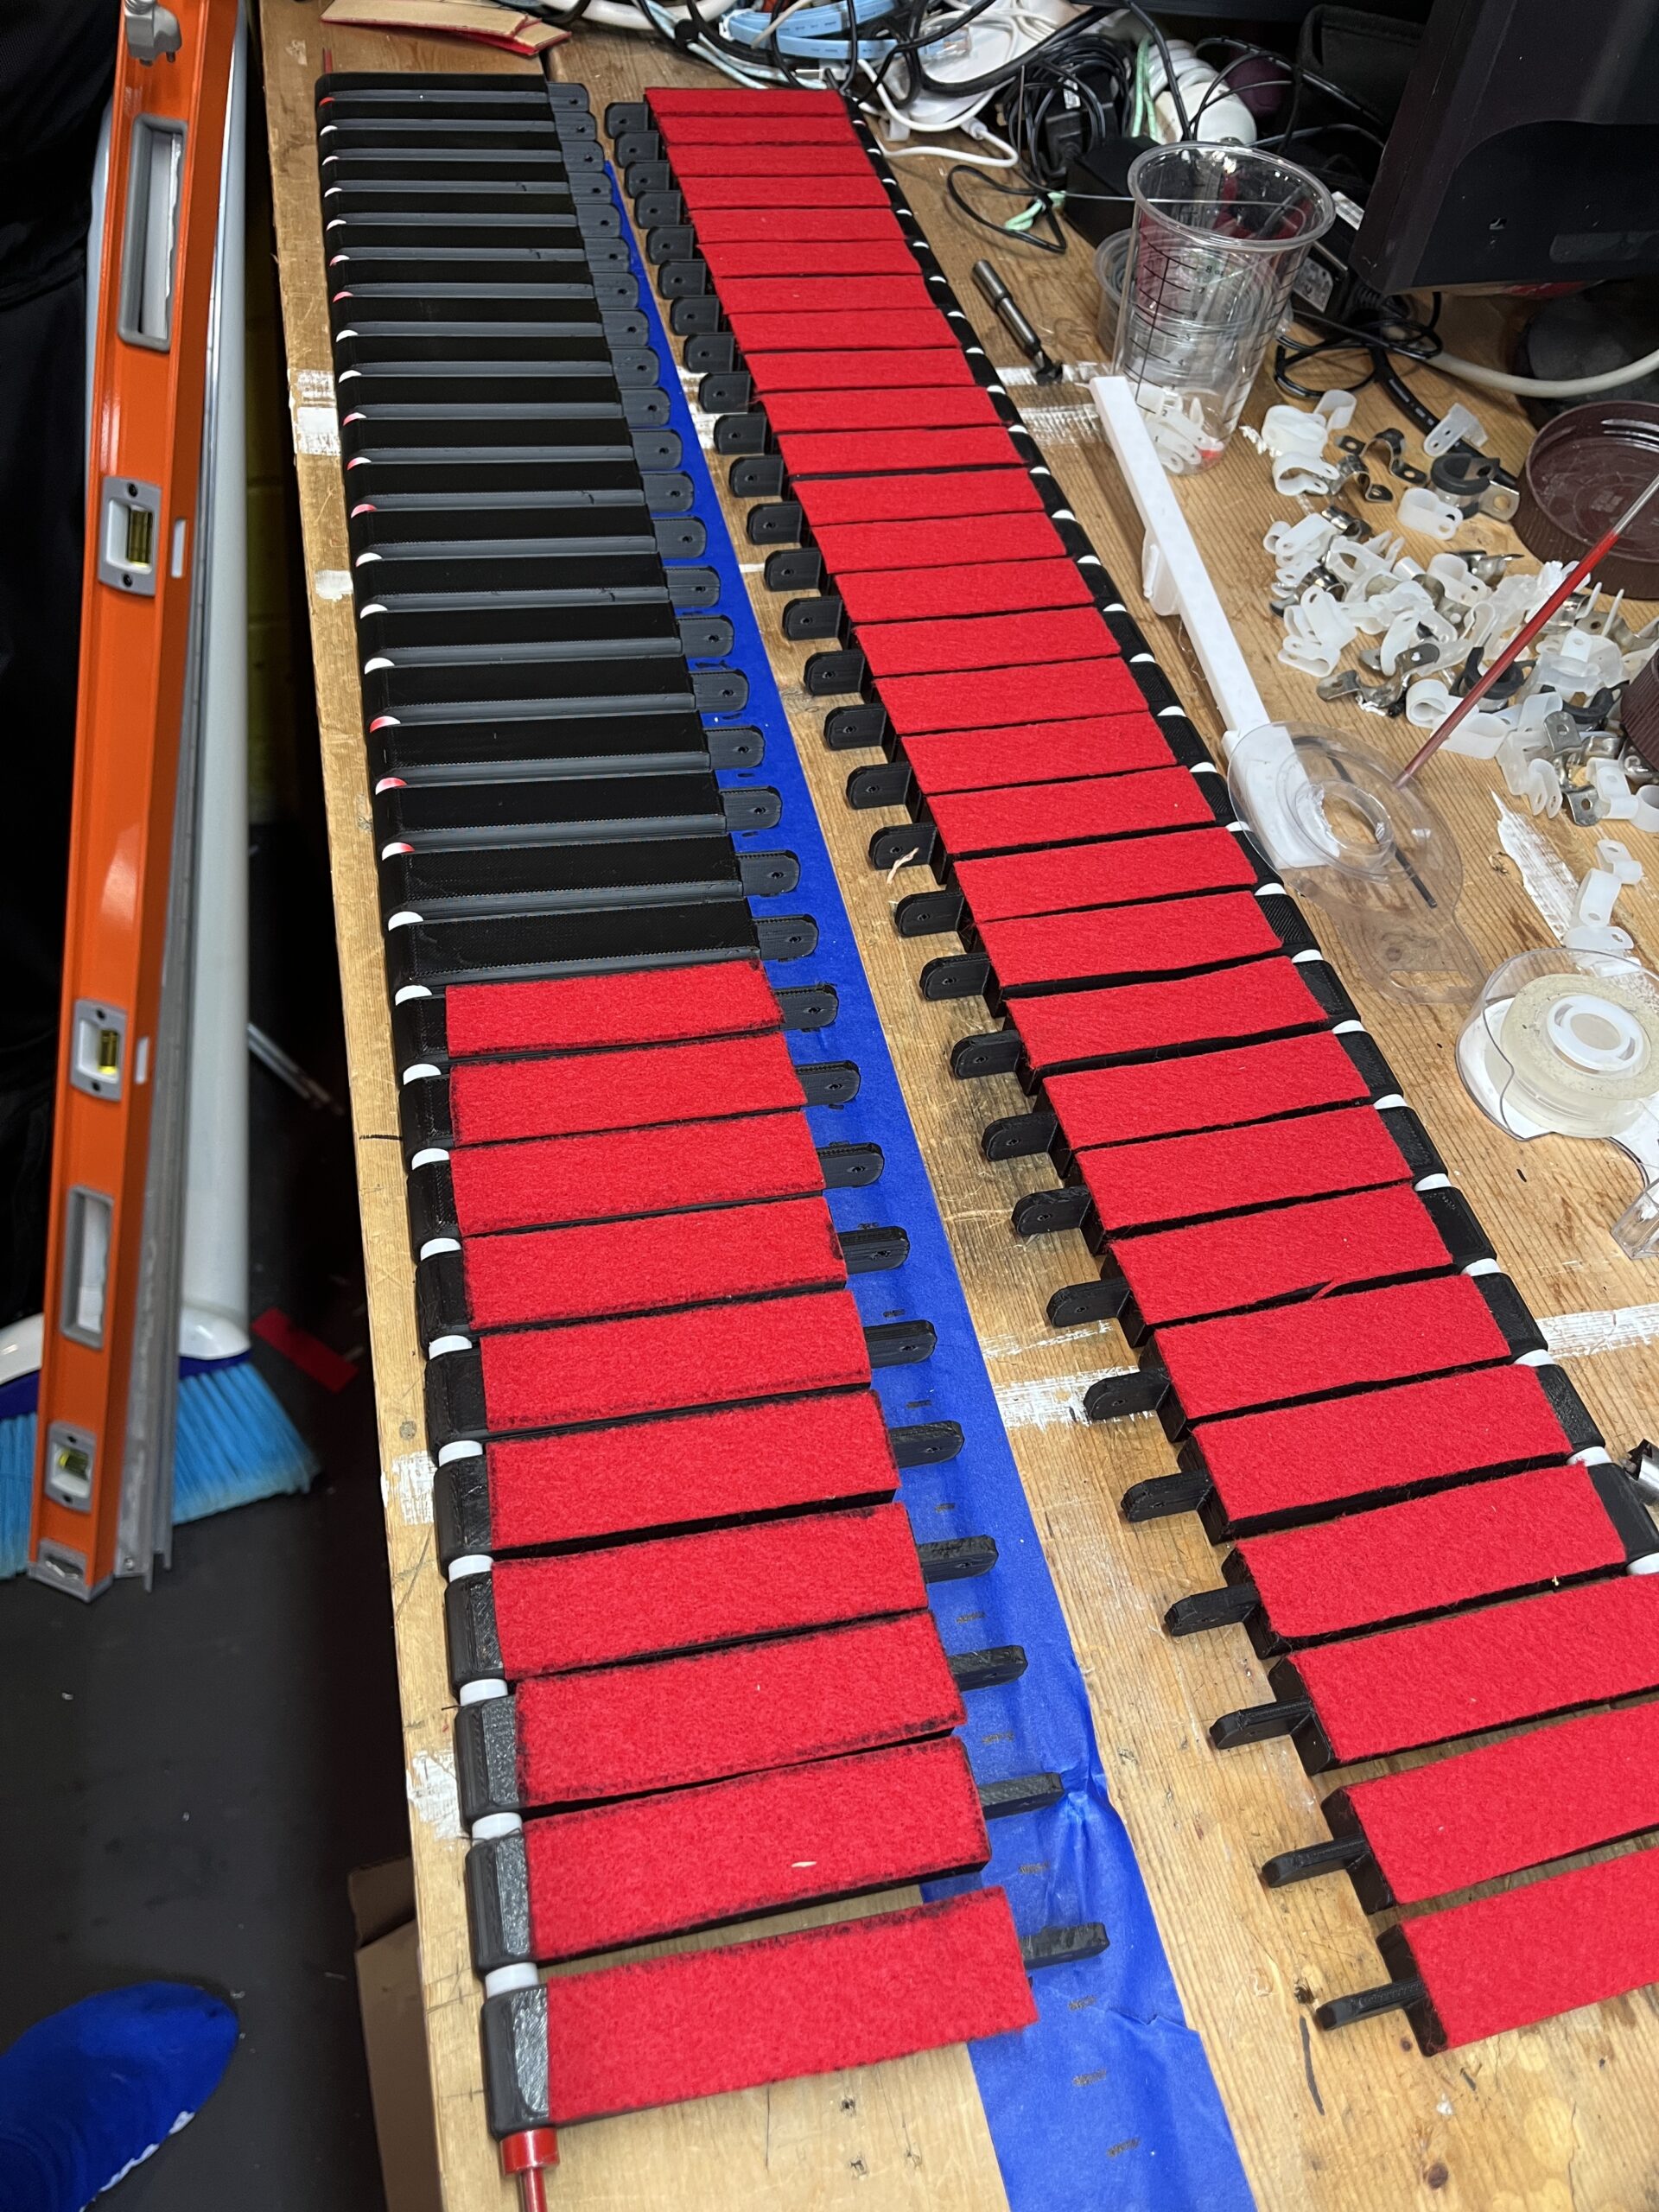
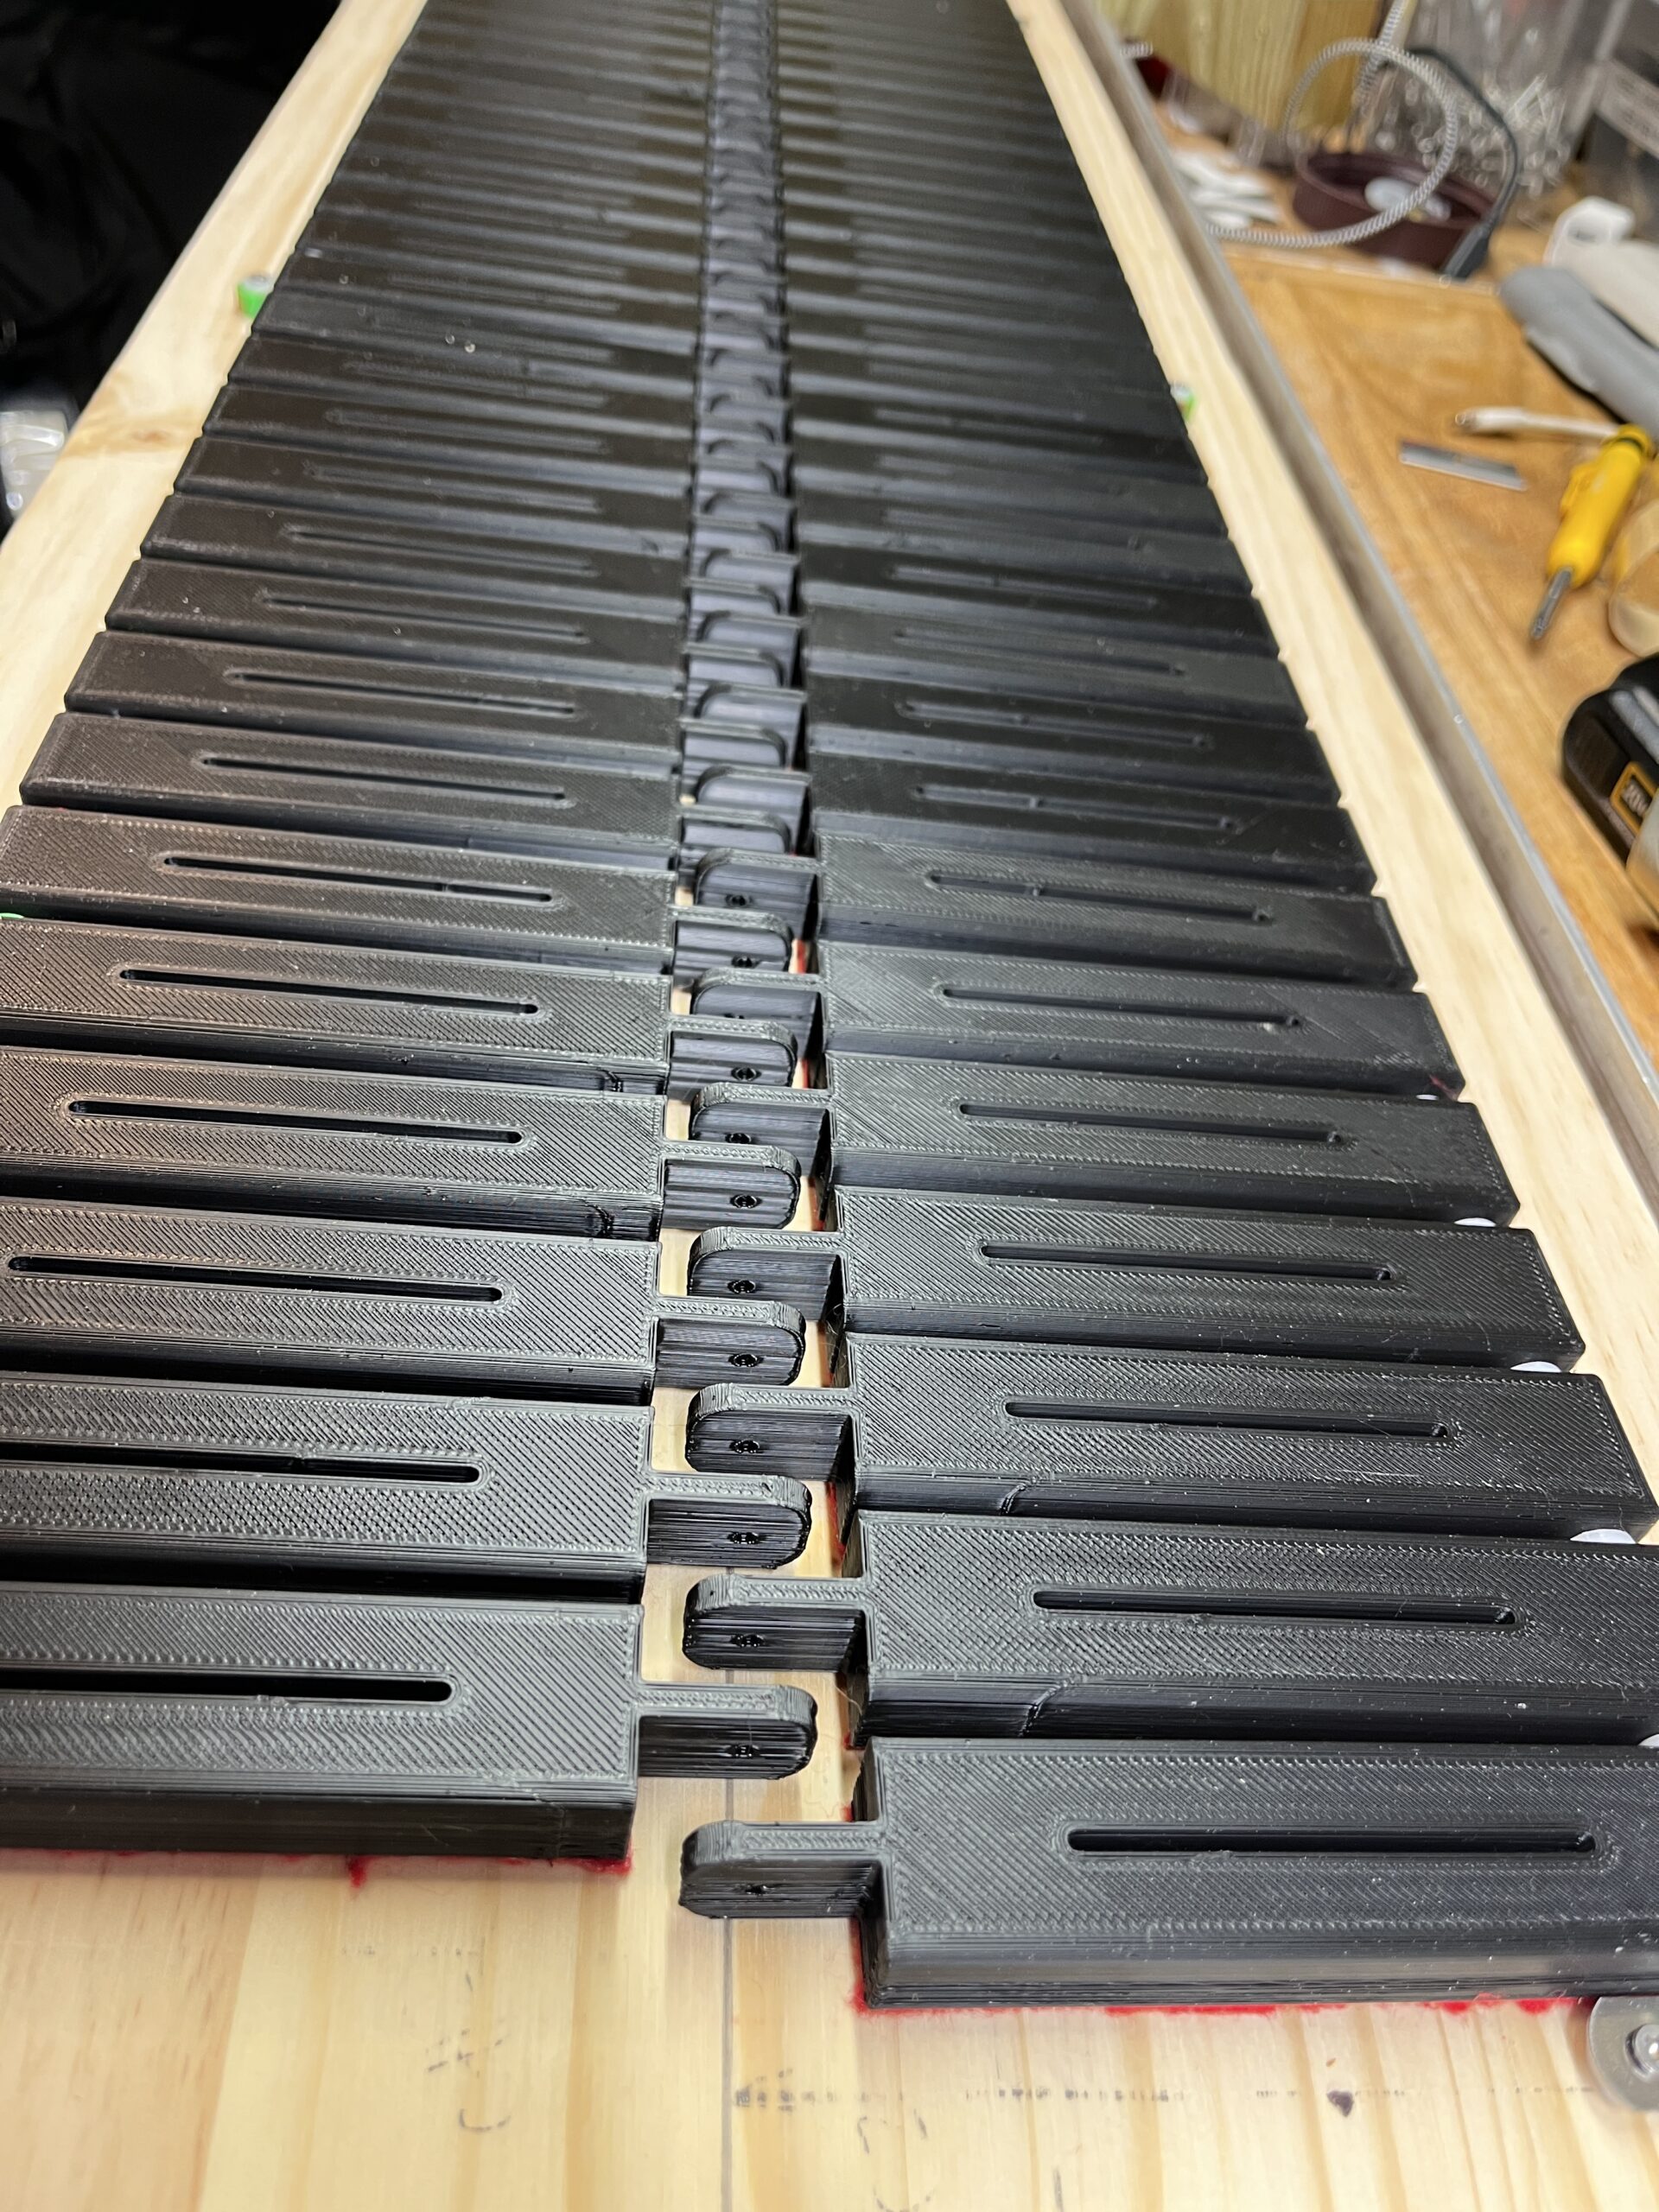
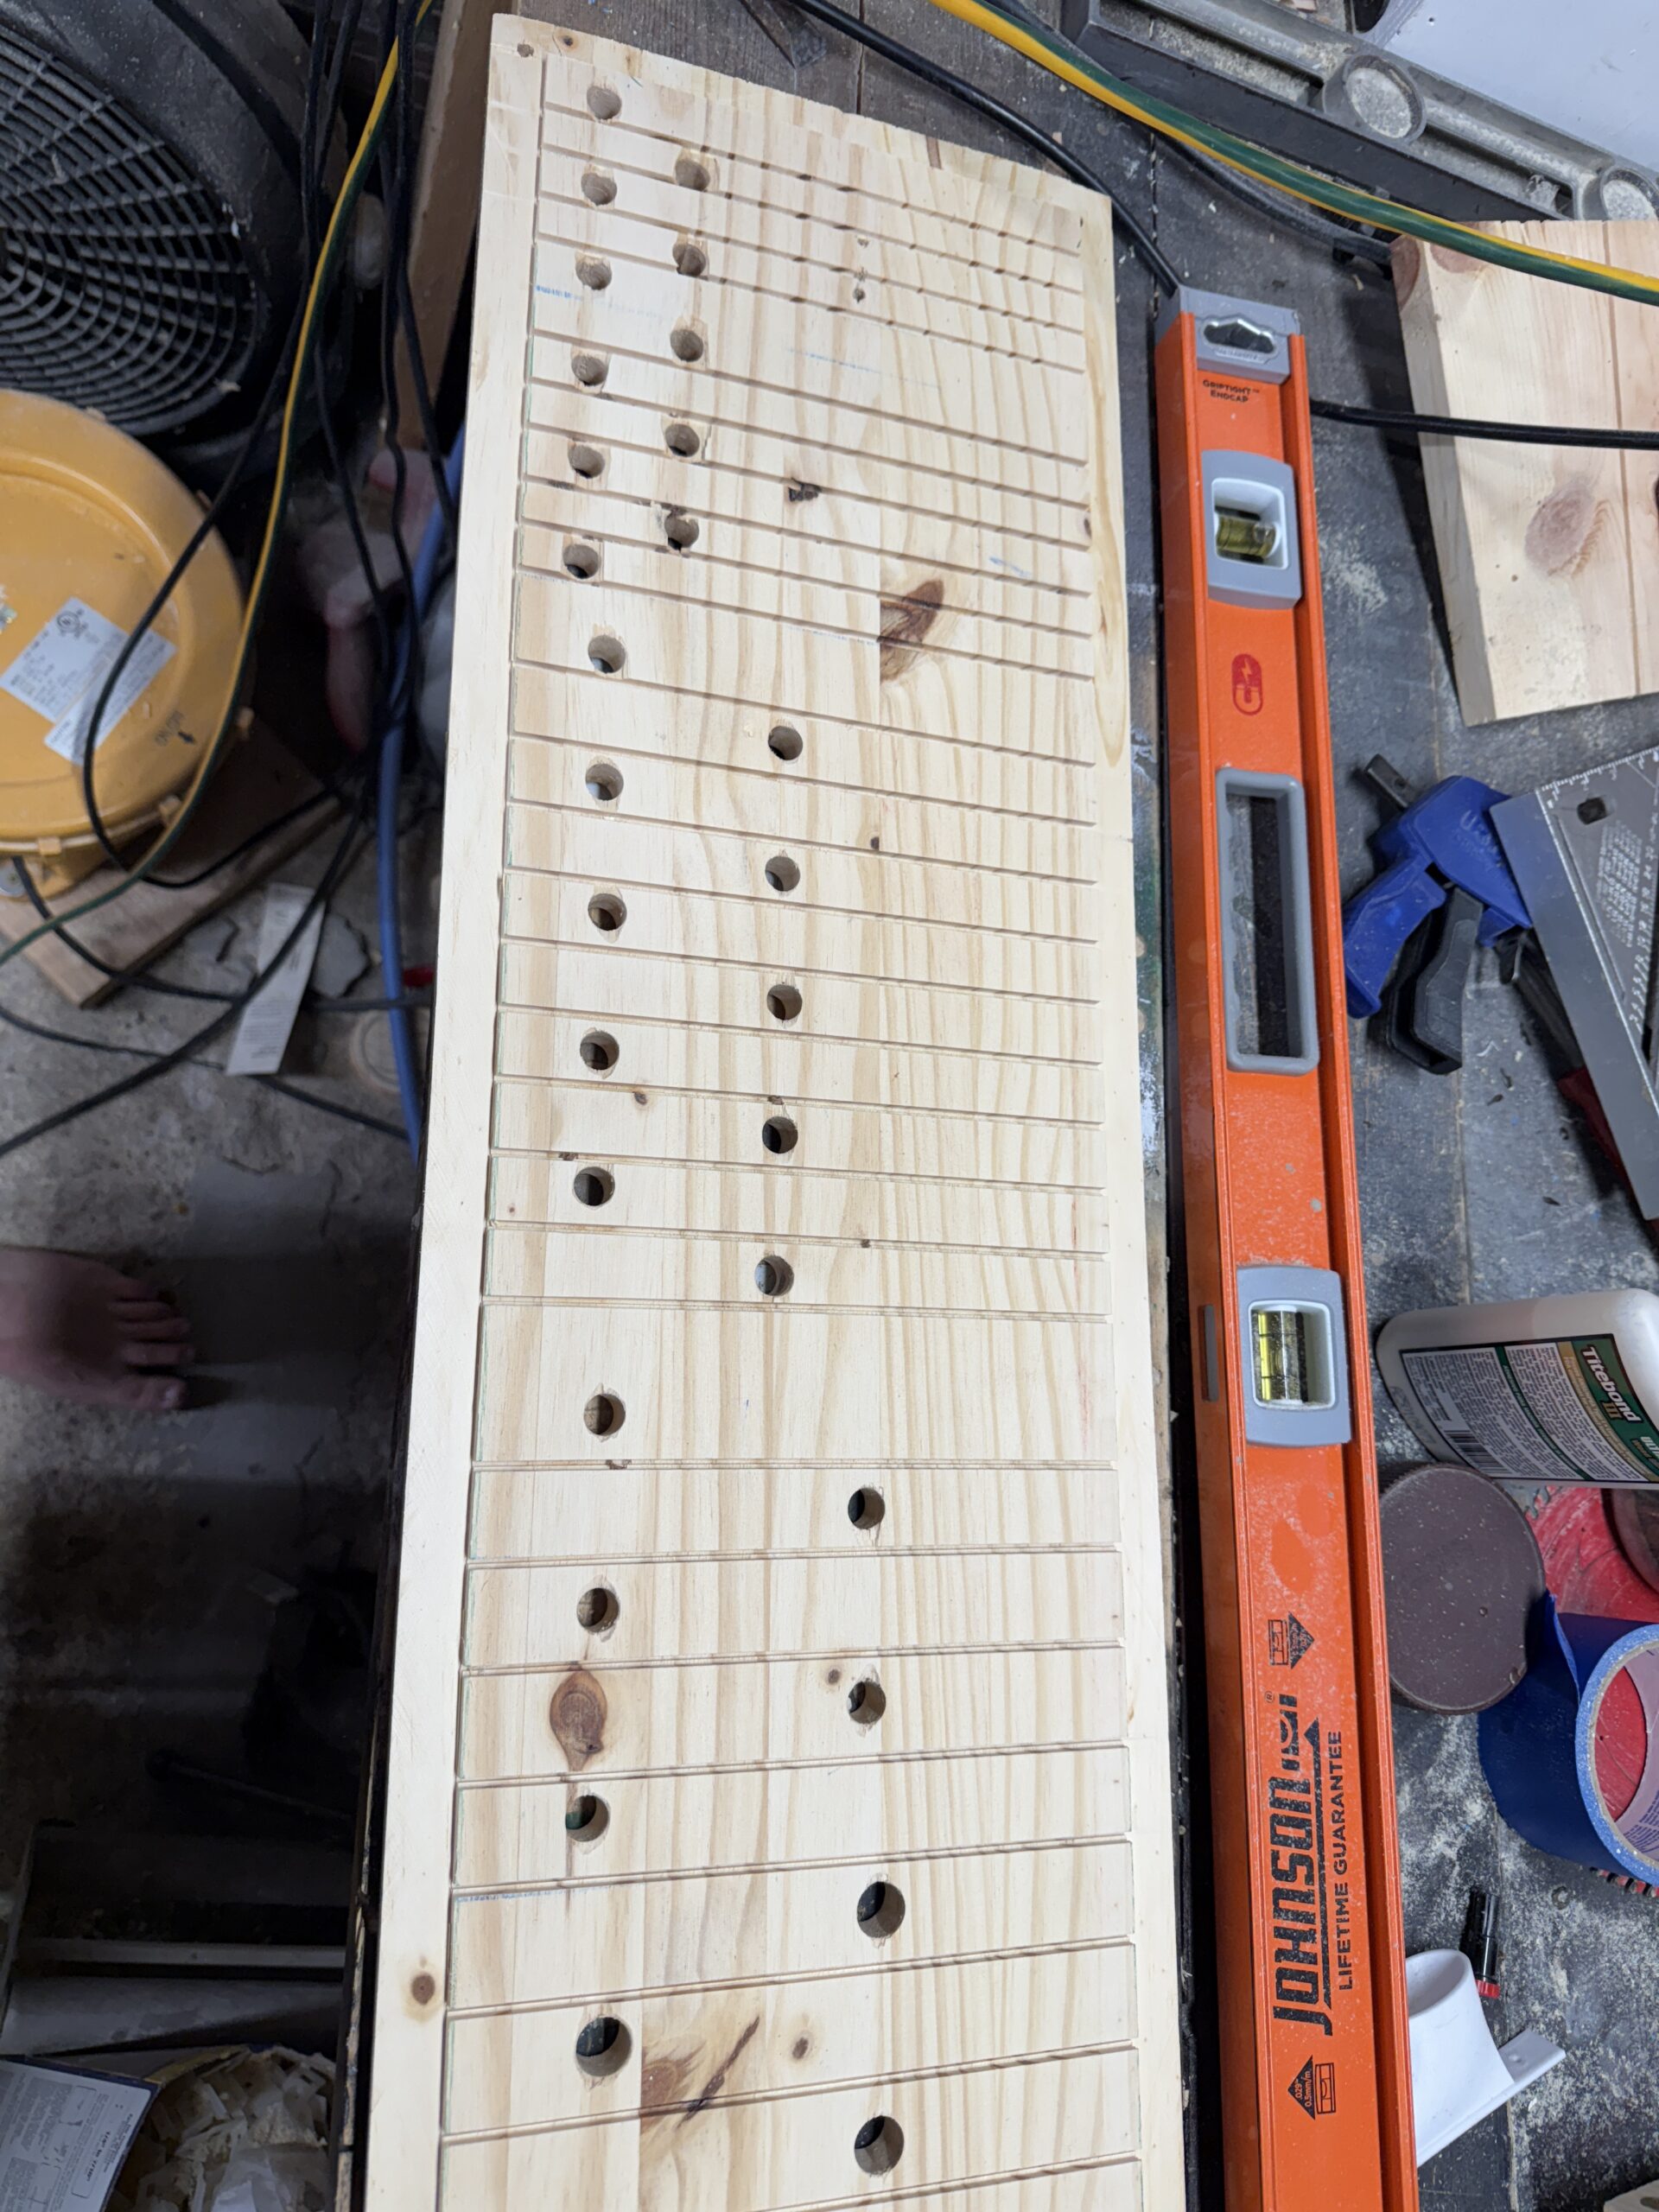
- Manual keyboard designed (FreeCAD), printed, and constructed, 61 keys, C2 – C7
- Pipes in the 8′ principal on the manual rank are done (C3 – C7). Some of the pedal pipes (C2 – C3) are done and waiting silently like strange soldiers.
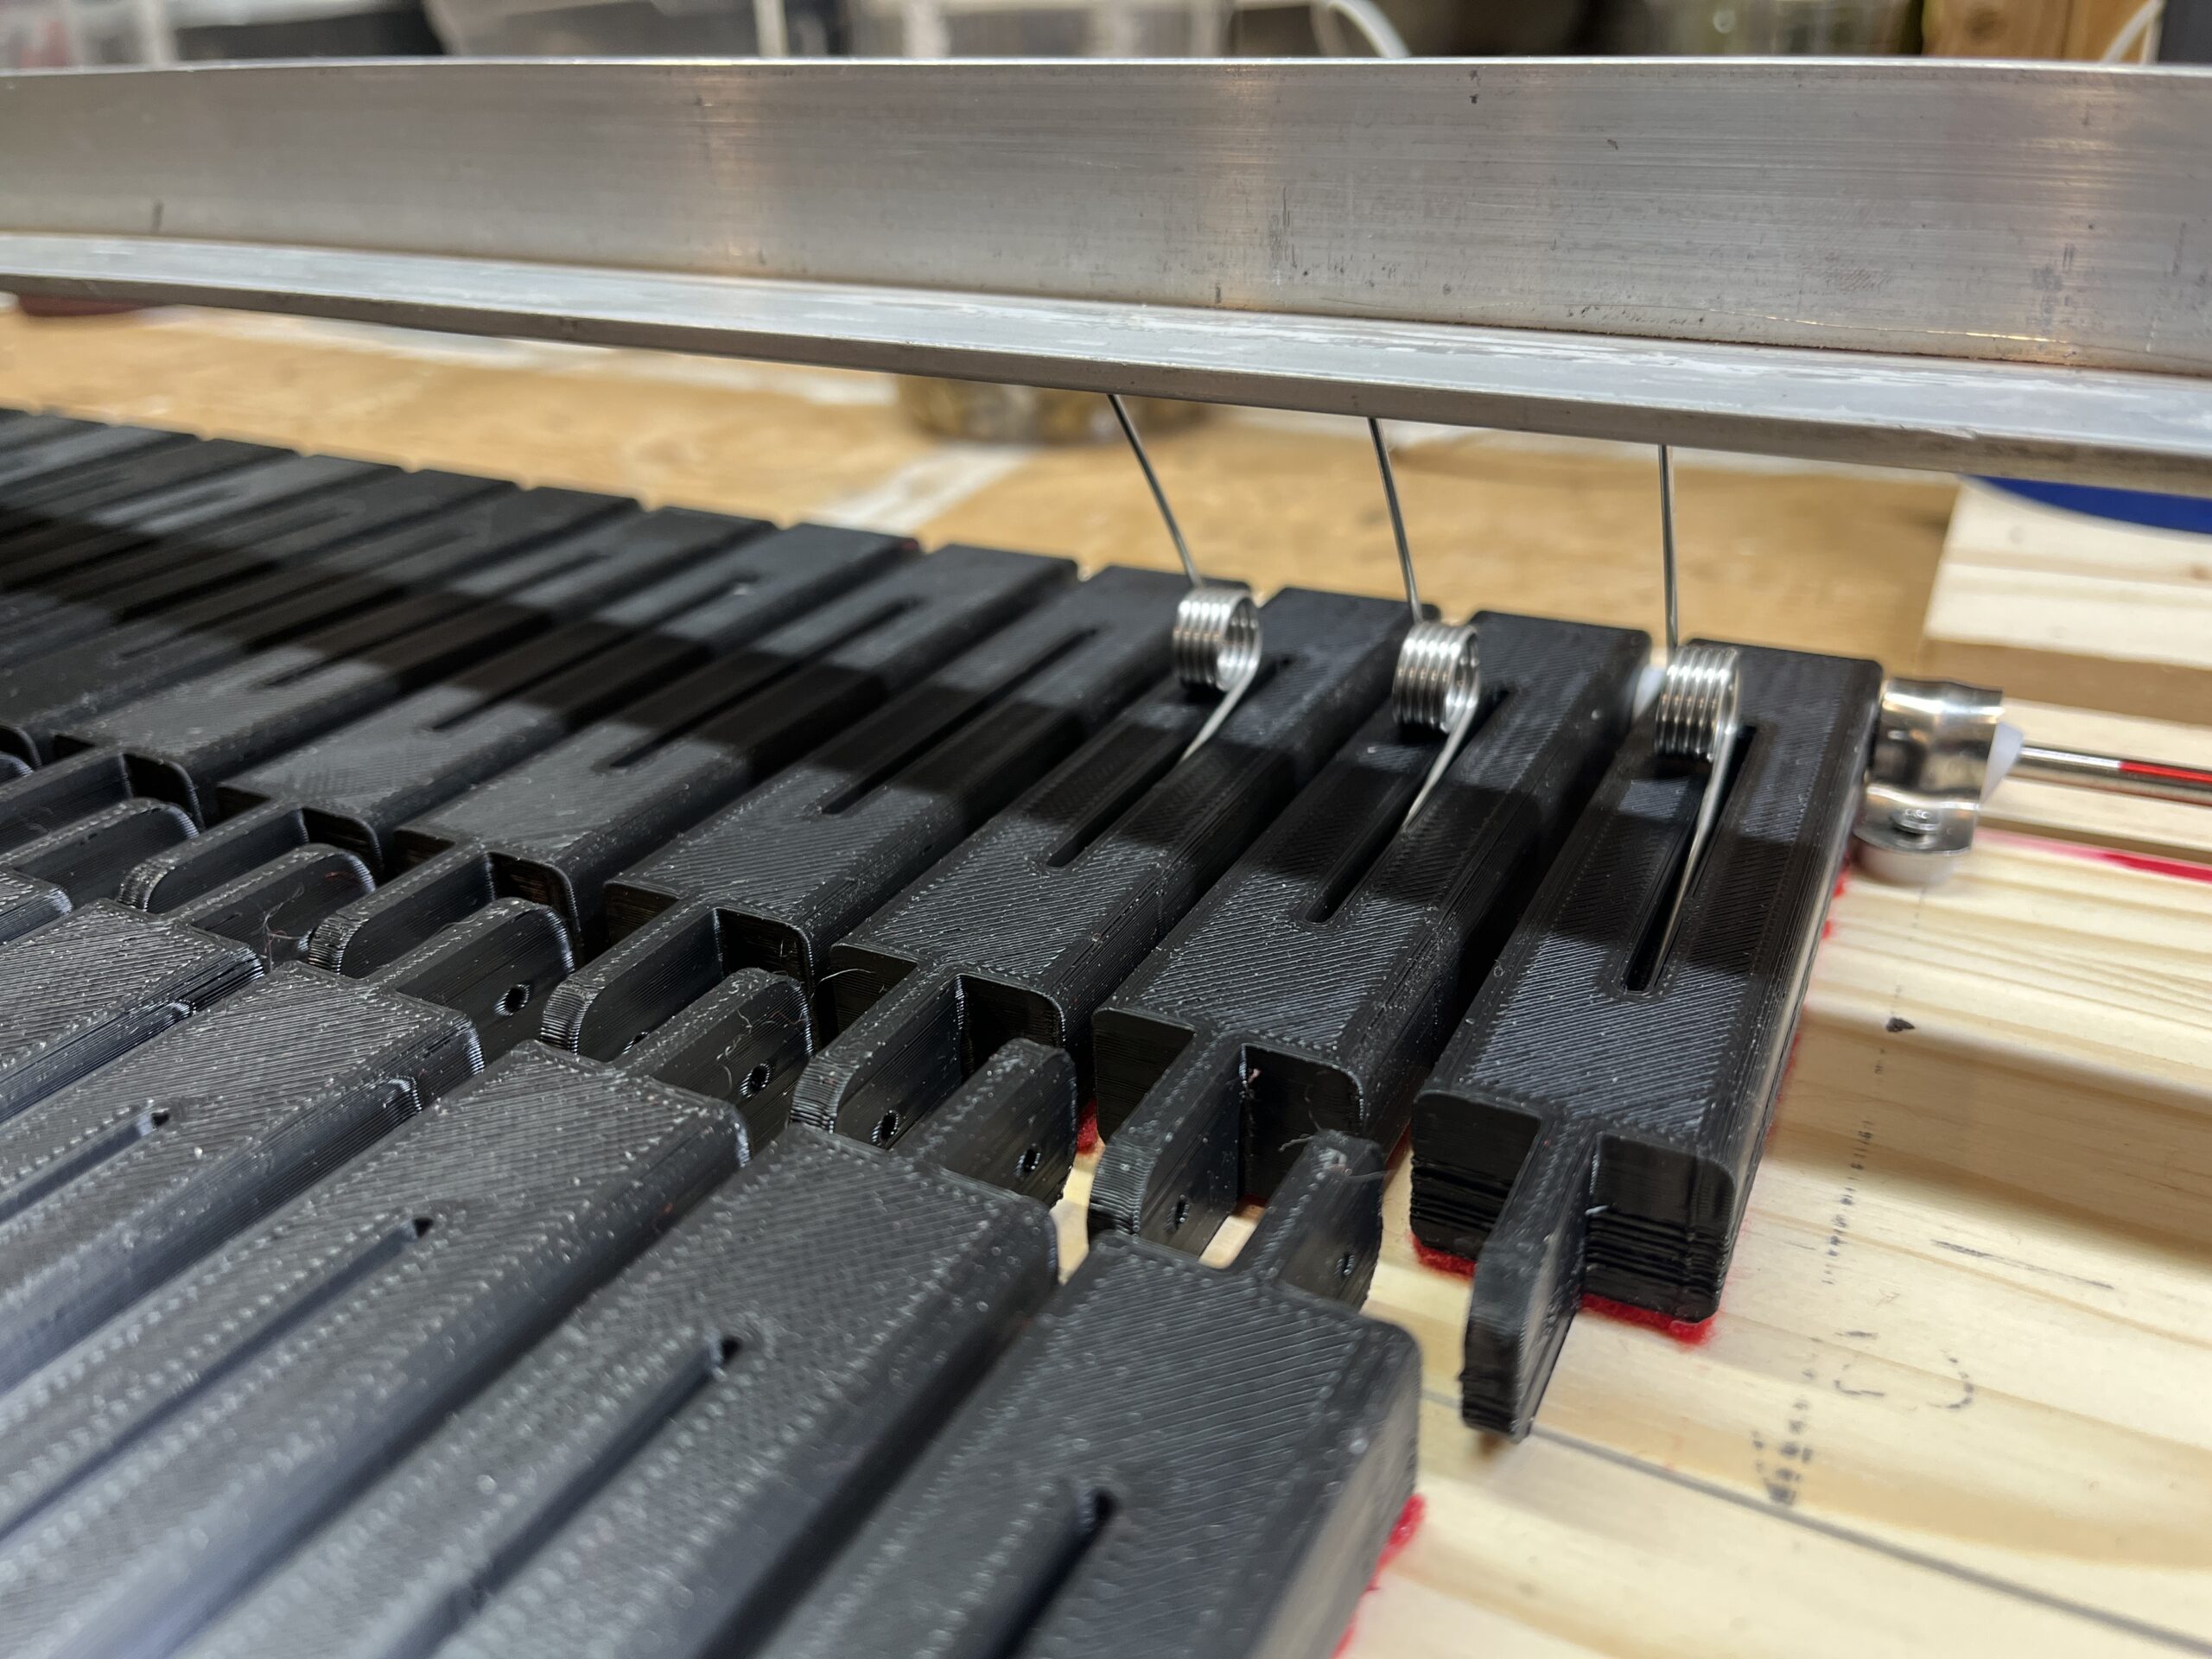
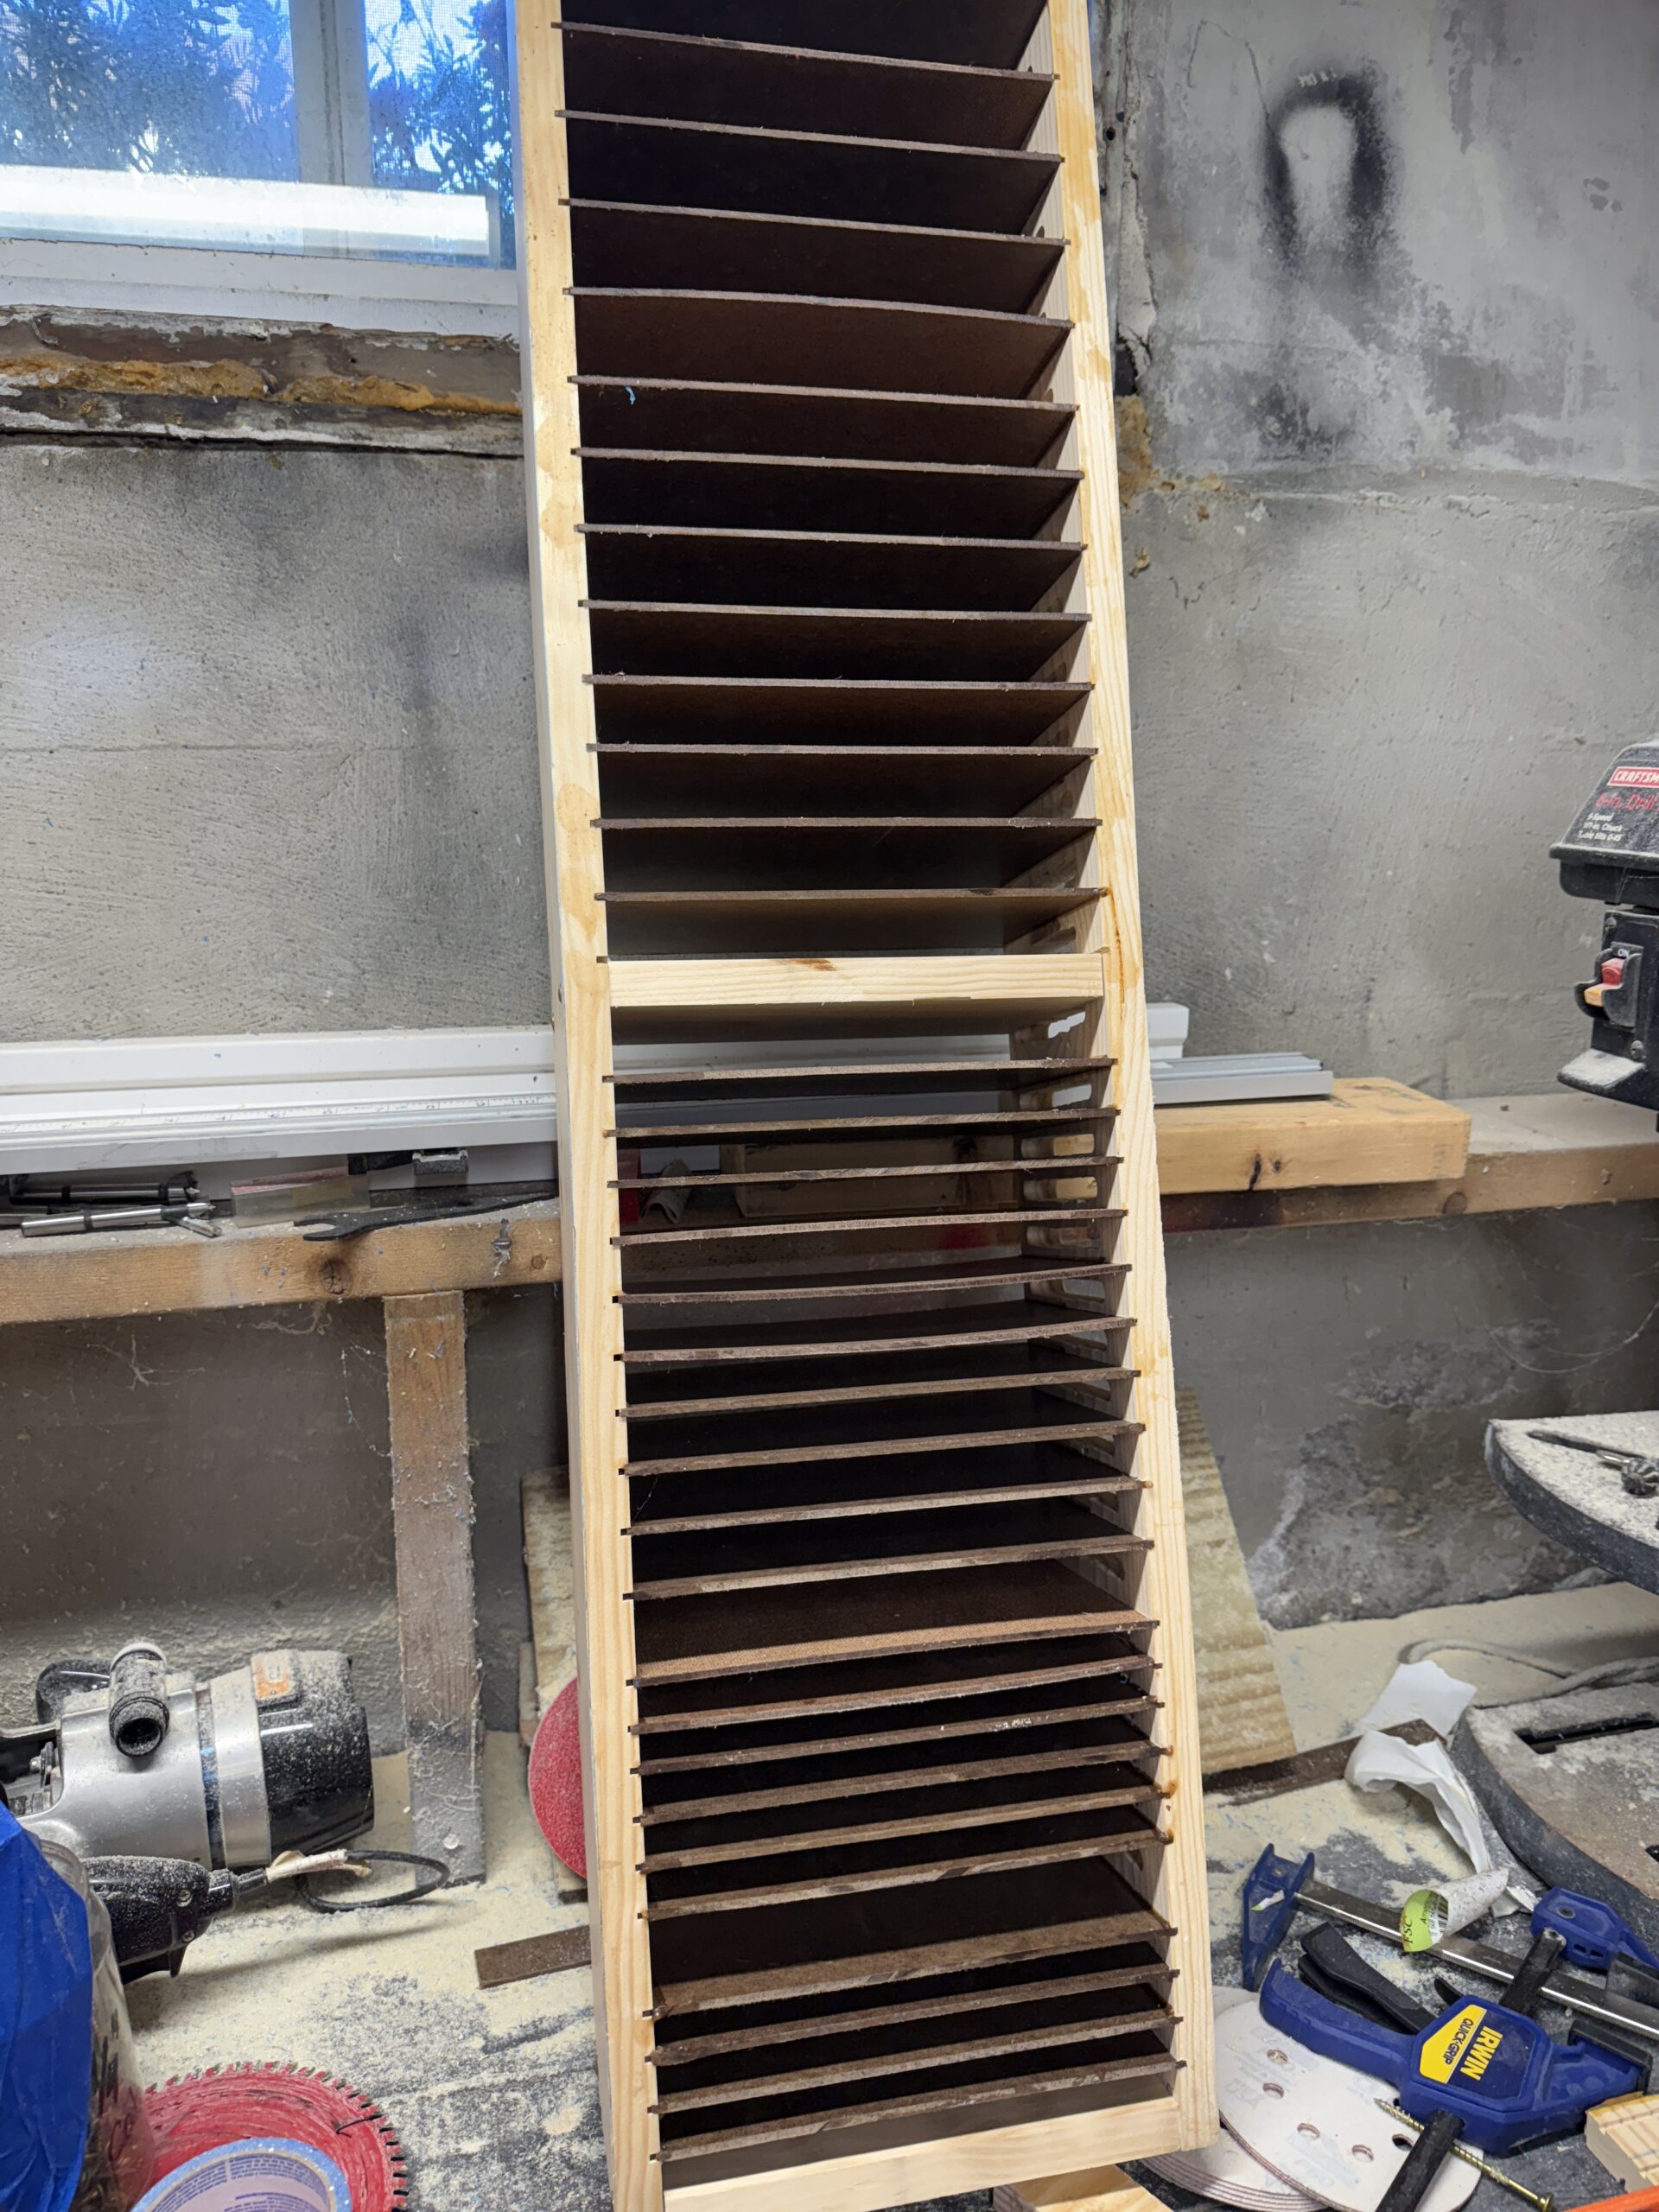
- Manual windchest is done after 3 iterations; pallet valves printed, leaks fixed, key linkages done.
- Pipechest built for the first rank and tested; I was able to get it sealed well finally.
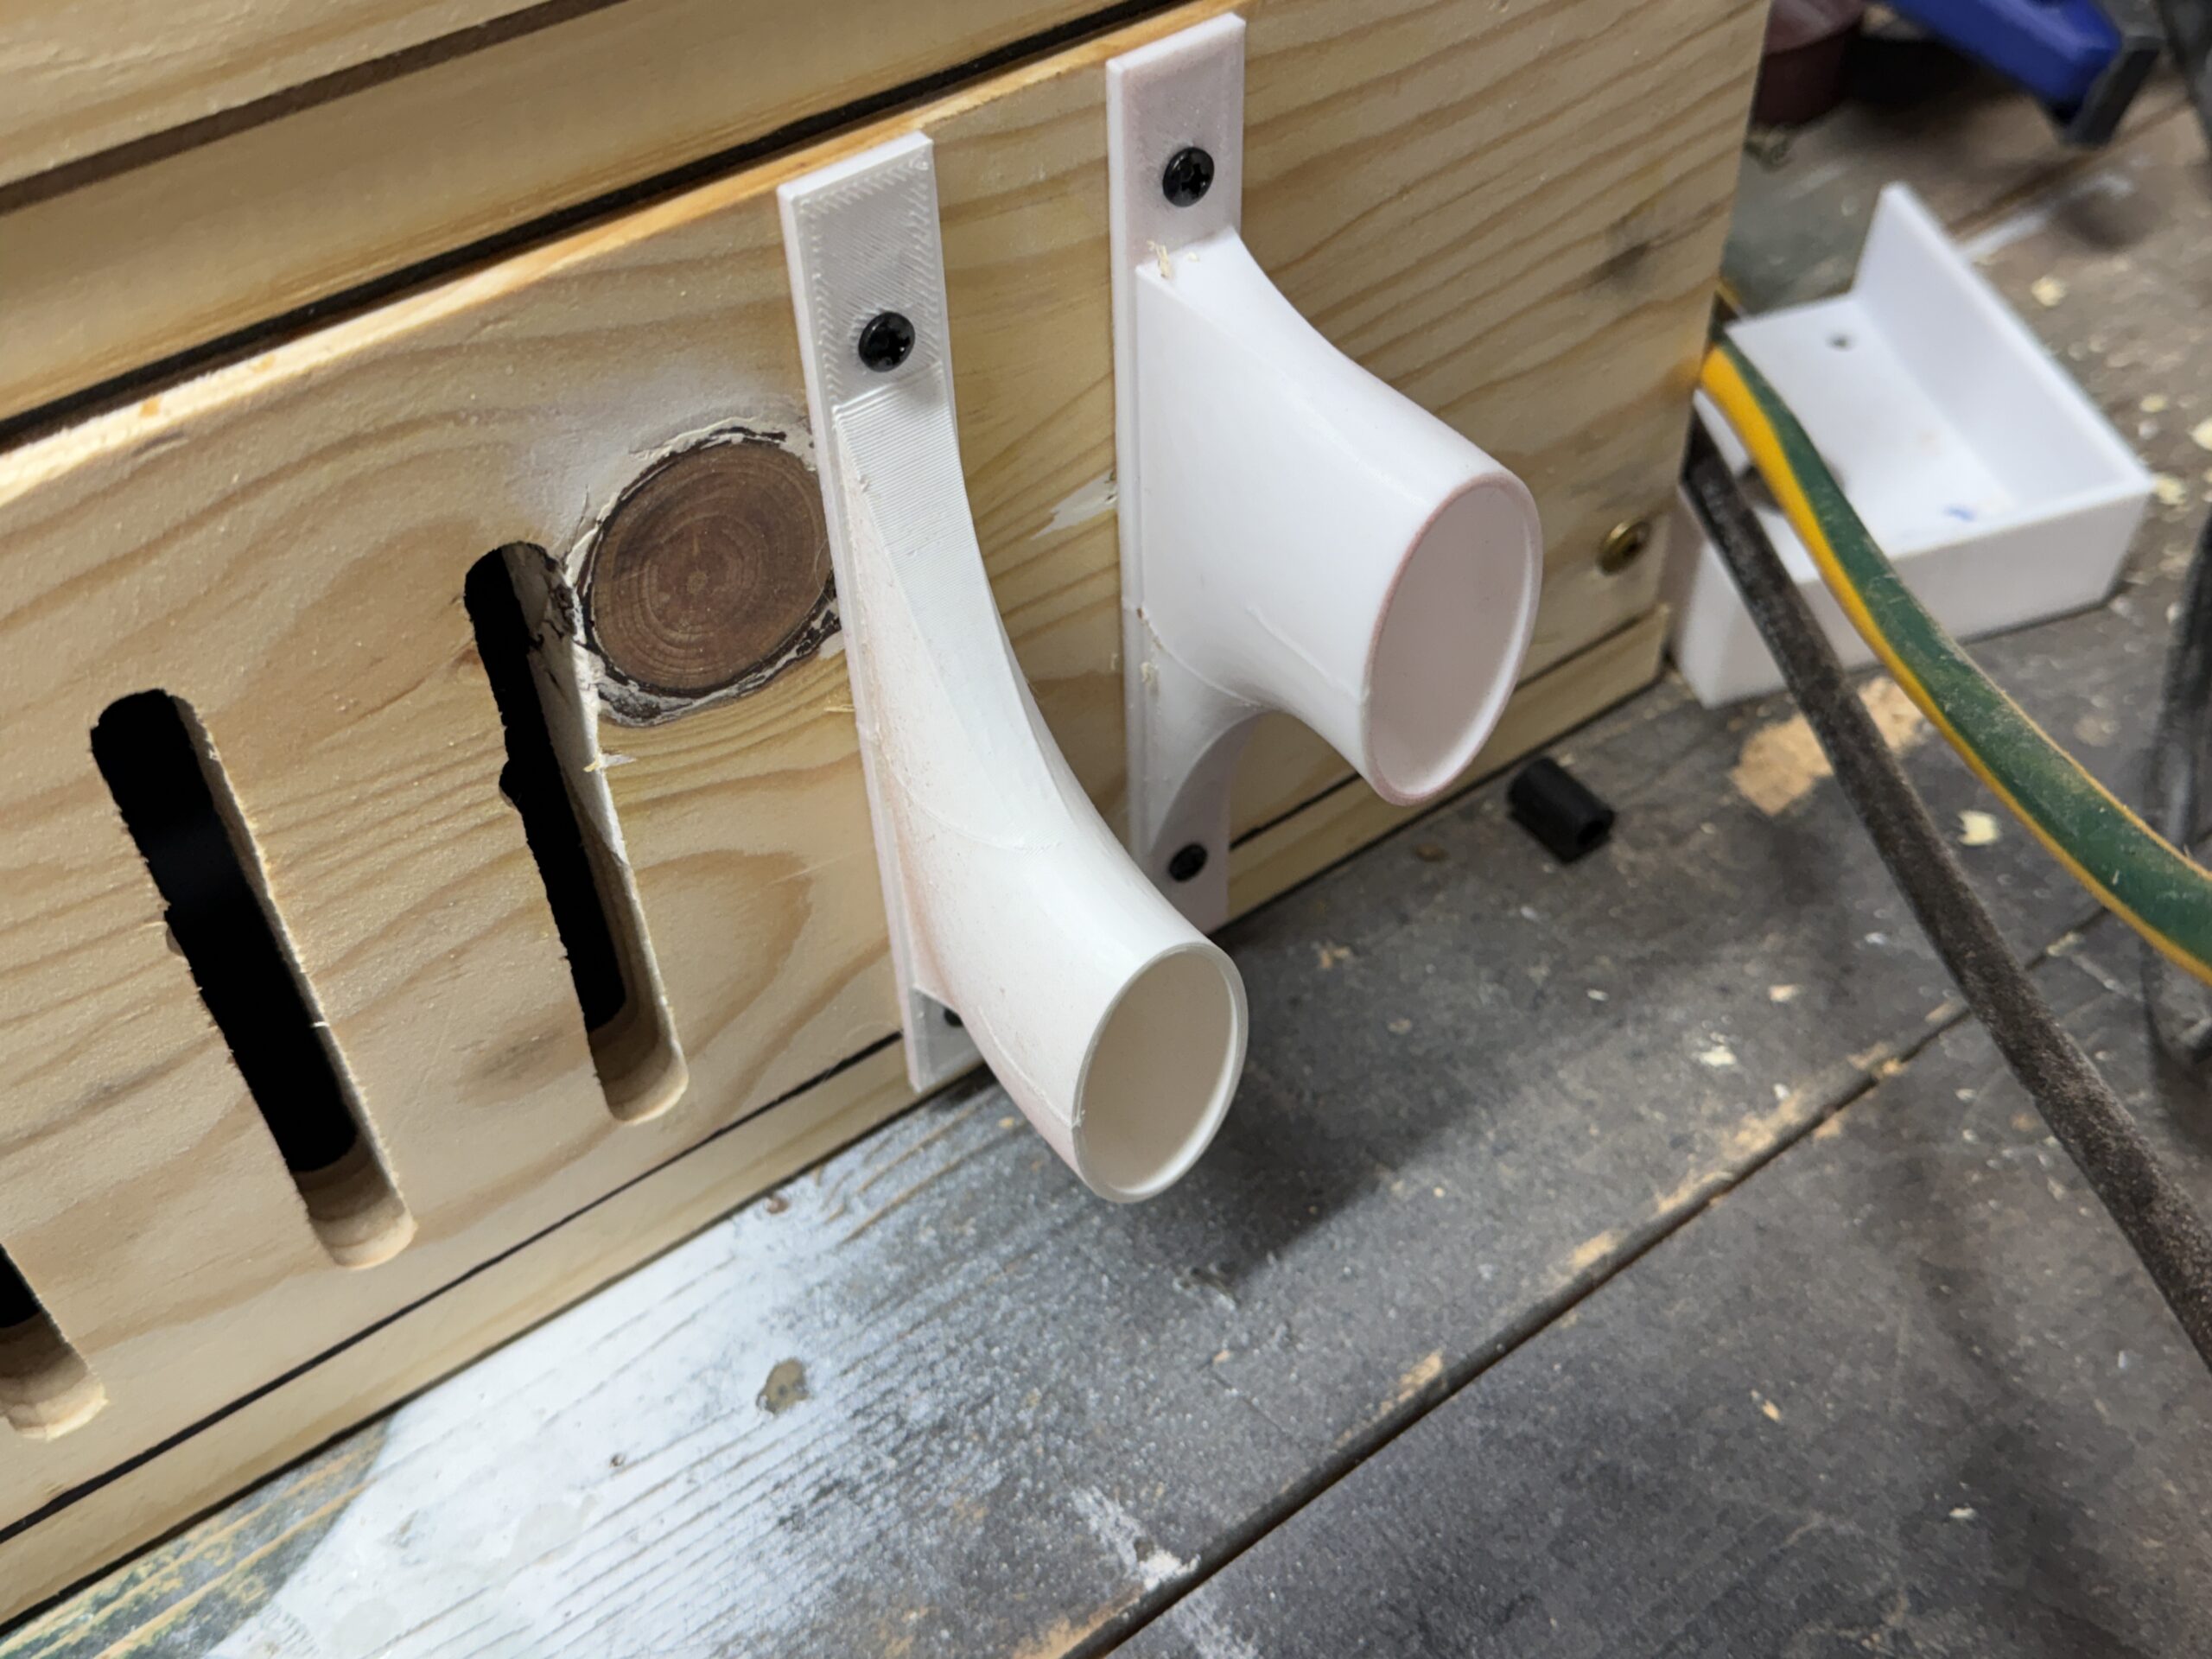
- I can now play ~10 notes — A#3 through G4. However, I’m using flexible duct to connect windchest to pipechest and it’s proving to take up too much room, so I’m working on re-engineering my connections to potentially use 1″ PVC instead. Working on templating those so I can test that theory.
An organ? WHY!?
Because I could. And because I think pipe organs are fascinating machines and some of the prettiest sources of music out there. They are literally the largest instrument in the world by a long shot, and yet the fundamental technology is so very old school. Air, controlled by a valve (key), blown through a pipe, vibrating a reed or across a lip, produces a note. You can only have one note per pipe, so for a full keyboard, you have to have 61-88 notes, and then to create harmonies and colors and fullness, you duplicate that, over and over and over, going octaves above and below and in harmony, until you get a cacophony of sound that is nothing less than glorious. This results in a massive machine literally filling up entire rooms, stadiums, or shopping malls, all controlled by one lone operator at a console somewhere.
The reality is that the art of pipe organ construction is very, very old (3rd Century BCE) and has gone through many iterations and yet still remains a bit of an engineering feat and, because I’m an amateur and have never done this before, of course I thought I’d try it and learn through trial and error and error and error and error, because why not?
Specifically, I chose to primarily 3D Print a pipe organ, or at least a good portion of the parts. The pipes would be PVC (because it’s cheap and easier to deal with than melting and shaping lead-tin pipes), the mouths 3D printed, the keys 3D printed, and much of the windchest, valves, etc. would also be printed. The rest would be wood and a bit of metal and springs and bits and bobs.
It also turns out that nobody has tried this before, which is always a good omen. I mean, people have built organs before, but not out of PVC, and certainly not at this scale. I want at least a few ranks (sets of pipes), a pedal board and one manual (keyboard), and stops, etc. to go with it. WHAT COULD GO WRONG!?
“Lots”. “Lots” is the correct answer. It has been nothing short of an engineering puzzle and curiosity and fabricating a lot of things that didn’t go right and I had to redo. I’m only on my…..5th keyboard….and 3rd windchest? I think. I try not to think about the time wasted. 🙂 But I’m learning a lot and having fun, so that’s what counts, right? One step forward, 8.5 steps back. Etc.
Credit to this design on Thingiverse from user gmeik (Geert Eikelboom) for giving me my first pipe mouth from whence everything else was scaled up/down from, modified from, adjusted to my own devious needs, etc.